


 Melbourne BG SCS Train Timetable


Commandos – Behind Enemy Lines Resolution Fix
Unofficial STEAM support:
Scroll to the bottom and find the comment by Tonelotto with instructions on how to get it going.
You can also use this patch to carry out the Locale hack described here.
Skip straight to the bottom of this post if you just want the application!
An Introduction to the game
A friend and I recently stumbled across the Commandos Ammo Pack ('Behind Enemy Lines' and it's expansion pack 'Beyond The Call Of Duty') at Good Old Games.com and we just couldn't resist downloading it. It did cost US$5.99, but that's absolutely chicken feed when compared to the awesomness of this game.
It's an old game, created in 1999, and could handle resolutions up to 1024x768 for single player; but for multiplayer the resolution was fixed at 640x480. I google'd around a little and saw that one person on a forum had created the Mysoft - Commandos Loader v0.8 which seemed to hoist the application in to memory and then hacked around with variables. I wasn't sure this was the best method and had the main Commandos EXE in IDA Free before too long.
I'd read that it used DirectDraw/3D and started searching for the appropriate functions. Before long I had the AdjustWindowRectEx, DirectDrawCreate and other functions under the microscope. I then opened the EXE up in OllyDbg and started slapping breakpoints everywhere. Before long I'd noticed the pattern:
push    10h
push    1E0h
push    280h
This seemed to be popping up everywhere and co-incidently 280h x 1E0h = 640x480 pixels... the default for the game. I then found code that set the resolution based on those shown in the video settings menu and then the game was doing what I told it.
After a little more google'ing I found that someone else had already gotten to this point. Ferdinand had the hacks there to change the resolutions, but did not have the final piece to ensure that re-loading the game brought the resolution back.
After a little more disassembling I found that the resolution was being loaded at startup from a file on disk... this turned out to be "COMANDOS.CFG" in My Documents. The exact line from the config was:
.SIZE [ .INITSIZE 2 ]
From the config it was obvious that the game was using 'index 2' from the resolution list. Of course, it also meant that it knew how to decipher that '2' to a real resolution from the list in the code. After a little forward and reverse searching from the file loading to the resolution setting I came to the switch statement in the code which had the values hard-coded. I now had 3 points per resolution setting in the code that needed to be changed if I was to write my own utility.
Commandos Resolution Hack Alpha 1
I hadn't liked anything that was already available to do this and so I chose to wrote my own. The application loaded the EXE into memory, read out the resolutions stored, audited that they were all in sync and then allowed the user to select a new resolution per slot. If the resolutions weren't the same then you would get a warning, but this would have been corrected on the next resolution hack.
This worked fine, but I found it pointless to specify four separate resolutions when you only really needed to specify one. I was more in for the challenge of allowing all four to change, rather than the practicality.
Testing and more bugs
So, it all worked... I then closed the game, re-opened it and found that it loaded up at 1024x768 instead of the 1680x1050 resolution I had set. I closed it again and looked at the configuration file; the setting had indeed changed back to '2' instead of '4'... but I hadn't touched it! I then loaded the game again and it was back to 1680x1050... closing and opening brought it back to 1024x768... the flip-flop continued.
So... what did this seem to mean? I had overlooked the storage of the resolution configuration. If the indexed resolution was read from the file, then it would have to be written back as an index. I went back in to the disassembler and searched for anything relating to writing 'SIZE' into the configuration file. The logic in the game was then obvious: it carried out an "if less than X but greater than Y" across the 'stock' resolutions and then stored the relevant index. This complicated my approach and confirmed that I really should only bother adjusting the 'fourth' resolution in the list. There was no point allowing the user to re-order the resolutions as this code then wouldn't work. The fourth resolution would need to be the only one customisable and the value must be greater than the third resolution at 800x600.
Commandos Resolution Hack Alpha 2
So, with this in mind, I wound the application down to just editing one resolution that had to be higher than 800x600. This meant that the internal configuration saving would work and the user would just have to select the final resolution in the list. Note that this only affected single player... the multi player resolution would still be a separate setting.
Everything was now working great... except the drawing issues above 1024 resolutions...
Drawing bugs
So, the game obviously wasn't meant to be played with a horizontal resolution greater than 1024 pixels; rendering artifacts started appearing when higher resolutions were used. Fortunately, the game is quite dynamic when it comes to rendering the screen and menus. Trawling through the code I could see that it was trying to find a BMP that matched the resolution, even using the resolution as the file name. Ferdinand had also worked this out and even has a list of assets downloadable for higher resolutions.
Commandos stores all of its graphical assets in a file named 'WARGAME.DIR' and references this when the game loads. I started looking into modifying this file via my program but realised it would be wuite a task to decipher and re-pack. Fortunately, some clever fellows across the world have created the necessary tools to extract these files. DirExtractor allows us to expand the DIR files and, once in the Commandos directory, the game itself will actually use the extracted versions if you remove the WARGAME.DIR file. This then meant that I could use my app to call DirExtractor, extract the files and then modify them where required to ease the majority of graphical glitches.
Required Graphical Modifications
- A single change to the fourth resolution string in DATOS\MISIONES\GLOBAL.STR to whatever the custom resolution has been set to. This can be found by searching for the token OVI4 and then replacing the string following.
- The creation of the menu background. This has to be a Bitmap file named MENU####.BMP where the #### is the horizontal resolution of the screen.
- Build a WAD file for the game-play interface. This WAD is named via the resolution (i.e. 1024X768.WAD) and contains values that tell the game how to render the interface. I created a one-size-fits-all file that ensures that the graphics are wide/long enough for the screen resolutions (max 1920x1920) and the application simply renames the file and ensures that it is available to the game.
A final glitch
There was only one drawing issue remaining after this... any resolution over 1400 meant that maps thinner than the overall monitor width would not re-draw the areas that they could not cover. You can see this in the following screen shots.
Fortunately you can press '+' and '-' in-game to zoom in and out. What this meant was that the user could stop the map from clipping by adjusting the zoom. I took this as a suitable workaround at the time.
Smeared resolution?
It seems that some laptop resolutions are a little out-of-whack. I previously had a Samsung Ultranote with resolution of 1366x768, but windows reported that it could also run at a resolution of 1360x768.
It turns out that if you choose the wrong one (although it may seem the right one if that's your current windows resolution) that you'll get the following display:
Simple fix: Try another resolution... it'll work eventually!
And you thought it was going to be this easy?
So, I had the app working great for the modification of the GOG version of the EXE. It turns out that there are many more versions in the wild. It also gets worse as there is another patch here that fixes up a whole lot of other issues in the game. Fortunately it seems that the EXE from the above link is the exact same as the EXE from GOG? Either way, I've tested it and my hack works on it perfectly.
Due to the above, I started a list of EXEs for the game and then began deciphering them (as I knew the basic items to change) to allow my application to work with them.
Items in bold are those that come from GOG.com.
| Game | Version | File Size | Supported |
|---|---|---|---|
| Commandos - BEL Demo | 2,452,992 bytes | Works.. | |
| Commandos - BEL German | v1.0 | 2,469,376 bytes | Works, Asks for CD (Language issues, I'd imagine) |
| Commandos - BEL Spanish | v1.0 | 2,469,376 bytes | Works? |
| Commandos - BEL Spanish | v1.05 | 2,469,888 bytes | Works? |
| Commandos - BTCOD Spanish | ? | 2,696,600 bytes | Works? |
| 'Sold Out' | v1.1 | 2,479,104 bytes | Works fine. Speed issues with game (known issue) |
| GOG.com Ammo Pack | v1.1 | 3,715,072 bytes | Works perfectly! |
| Commandos Ultimate Fix | v1.1 | 3,715,072 bytes | Works perfectly! |
| Commandos - Beyond the call of duty | ? | 3,133,440 bytes | Works perfectly! |
| Commandos - BEL Russian | ? | 2,470,400 bytes | Works fine. Speed issues with game (known issue) |
| Commandos - BTCOD Russian | ? | 2,968,576 bytes | Works fine. Speed issues with game (known issue) |
| Commandos - SINP | v2.3 | 2,482,688 bytes | Works perfectly. |
| Commandos - SINP Chinese | v2.3 | 2,313,216 bytes | Does not write out chosen resolution to configuration file. You should only change the resolution via this hack! |
My application was then built to determine the EXE via file size (of course, this isn't fool-proof) and then hack appropriately.
Commandos - Beyond The Call Of Duty
So, this was just an update to the main game... turns out the code was slightly different, but still workable with my current program structure. After about 6 hours debugging all was working! Enjoy!
Commandos Hack v1.2
The final release contains the following features:
- Support for all versions known above. (Note that the Demo and German versions don't actually save their configs to disk; we therefore hack the initial startup resolution.)
- Resolution list options based on monitor capabilities.
- Both EXE and WARGAME.DIR are backed up.
- A one-size-fits-all menu background has been included.
- German file encoding is preserved when the text is changed.
- Resolution menu text shows the selected resolution.
- Compatibility mode now checked to allow proper resolution and disable scaling.
- The Locale hack from here has also been added.
Download the application here.
And you can also download the .NET source code here.
Meanwhile, if you got a lot out of this app, then feel free to donate!
And that's a wrap... go use every pixel your monitor can produce and play the game!
Creating two more MAME Controllers
I've since realised that, after building the original two MAME Arcade Controllers, I've needed two more to really re-live the old classic games. I suppose one more would've been OK for games like Rampage, but TMNT, Simpsons Arcade and Sunset Riders need all four players... so... the following lists the relevant information to build controllers 3 and 4.
Sunset Riders
It turns out F12 saves snapshots of MAME games... so I couldn't resist...
Key Mapping
Below lists the mapping for the two new controllers to be created. I went ahead and used the default keys from MAME plus whatever else was free...
NOTE: Out-of-the-box MAME does not specify buttons 4,5,6 for Players 3 and 4! You can set these very easily in the 'default' config by using the basic MAME GUI (run mame.exe without any command line options)...
| Button | Player 3 | Pins | Player 4 | Pins |
|---|---|---|---|---|
| Joy UP | I | 6, 22 | Numpad 8 | 8, 22 |
| Joy LEFT | J | 7, 21 | Numpad 4 | 4, 23 |
| Joy DOWN | K | 6, 21 | Numpad 2 | 8, 21 |
| Joy RIGHT | L | 5, 21 | Numpad 6 | 14, 23 |
| Button 1 | R-CTRL | 13, 20 | Numpad 0 | 8, 24 |
| Button 2 | R-SHIFT | 10, 20 | Numpad . | 14, 24 |
| Button 3 | ENTER | 1, 20 | Numpad ENTER | 12, 21 |
| Button 4 | / | 3, 26 | Numpad + | 12, 22 |
| Button 5 | . | 5, 20 | Numpad - | 12, 26 |
| Button 6 | , | 6, 20 | Numpad * | 12, 20 |
| Player Button | 3 | 16, 19 | 4 | 11, 19 |
| Insert Coin | 7 | 7, 19 | 8 | 6, 19 |
Building the other two controllers
I bought cheaper controls for these two... but to no real benefit. I did save AUD$10, but I don't really like the button microswitches. The buttons aren't as tall and they do look cheaper. They're also a lot less 'clickier'. On the positive side: the short-stick joysticks feel nicer during game-play and are a lot more sensitive.
The build of these two followed the exact same path as the previous two (see the previous post) using cheap Microsoft Keyboards. It turns out that they were now a different colour (White vs. Black) and I decided to replace my current keyboards on other computers with the new ones. I therefore used a standard black MS Keyboard for Player 3 and a 'Microsoft Comfort Curve' for Player 4.
The MS Comfort Curve had a completely different matrix and the circuit board inside was much easier to solder to. Either way, the process was still the same in determining the pins and then wiring everything up. Testing was made a lot easier as well as I found the below testing applications to work out exactly what I'd messed up :)
After running out of solder and then later butane I got them together and we gave them a go. All went well until Players 1 and 4 hit magical key combinations... It seems that, although the keyboards are separate devices, you can still produce an ALT-ENTER or CTRL-ALT-DEL by having each player pressing each of the keys separately. This has since been remedied in the final section of this post!
Testing your new creation
I found out that Windows 7 (and possibly Windows Vista?) but not Windows XP has the mskey.exe keyboard test application (I have since found out that you can Download the Intellisense Software here which contains this application.) It came in very handy until I plugged 12v into a USB hub and cooked the HDD in my TV-pc (luckily only the HD, the PSU managed to protect everything else!) and lost my Windows 7 install. For Windows XP systems (of which all my computers are now back to) I downloaded and used the PassMark KeyboardTest application. At first, the Google search result made the application look like a typing tutor, but after downloading I realised it was exactly what I needed.
MAME Configuration
So, as previously mentioned, MAME doesn't specify Buttons 4,5,6 for Players 3 and 4 by default. I suppose there aren't many games that have more than 3 buttons for all four players? I can't think of any... but my memory is quite hazy as to what 4-player games Combat Zone had back at Tuggeranong Hyperdome.
Either way, we've specified them above and we also need to make sure they map to the correct player/keys in MAME. Here's a snippet for Player 4 in my default.cfg:
<input>
 <port type="P4_JOYSTICKRIGHT_UP">
  <newseq type="standard">KEYCODE_6PAD KEYCODE_8PAD</newseq>
 </port>
 <port type="P4_JOYSTICKRIGHT_DOWN">
  <newseq type="standard">KEYCODE_2PAD KEYCODE_6PAD</newseq>
 </port>
 <port type="P4_JOYSTICKLEFT_UP">
  <newseq type="standard">KEYCODE_4PAD KEYCODE_8PAD</newseq>
 </port>
 <port type="P4_JOYSTICKLEFT_DOWN">
  <newseq type="standard">KEYCODE_2PAD KEYCODE_4PAD</newseq>
 </port>
 <port type="P4_BUTTON4">
  <newseq type="standard">KEYCODE_PLUSPAD</newseq>
 </port>
 <port type="P4_BUTTON5">
  <newseq type="standard">KEYCODE_MINUSPAD</newseq>
 </port>
 <port type="P4_BUTTON6">
  <newseq type="standard">KEYCODE_ASTERISK</newseq>
 </port>
</input>
As you can see, the default.cfg only adds in controls we have overridden... the others must be hard-coded into mame.exe. Drop the configuration file in to your mame/cfg directory (note that you may want to check your file first as you could have other customisations!) and then you'll have the appropriate settings ready to go!
Diagonals and 4-Way Joysticks
Right, I couldn't work out why I couldn't get 'Steve' in 'Sunset Riders' to shoot on the diagonal... usually this was carried out by holding down the Up and Left (or Right) keys on the Keyboard, but it wasn't working. I scoured the internet and initially thought it was an issue with the way I'd wired up the joysticks.
It turns out that MAME has added in the ability to assign a separate key for the diagonal movements. This is great if you have an 8-way Joystick with actual individual microswitches on the diagonals, but I have a 4-way and I cannot, without logic circuits, wire up another key to activate when two of the direction microswitches are closed. I did actually start thinking of logical OR/AND gates to fire the specific keys when the direction goes diagonal, but this would require re-work on the sealed controllers. :)
So, I went in to MAME and then mashed the keyboard on the configuration screen. It turns out that you can assign multiple keys to a direction. This then made life easy... I would make Player 1's "Up/Left" key 'Up' + 'Left' instead of the 'I' key on the keyboard.
After testing this new configuration I realised it wasn't actually MAME that was the problem! It turns out that there was an actual physical issue with the initial two joysticks I bought when compared to the second two...
Arcade Joystick differences
So, the diagonals worked on the new joysticks I bought... they seemed to be a lot happier at pressing two directions at once. Unfortunately, the original joysticks only really wanted to go one way at once... After a little investigation it turns out that the plastic spacer/washer that slides onto the joystick stem was not wide enough (circumference-wise) to actually activate two microswitches at once. I'd also misplaced the original 'extra' components from the intial build and therefore didn't know if wider spacers existed? Either way, I had to make the spacers fatter to ensure that diagonal movements could be easily made.
In the end I cheated and used duct tape around the spacer at the bottom of the stick to make it's circumference wider. This meant it was more keen to press two microswitches at once and the world was a happier place!
The sticky-tape-fix was then tested for Player 1 and worked. I then did the same for Player 2 but had the controller back open in seconds after playing Bomberman as it turns out it was now too happy to go diagonal instead of 4-Way. Removing just over one layer of tape from the spacer on the joystick balanced out the circumference vs. microswitch equation and made the joystick much more responsive. Your mileage will vary with how much tape is required based on the sensitivity of the microswitches and how much travel/space you have between them and the center stick.
The verdict: Windows short-cut keys kill gameplay
The next step was to reconfigure any keys on the controllers to not use any modifier key (CTRL,ALT,SHIFT,ENTER) so as to not activate shortcuts during gameplay. When Player 1 and Player 4 pressed certain buttons (specifically ALT-ENTER) the MAME window would restore and, of course, it was possible that all four players could do a perfectly orchestrated CTRL-ALT-DEL and throw Windows XP to the Task Manager.
To do this I had to re-solder buttons on Controllers 1, 2, 3 and 4 to the nearest free keyboard button. Fortunately the Numpad had more than enough nearby keys free and there are still letters of the alphabet unused near Player 1's keys. The layout of buttons on the keyboard did not have to make sense to a human user and so any free buttons were used if the wiring was easier.
The Final Re-Mapping
So, in the end I re-mapped the modifier keys and also removed the duplicates between Players 2 and 3. Edits are in bold... NOTE: You must UNMAP 'T' from the 'Other Controls' area otherwise when Player 1 hits Button 2 you may receive a 'Tilt' message and game restart.
| Button | Player 1 | Pins | Player 2 | Pins |
|---|---|---|---|---|
| Joy UP | UP | 12, 24 | R | 11, 22 |
| Joy LEFT | LEFT | 12, 26 | D | 16, 21 |
| Joy DOWN | DOWN | 4, 26 | F | 11, 21 |
| Joy RIGHT | RIGHT | 8, 26 | G | 11, 24 |
| Button 1 | E | 16, 22 | A | 18, 21 |
| Button 2 | T | 11, 23 | S | 17, 24 |
| Button 3 | C | 16, 20 | Q | 18, 22 |
| Button 4 | V | 11, 20 | W | 17, 23 |
| Button 5 | Z | 18, 20 | U | 7, 22 |
| Button 6 | X | 17, 20 | O | 5, 22 |
| Player Button | 1 | 18, 19 | 2 | 17, 19 |
| Insert Coin | 5 | 11, 25 | 6 | 7, 25 |
| Button | Player 3 | Pins | Player 4 | Pins |
| Joy UP | I | 6, 22 | Numpad 8 | 8, 22 |
| Joy LEFT | K | 6, 21 | Numpad 4 | 4, 23 |
| Joy DOWN | J | 7, 21 | Numpad 2 | 8, 21 |
| Joy RIGHT | L | 5, 21 | Numpad 6 | 14, 23 |
| Button 1 | B | 11, 26 | Numpad 0 | 8, 24 |
| Button 2 | N | 7, 26 | Numpad . | 14, 24 |
| Button 3 | M | 7, 20 | Numpad / | 8, 20 |
| Button 4 | / | 3, 26 | Numpad + | 12, 22 |
| Button 5 | . | 5, 20 | Numpad - | 12, 26 |
| Button 6 | , | 6, 20 | Numpad * | 12, 20 |
| Player Button | 3 | 16, 19 | 4 | 11, 19 |
| Insert Coin | 7 | 7, 19 | 8 | 6, 19 |
 Download the configuration file here.
This configuration overwrites the diagonals for Player 1 and adds/corrects all of the other mappings listed above.
And this is now to be tested in gameplay... I've done the re-wiring and have tested individually but have done no actual thrashing with MAME.
The End
And that's that... it was enough fun playing with Player 1 and 4 making sure not to mash the same buttons at the same time... but it should be a lot better now once I organise the beer and the people to play... will see how we go!
Usual suspects: DERM58
May 7th saw the Diesel Electric Rail Motor Preservation Association of Victoria Inc run another tour with their prized DERM58. This time it was out on the freight BG to Seymour with a return trip via the passenger line through Essendon. I woke up at sparrows-fart on Saturday to see it on the viaduct over the Maribyrnong river near McIntyre Loop.
The weather, as per Melbourne, was playing hard-to-get and it was bloody freezing before the sun came up. There was a lovely pink sunrise which I tried to capture before realising I'd remembered the XPT arrival times wrong... I heard it coming and just managed to get a dodgy shot.
The next train wasn't for an hour... so I entertained myself by finding a good location where I could use the tele-lens and the available sunlight. It turns out that on the high-way side there is a nice incline where you can get above track-level with a great view of the viaduct. You can also see the signals in both directions to know when something is approaching.
After being entertained by quite a few noisy birds...
...I was greeted by howling NRs on a superfreighter heading north...
The XPT was to return next... it did and it wasn't hanging around. Fortunately the sun came out to ensure I could match a shutter speed with the train's speed.
It was then about a 40minute wait for the DERM to arrive... during this time there were multiple acts of stupidity by various forms of wildlife.
And then the DERM arrived...
The next train was to be a southbound superfreighter in an hour. I decided that the weather wasn't getting any better and so started making my way back to the car. Of course, if anyone had looked in the long shots of the DERM58, you'd have seen that the southbound signal was at clear... these things are completely hard to trust, but it turns out that if you see a green in this area then you should hang around.
I'd made it half-way back to the car when I heard a very nice howl from the north... as I turned around QR came hurtling across the bridge with an awesome lashup of LDP-009 + 6005 + 6002 + LDP-008.
Supposedly it held pace all the way into Sunshine and scared a track gang working around the corner... I'm not surprised.
I headed to Kensington in the afternoon to see the DERM return via the passenger lines. There's a nice spot near the Allied Mills where you can see the lines off to the West as well.
And that was that... it was cold and wet and any further chasing would have been futile. I'm still learning the correct approach with photographing under low light conditions, but am pretty happy with how the above shots came out.
Playart HO Scale Series 0 Shinkansen (4-Car Set)
As luck would have it, I managed to stumble across this set a model train/toy swap meet over the weekend. I'd never seen anything by Playart before and was not expecting to see a HO Scale Shinkansen. I purchased a bit of track with it as I had only had N Scale on hand.
I gave it a quick run on some flex-track with a 12v supply I had lying around. It was noisy, but for something of its age, moved quite well.
Both end cars pick up power through their front bogie and both have internal lighting. It seems to be a standard incandescent light bulb and it actually lights up the entire nose of the train... makes it look very toy-ish... I would actually stop this from happening if I was to run these full-time, but I have no HO layout.
Either way, this is a cool set... and I was very impressed to find out that some company (I believe they are French?) made this back in the 70s/80s. As written underneath, they were made in Hong Kong.
It turns out that the company also made a Series 485 EMU which reminds me of the Kita Kinki in Kansai.
There was also an Endou Vista 3-Car EMU in N Scale which I couldn't recognise (looked like something Kintetsu or Meitetsu...) which I'll try and pick up next time... information on it is here, here, here and here. And yes, it's Kintetsu.
Echuca, Victoria
It was the ANZAC/Easter 5-day holiday and Steamrail were to make an appearance at Echuca in Mid-North Victoria... so what better way to catch them than by making a loop of it and attempting to see traffic on nearly all lines serving Melbourne.
Google maps, as per usual, allowed me to set a good path and also calculated times not-too-far-off from the real-world equivalents. I wanted to get out to Manor Loop, Gheringhap Loop, Bacchus Marsh (to see the massive horse shoe), Bendigo and then on to Echuca/Moama. I also, on the way back wanted to see the Main South to see what super freighters were loitering around. Chances are I would also intercept the XPT as some point.
The trip started damn-early on Good Friday in an attempt to see traffic on the Melbourne-Adelaide railway line. The first stop was Manor Loop and there was nothing around and no green signals. As it was also 6am, it was still too dark for any good shots. I therefore continued on to Gheringhap and was welcomed by green up signals and then a QR freighter with LDP004 at the lead.
I loitered for a while longer, referencing the Gheringhap Loop Sightings and the ARTC timetables for hope of another train, but nothing came about. Back on the road, I headed towards Bacchus Marsh. As I approached the horse-shoe railway alignment a V/Locity rounded the bend, but the lighting and traffic didn't allow for a photo. I stopped for fuel and breakfast and then proceeded through Gisborne. Here I met the BG rail to Bendigo, but it doesn't happen to be too visible from the road. The single train sighting on the morning saw me push right through to Bendigo and arrive at Echuca earlier than I'd told the motel. I did stop at Elmore along the way and remembered how difficult it was to chase V/Locities.
At around 3pm I headed in to town to check out the sights and was impressed with Echuca's Yard and infrastructure.
After tiring out completely from a huge walk, I grazed on a parmigiana (sorry Victoria, I bought it in NSW) and then slept early. The alarm went off at 3:20AM and I was back at Echuca Station by 4AM.
Not much was happening... so I headed to the level crossing at the entrance to the yard... at around 4:15AM there was a gloomy headlight in the distance. Then the drivers decided no one needed to sleep and let loose with the steam whistle. The consist made its way across the crossing and into the station.
It was then back to bed to be up in time for the first shuttles of the morning. I made it back to the North end of the station in time for the consist to leave but it so happened that the train went in the other direction. Quite a few of us were fooled and it does make you wonder who you can trust when information is so freely available on a whim.
The scenery around town wasn't the best... so I headed out to Strathallan the back way... after taking my poor little MR2 over a nasty dirt road I arrived at a seemingly popular level crossing. I was soon to find out why: The shuttles were terminating not 50 metres further on and the scenery was fantastic.
After this I returned home via the main south to be totally disappointed by track work. The employees around Avenel even went to the effort to trigger the level crossing gates intermittently in order to have a good laugh. I could've been more jovial towards it but it was my bad for not even asking them what was happening around the tracks.
DERM 58 around Melbourne
The Diesel Electric Rail Motor Preservation Association of Victoria Inc has just recently gotten their DERM 58 back on the rails. This rail-car was built in January 1930 at Newport Workshops, Victoria under license from Electro Motive Company. The association is now running tours with this vehicle across the Victorian broad gauge and this past Saturday, the 9th of April, saw the unit head from Newport to Pakenham, Pakenham to Bacchus Marsh and then back to Newport via Southern Cross station.
I happened to be in the vicinity at SCS and FSS for a few shots.
Knowing it was heading out to Bacchus Marsh, I headed out to Rockbank to get a shot of it against some great countryside.
They turned it at Bacchus Marsh and then I caught it again on the way back through Rockbank.
The engine sounded quite nice and they had some good speed up when heading in to Rockbank. I can only congratulate their efforts and will enjoy seeing it out on the rails more... their next trip is on May the 7th to Seymour. Check their site for more details.
2 Weekends, 4 Steamers and a transfer from WA
Right, it has been too long between postings already... over the last two weekends I've been chasing the Steamrail Shuttles around Melbourne. The weather has been dismal, but it has proved a great lesson in shutter speed vs. exposure and dealing with fast adjustments.
Steamrail from Williamstown to Flinders St
Steamrail, after a quiet Christmas, have been running their K Class Steam Locomotives around the suburbs of Melbourne over the last two weekends. The first of these trips was a shuttle for the Williamstown Festival from Williamstown to Flinders Street with no intermediate stops. Although the weather was pitiful in the morning, I still ventured out to see what was around the traps at Newport.
Fortunately SSR had a rail-train at Anzac Sidings which meant there was something to mix into the background. This train, with GM22+S317 on it, had its headlight on the the majority of the morning and I was hoping it would depart. Unfortunately it turns out it had just returned to the sidings.
There was also a good mix of random Metro and V/Line meetings.
I was also lucky enough to see a freighter heading West.
I then returned to the City and got another few shots of the steam engines at Flinders Street Station.
QR/ARG Grain Train transfer from Western Australia to NSW
As luck has it, I had decided to go to Gheringhap Loop on Saturday the 2nd of April to simply check the place out. I had never been before and wanted to see what all the fuss was about. Once there, I met a few other onlookers who noted that a special transfer from the West was coming through with some interesting locos on it. I was also informed that I'd just missed a Metro transfer from Ballarat and another BG freight train.
Either way, We first saw a loaded Pacific National grain train pull into the loop and then the WA transfer came through.
So, the photo of the transfer sucks.. right? I fumbled the shutter speed as the train bolted through and decided that I had to therefore get a proper shot. I knew it was on its way into Melbourne, so I jumped back in the car and headed to Spotswood. On the way I caught up with the consist just after Werribee. I was on the highway doing 100km/h and I wasn't exactly losing the train. It would've been doing 95km/h at the best of times.
I made it to Spotswood with around 15minutes to spare.
I then proceeded to Bunbury Street Tunnel. All signals were red and there was not a movement to be seen. I then returned to West Footscray where I met some of the other onlookers again. They were all waiting for the consist but weren't sure where it was. At this point it occurred to me that it was probably going to bypass Melbourne and could be at McIntyre Loop. I was in luck...
At this point, LDP001 had detached and was running around the consist. There was quite a turnout there of fans to see the train and one noted that they were doing a loco swap. This meant there would be another QR loco coming from Dynon to then take the train further north. I got my photos from this location and then headed to the other side of the bridge to get further shots.
LDP002 came storming through with a northbound freighter and an A380 swooped over before the grain train departed.
Finally LDP006 showed up.
The consist approached me and my battery died as I was about to take the final shot in great sunlight. Such is life.
Steamrail from Berwick to Pakenham
Sunday, 3rd of April saw another Steamrail shuttle service all day between Berwick and Pakenham. I had decided to take Metro and started walking to North Melbourne Station at 8am. I grabbed a coffee on the way and heard the steam whistles at around 8:25am passing the city... too bad, I wouldn't've minded being in front of them. I arrived at Flinders St only to realise that the next Pakenham server wasn't until 9:11am... Off-peak isn't fun.
Fortunately I did get to see something interesting. A ComEng was in the opposite platform and another was right up against the light behind it. I thought the one in the platform was dead, but instead I saw something I didn't realise Melboune/Metro did.
Metro kept announcing that the train wasn't taking passengers... so I don't actually know if they then used that 6-car set, but it was nice to see. It reminded me of Japan where a lot of the services split and join at certain points (fully loaded) with no issues and very little time required.
I jumped on the Frankston train and got off at Caufield... switching to the Pakenham train which got me to Berwick at around 10:30am. I bought my Steamrail ticket and found out the next shuttle wasn't until 11:18am. The station was actually in quite a nice area. The steamer was a little late.
Once on-board... I attempted to photograph some of the features of the carriage I was in... I didn't even take down the carriage number.
We then arrived at Pakenham after a few rough red lights and I checked out K153 in more detail.
And that was that...I then jumped on the Metro back to Melbourne. The V/Line was meant to come first, but it didn't turn up. Supposedly you are allowed to ride V/Line from Pakenham (the only 'suburban' station where you can join an 'up' V/Line service) on your Myki/Metcard. We got to Hawksburn when it passed us... then we caught it at Richmond. No time lost...
Finally I watched a few trains again in the dwindling light through South Kensington waiting for the steamer to return home. I still don't know if my position was on-side with the rulebook... but I was behind the fence.
At that point the lighting was terrible and the noise in the shot is disturbing... but... all in good fun.
Creating your own MAME Arcade Controllers
Right, now for something completely different... The following article goes out to all those 80s kids who remember that familiar clicking sound of real mechanical microswitches. We all spent our pocketmoney on Bubble Bobble, Snow Bros, Rampage, Street Fighter; but now you don't have to. Just install MAME and build the following controllers...
Here's the photo album of the construction of the controllers...
Note, before starting this, you should really just skip the keyboard hacking and buy one of these.
Also, for a LOT of information on doing this, visit Arcade Controls.
Initial thinking...
All peripherals for a computer need to connect via an I/O port. Although there are quite a few available on most modern machines, the one we will use is USB. I've chosen this port because they will be around for decades and the old style Serial, LPT and Gameports have pretty much already been phased out.
Now, there are many options once we choose USB:
- My Arduino to accept all the inputs and feed them to a computer...
- One of the many off-the-shelf 'keyboard' emulators...
- or I could just rip open a cheap USB Keyboard and wire up the keys...
From the above, the cheapest method is to rip open a keyboard. Officeworks here in Australia was selling the Microsoft Wired Keyboard 600 for AUD$11.97 and I couldn't resist.
One big question here was cabling. Once I'd hacked a keyboard apart and wired up one controller.. would I then use other keys from that first keyboard and run a cable to the second controller? I looked at the price of data cabling and realised it was cheaper to buy another USB keyboard than it was to rig up a sophisticated central box that both controllers ran to.
I therefore bought 2 USB keyboards.
Now, there is an issue here... I will be 'emulating' keyboard buttons presses when the joystick buttons are pressed. Since once computer can accept multiple different keypresses at once, this will work, but it cannot distinguish multiple presses of the same letter/key from different keyboards (i.e. if the 'A' key is pressed from two different devices.) This means that the second controller will have to be mapped to a different set of keys... pretty obvious, yes?
Update/Note that buttons 5 and 6 for Player 2 aren't set by default... I've set these to I and K as they were free... for some reasons I didn't check Player 3 and 4 controls first and this is a direct conflict with Player 3 directional keys! So, you can use the below but be careful... in my this blog post I've remapped them to U and O respectively.
| Button | Keymapping 1 | Pins | Keymapping 2 | Pins |
|---|---|---|---|---|
| Joy UP | UP | 12, 24 | R | 11, 22 |
| Joy LEFT | LEFT | 12, 26 | D | 16, 21 |
| Joy DOWN | DOWN | 4, 26 | F | 11, 21 |
| Joy RIGHT | RIGHT | 8, 26 | G | 11, 24 |
| Button 1 | L-CTRL | 13, 25 | A | 18, 21 |
| Button 2 | L-ALT | 9, 24 | S | 17, 24 |
| Button 3 | SPACE | 1, 26 | Q | 18, 22 |
| Button 4 | L-SHIFT | 10, 23 | W | 17, 23 |
| Button 5 | Z | 18, 20 | I | 6, 22 |
| Button 6 | X | 17, 20 | K | 6, 21 |
| Player Button | 1 | 18, 19 | 2 | 17, 19 |
| Insert Coin | 5 | 11, 25 | 6 | 7, 25 |
Hardware
So, from the above, you'll need 2 USB keyboards for the PC interface. You'll then need the actual arcade joysticks and controls. Below is the kit I found recently on eBay for around AUD$50. I'm sure you could get it cheaper; my purchase was on a very large impulse and I had a few regrets afterwards as there were better joysticks on offer for the same price.
The buttons themselves are exactly what you'd find in real arcade machines... the microswitches make their motion feel perfect as well.
So, with all the components, it's now time to get it connected together. Start by ripping open the keyboard...
Decoding a USB Keyboard
Keyboards are built on a matrix. Just like the LED project previously with the Arduino, each button on a keyboard is connected to one row and one column of the circuit board inside. The circuit board will scan each row and column hundreds of times a second to check which buttons are pressed and then report this back to the computer.
As you can see above, the controller inside the keyboard is not soldered to the matrix. This is great news as I was expecting to have had to solder to fiddly little wires instead of the nice connection pads that you can see.
Firstly I pulled out the multimeter and started decoding the keys I'd need to use. To do this I put one probe on the pad circle of the key and I then ran the other probe across the connection to see which wire it connected to... I then recorded all of my findings:
The data I gathered is in the table above. Each key has two pins and these map from left to right on the controller connection seen above. I have only decoded the keys that I need, but it's easy enough to work out the rest when you have an opened keyboard in front of you.
I then began to wire up the controllers. One the first attempt, I thought I would solder short wires to the controller and then use these for connection points. This worked OK until I was up to the final wires. It seems that constant moving around of the controller puts pressure on the soldered joints and I ripped many of the tracks off. I then had to get my tiny copper wire and re-solder the tracks as the pads were gone. This became quite tedious, but I learnt my lesson very quickly.
I got enough of the wires connected for the first joystick and then quickly connected it to test. I then managed to play a quick game of Bubble Bobble. Impressive! You can see below my initial prototype housing for the controls. The washing basket was the worst idea on earth... but it was a cheap mistake.
Building real housing
I ended up at Bunnings looking for ideas for a box to house the controls. There was nothing off-the-shelf, so I opted for enough wood to make a deep enough box for the controls. This was a pretty simple and ugly construction... but it did the job.
Finished products
After testing, I put backing panels on both of the controllers.
Each controller can only ever be used as Player 1 and Player 2 respectively as they are mapped to specific keys on the keyboard.
Of course, you could change the configuration of MAME, but that would be tedious... Although sometimes on games it'd be nice to be able to play as one of the other 2 players (3 or 4) ... but I'll create two more controllers for that.
Future plans
I want to build two more of these (actualy, I did, here's the link!)... 'The Simpsons' arcade and 'Teenage Mutant Ninja Turtles' require 4 players for the most amount of fun, and 'Rampage' needs all three creatures bashing up buildings.
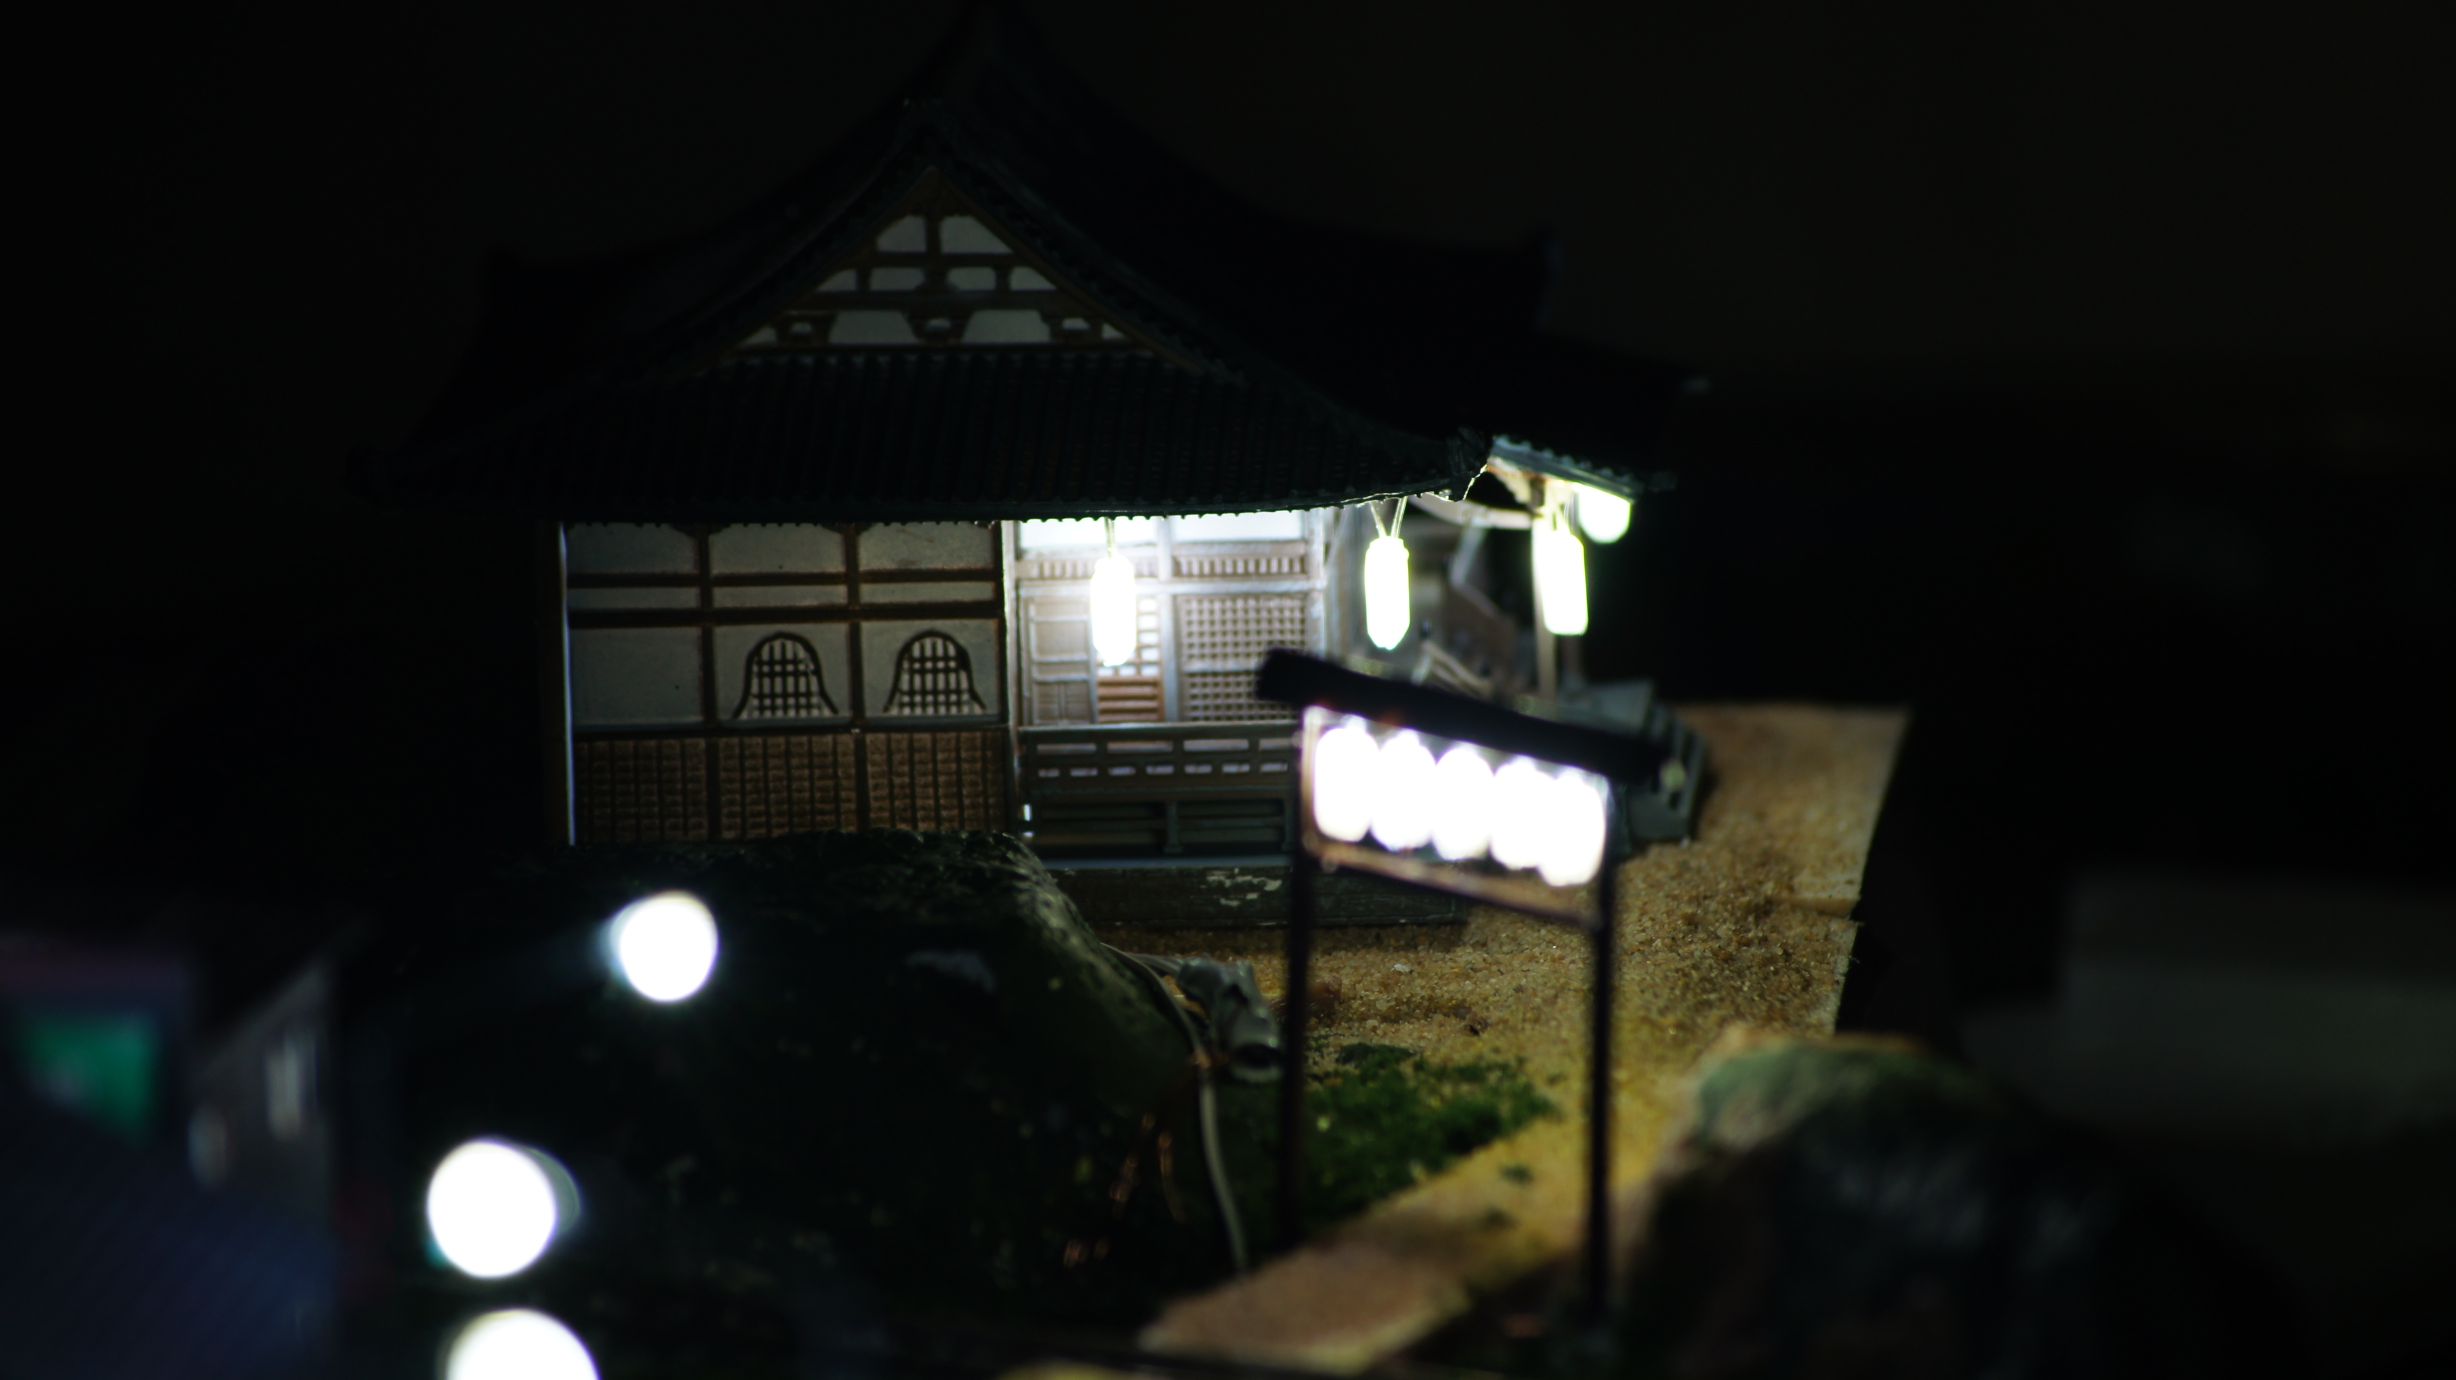
Lighting a Japanese Temple
I'd decided it was time to light the temple after building the Torii for the entrance. This temple was the Tomytec Japanese Temple A (Main Building) and is still available for purchase from most Japanese online hobby retailers.
I've slapped LEDs in buildings before, but this time I also wanted to add lanterns to the front of the shop. I'd made the lanterns before, as in my previous attempts of creating the Torii, but I was to make a few changes this time as I wasn't totally impressed with the previous outcome.
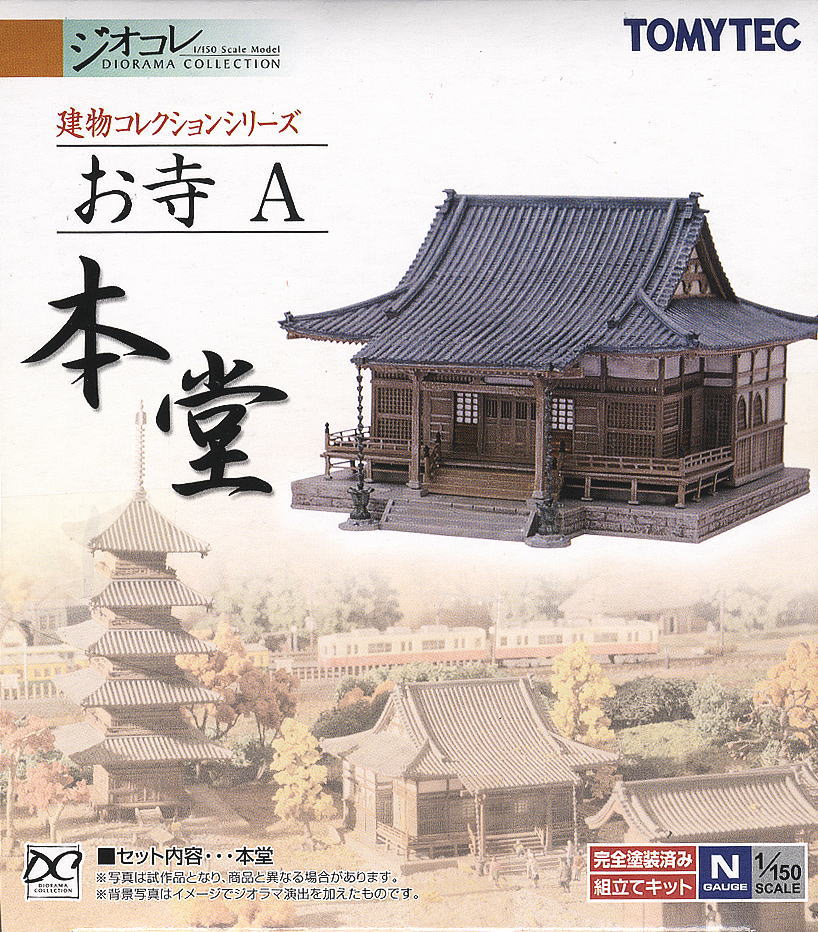
Creating the lanterns
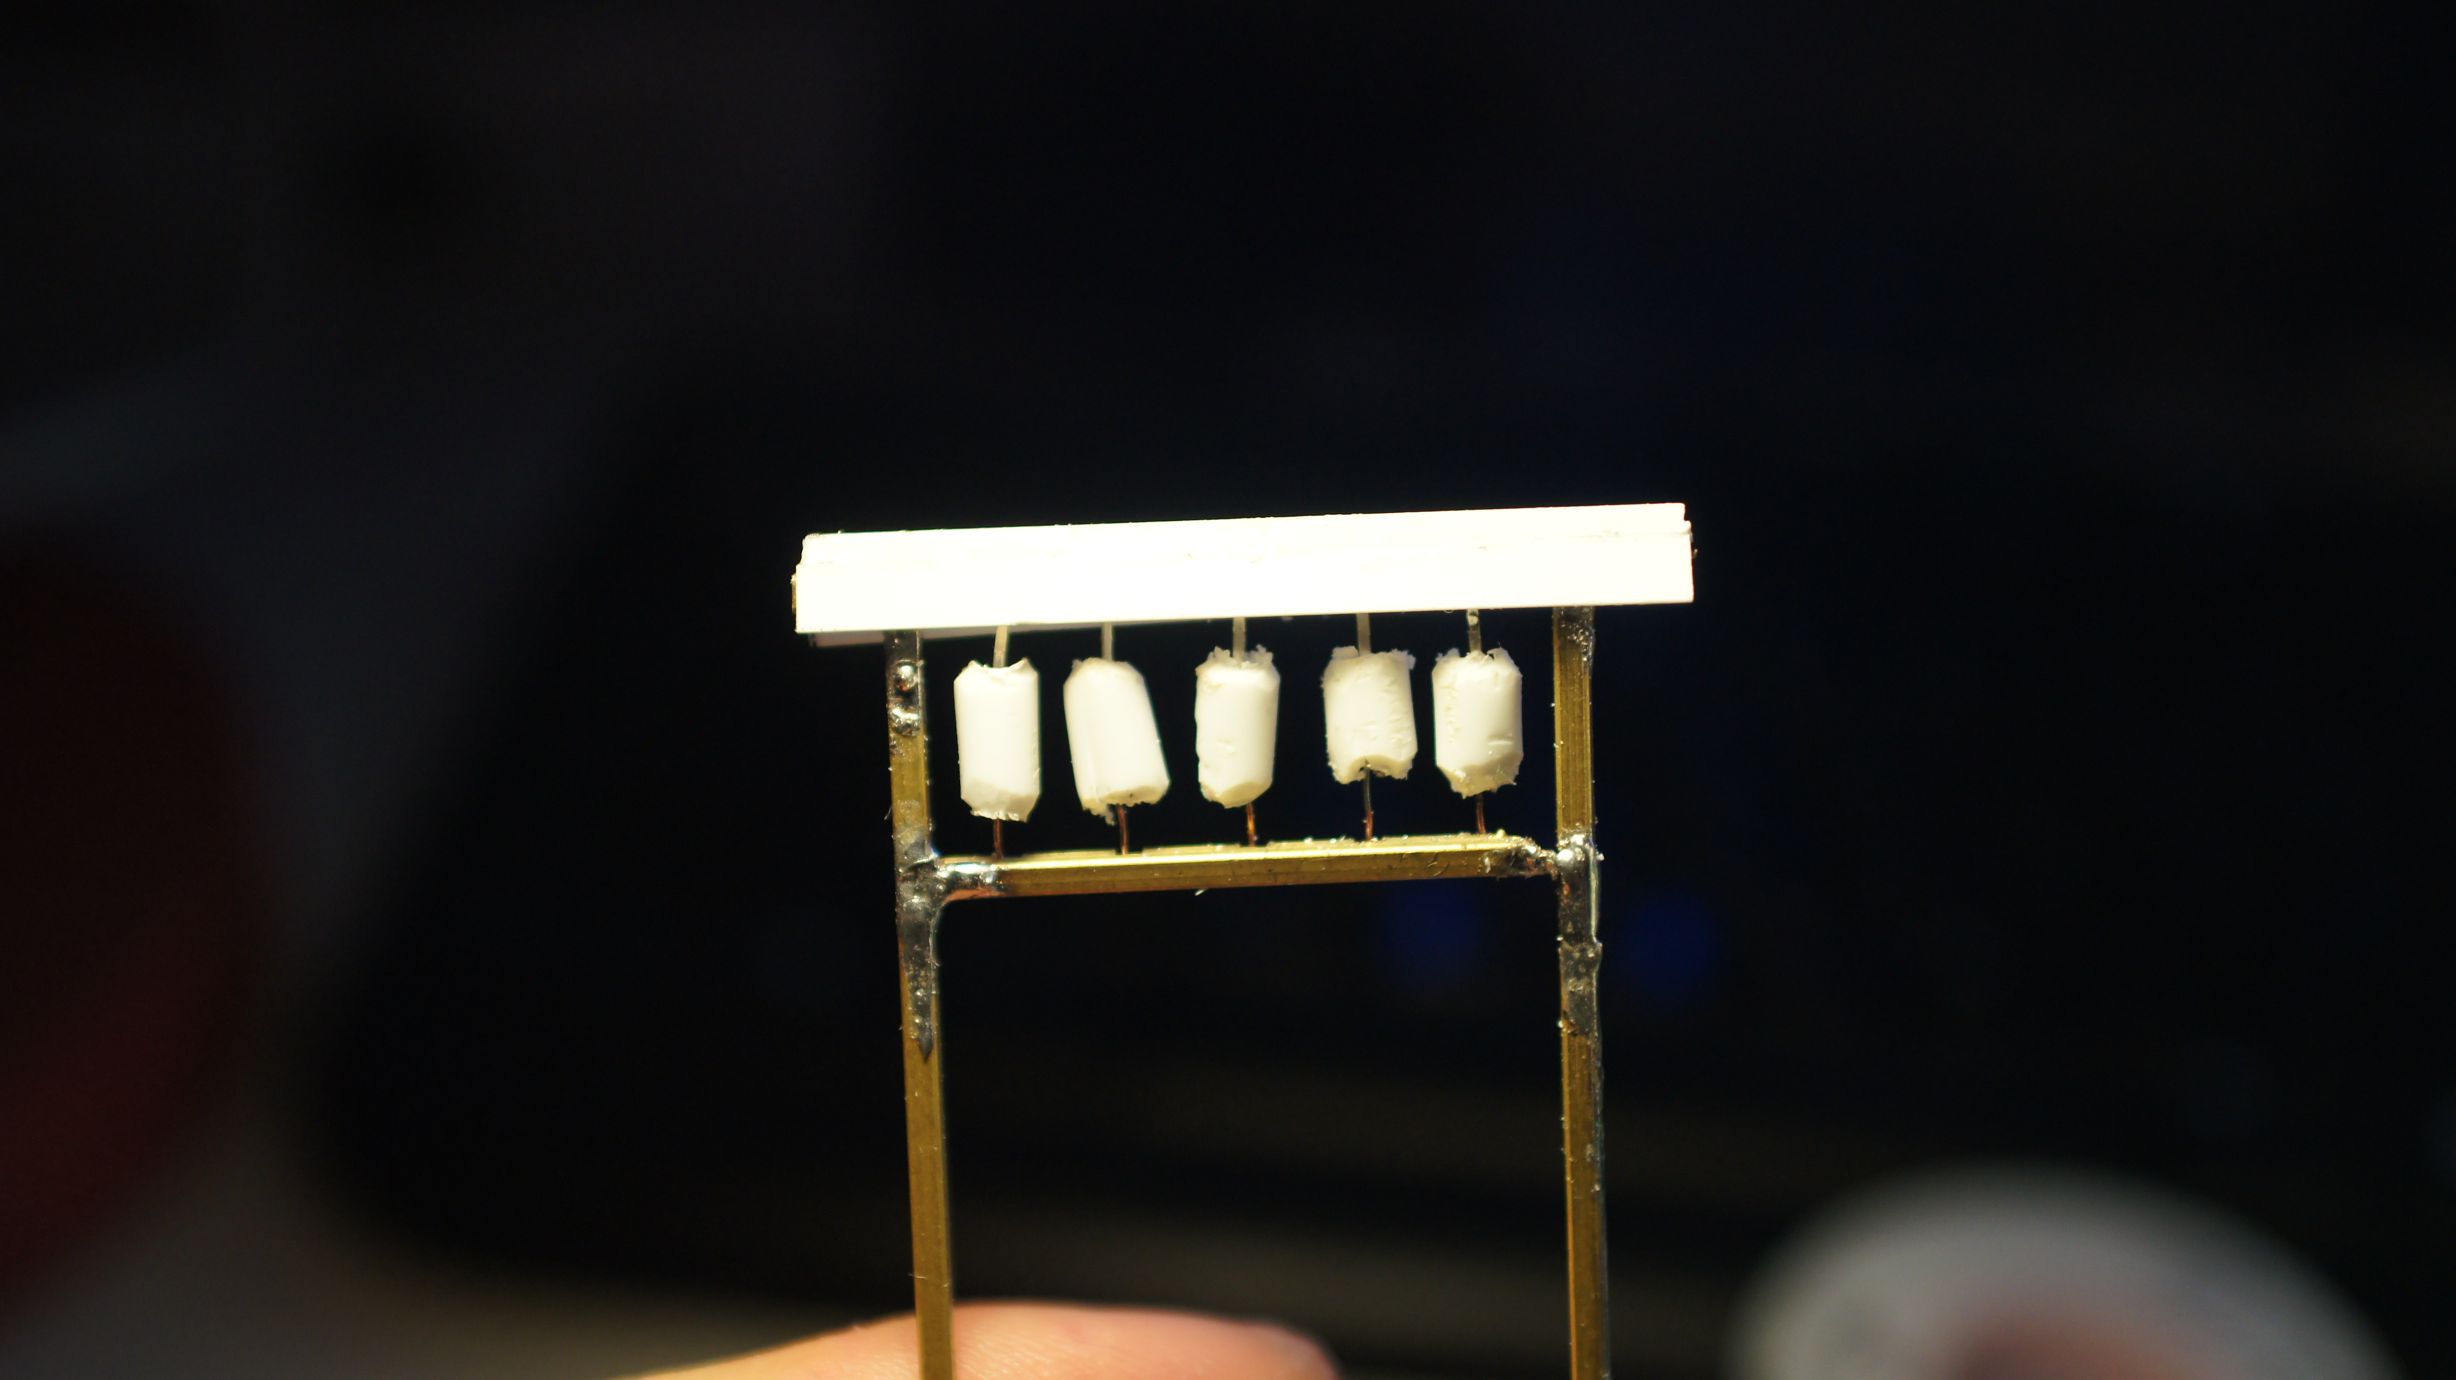
There was a slight change this time to creating the lanterns... instead of cutting them and sliding them over the LEDs, I shaved them down to fit and inserted them into the center of the tubing. This all worked well, but you must be careful when shaving down the LEDs as you can destroy them quite easily. To shave the LEDs, I held them in pliers in one hand and filed away with my pocket knife. It was pretty obvious to feel when you were no longer filing away at plastic and, unfortunately, this was usually the demise of the LED.
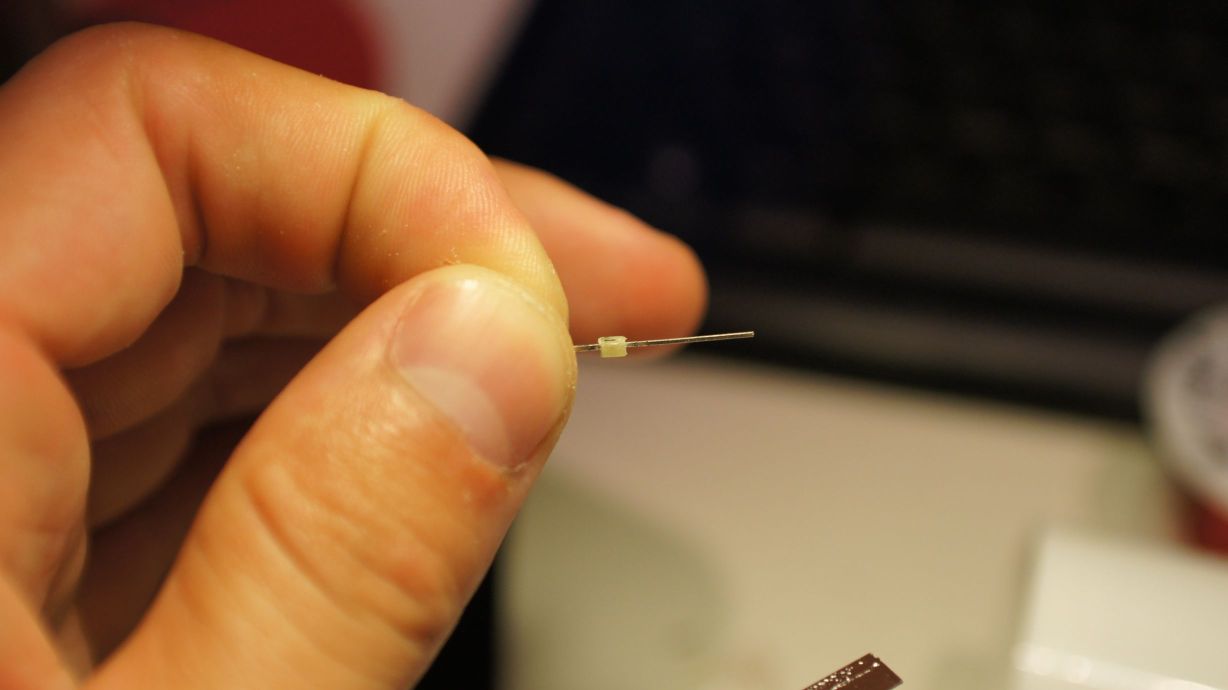

Mounting the lanterns
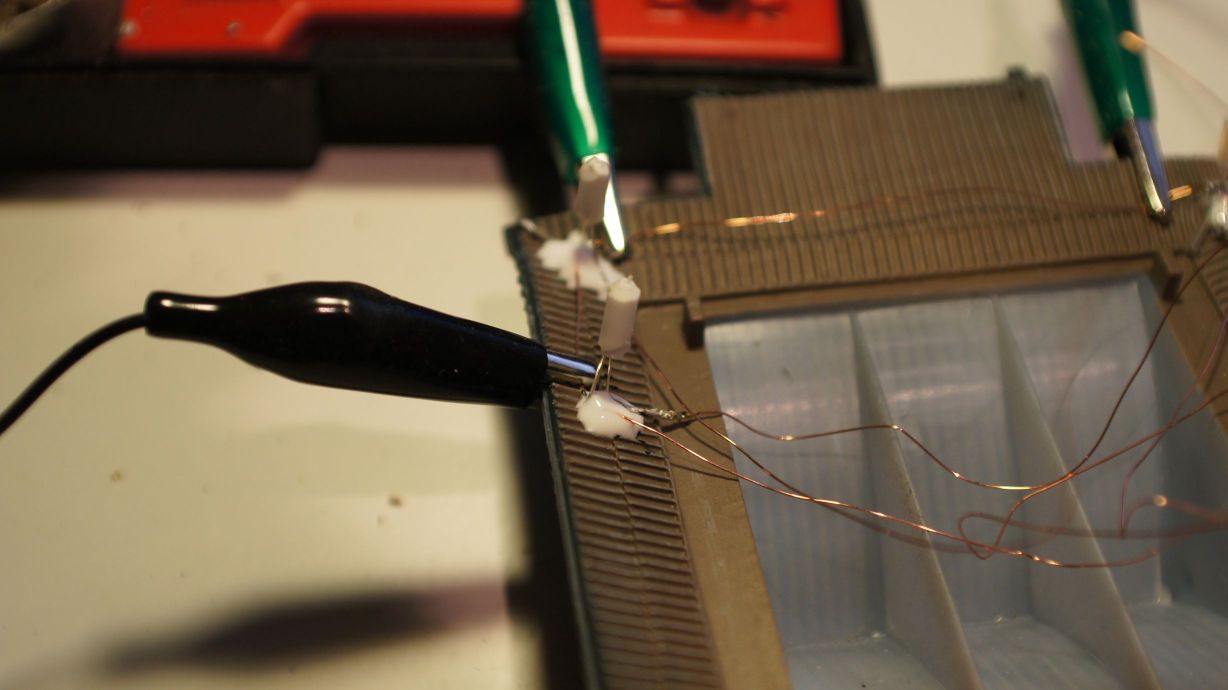
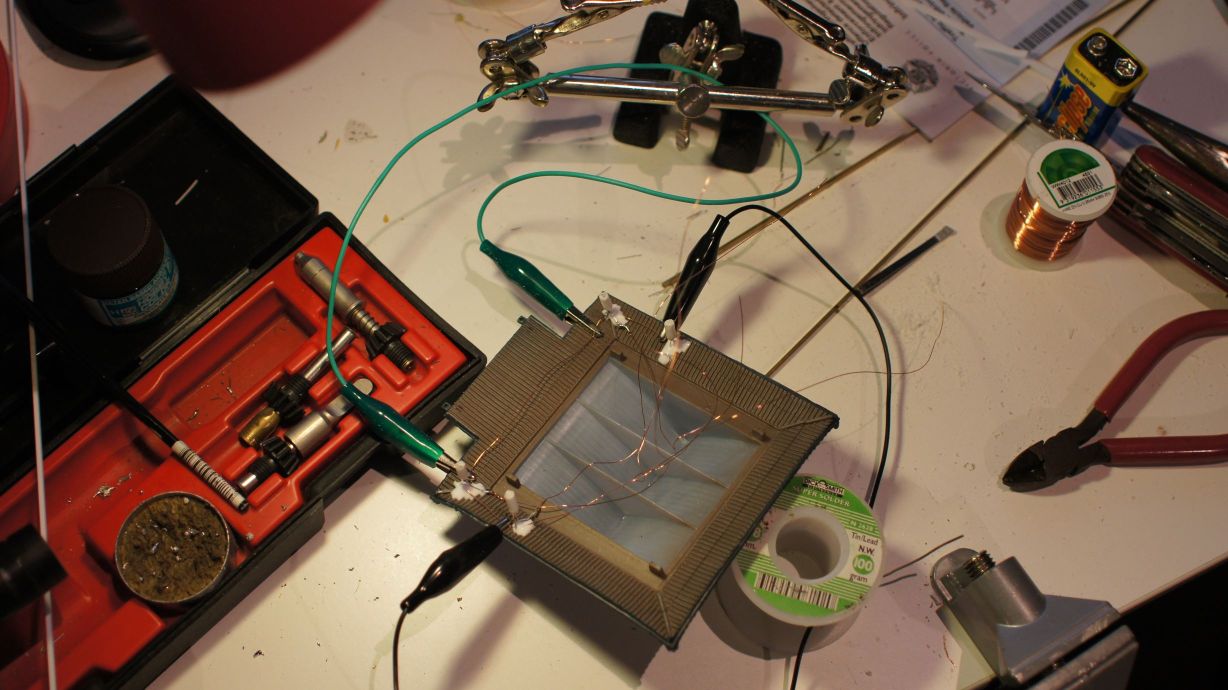
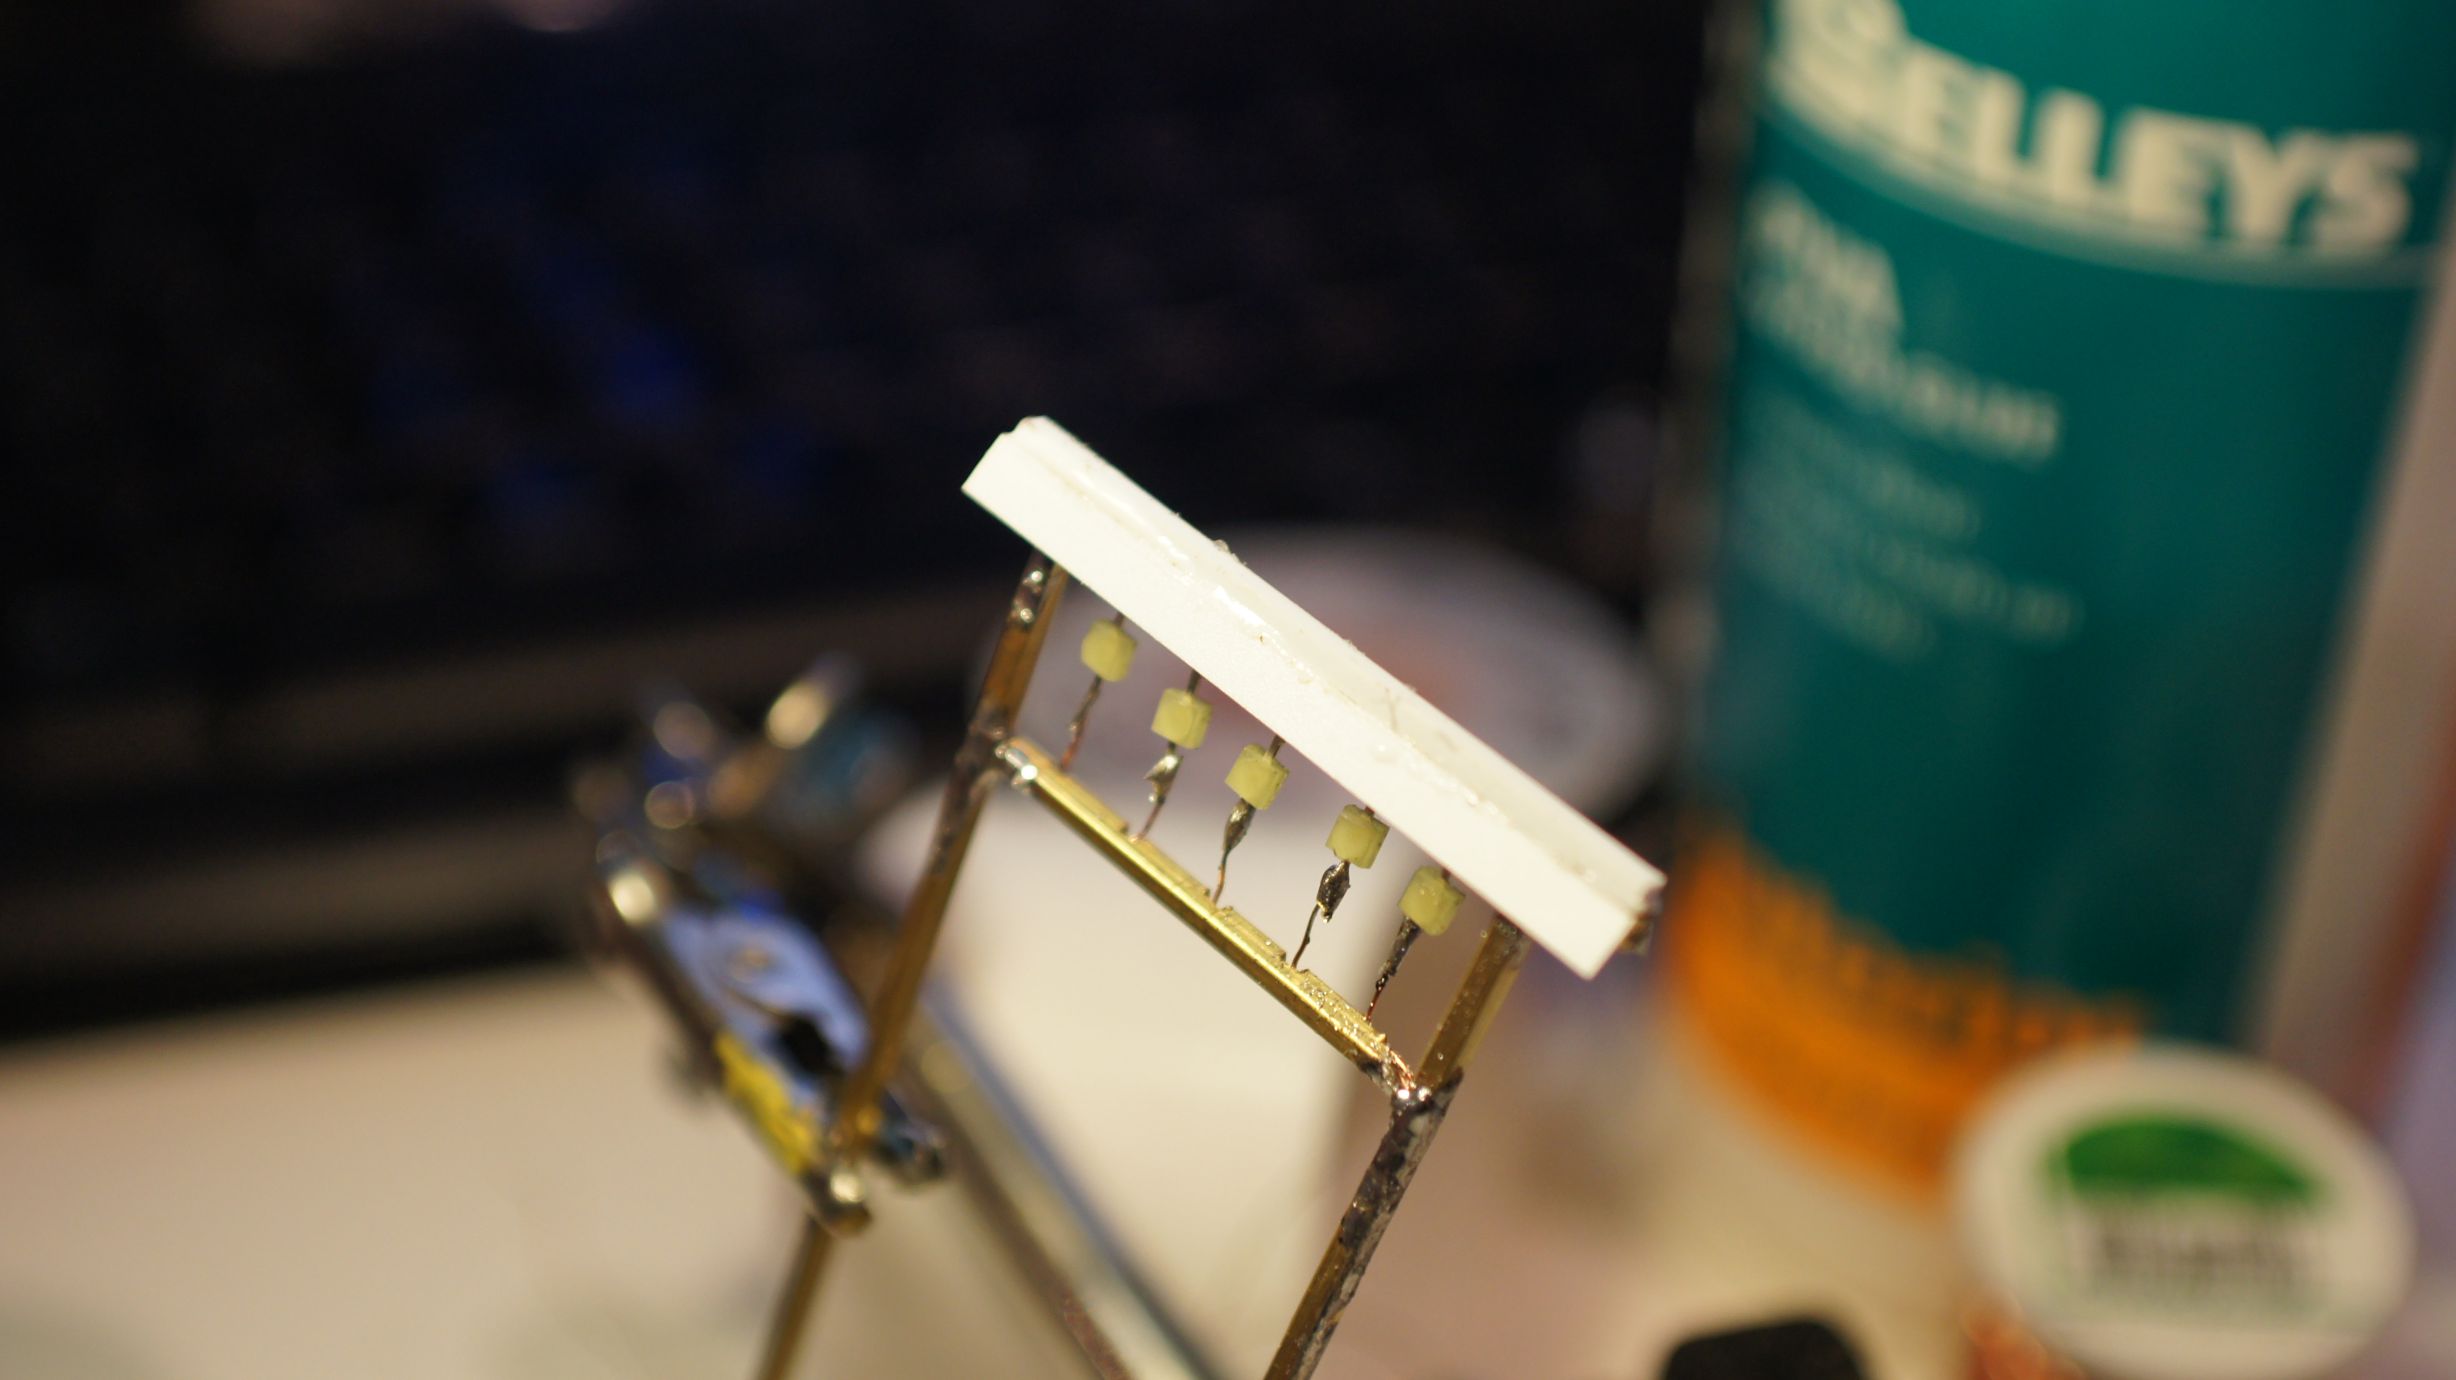
I used the same copper winding wire that I always do and bent it into a rectangular shape to fit the roof of the temple. I then started soldering the lanterns in place.
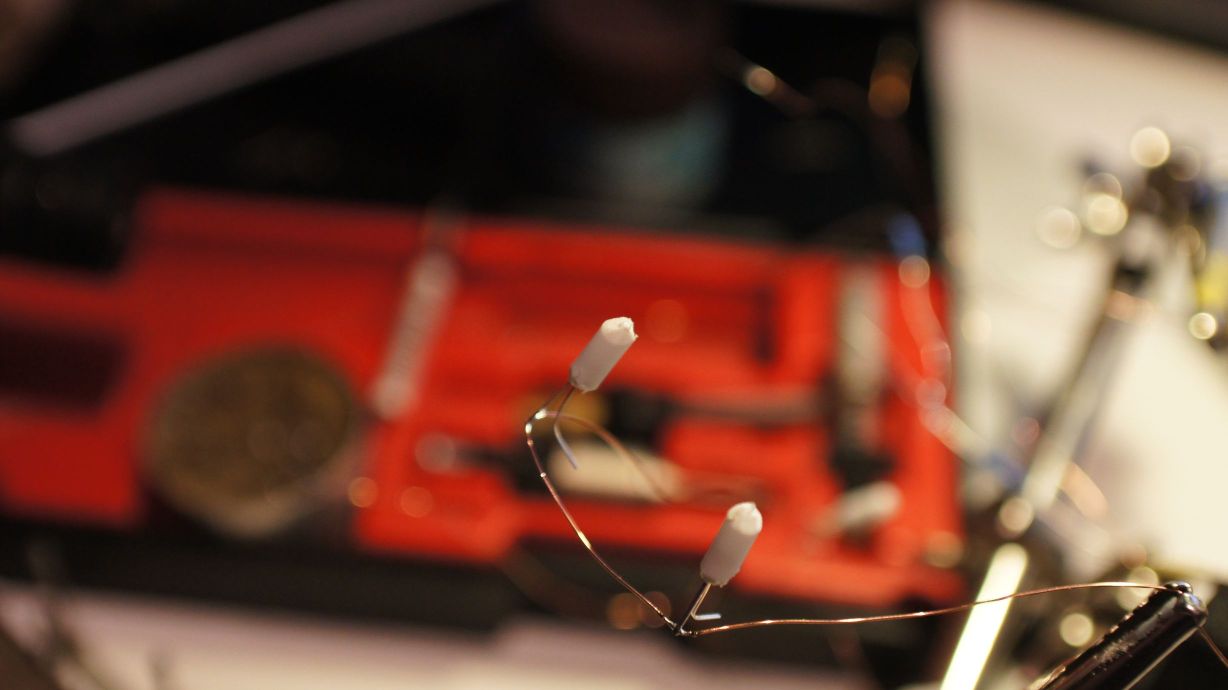
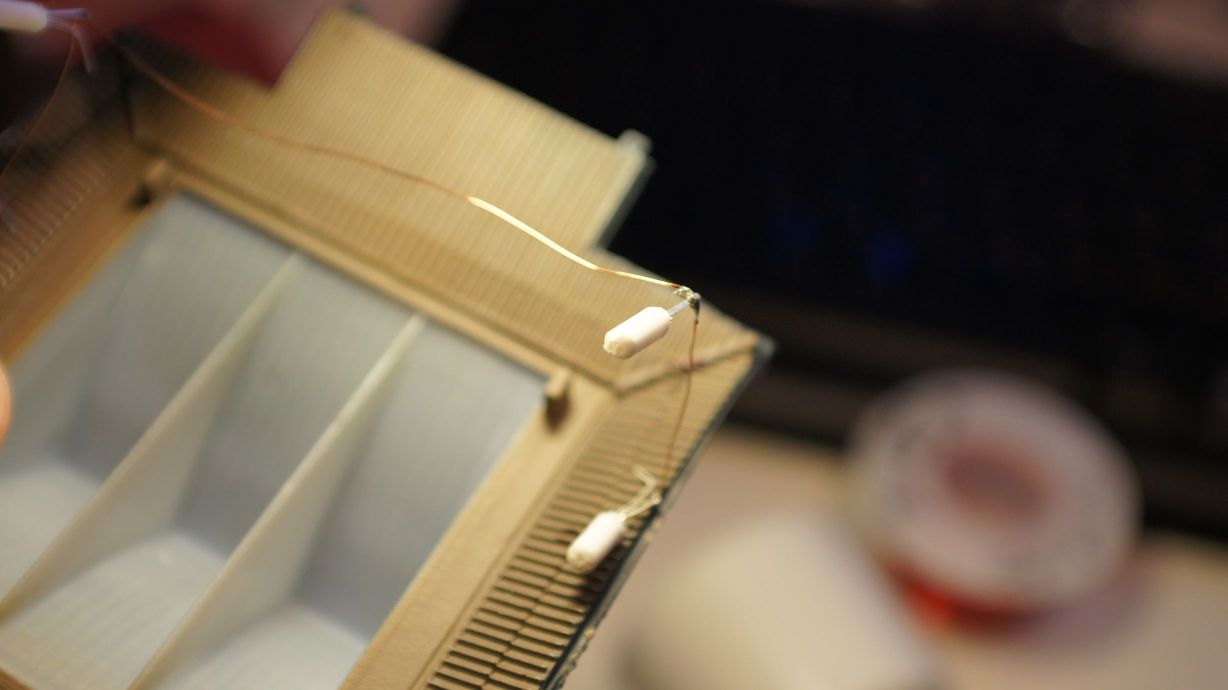
I then pulled out the trusty Selleys Aquadere and, using random aligator clips found on the bench, glued the lanterns in place.
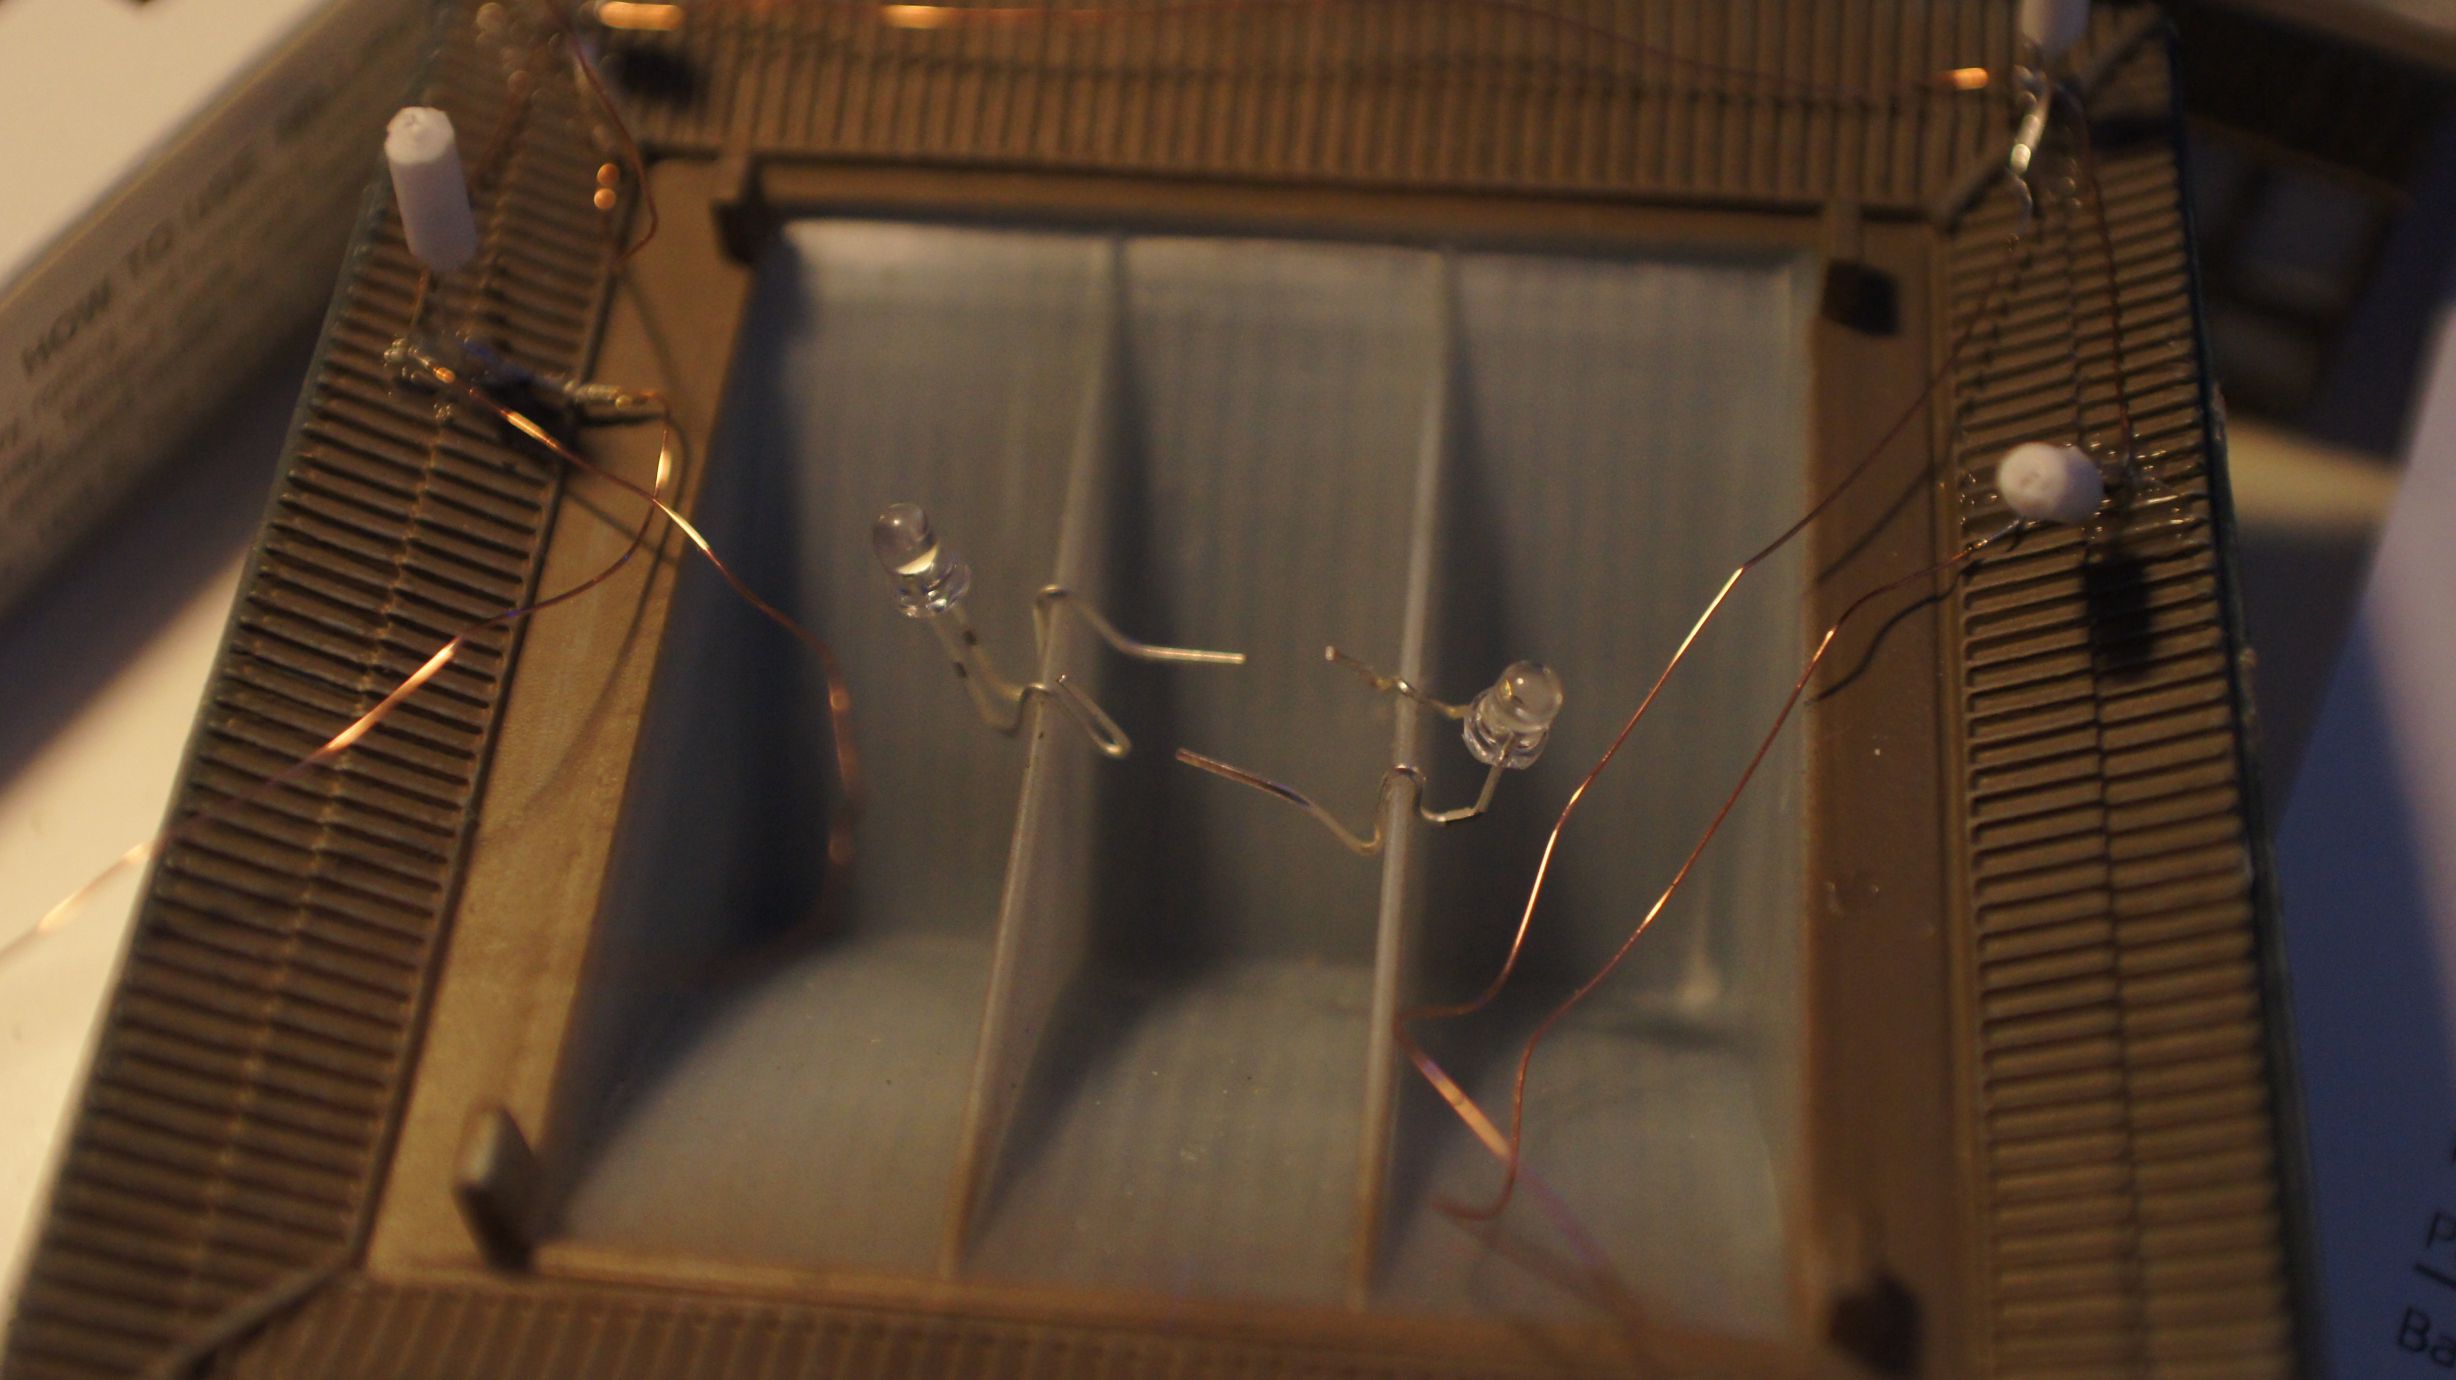
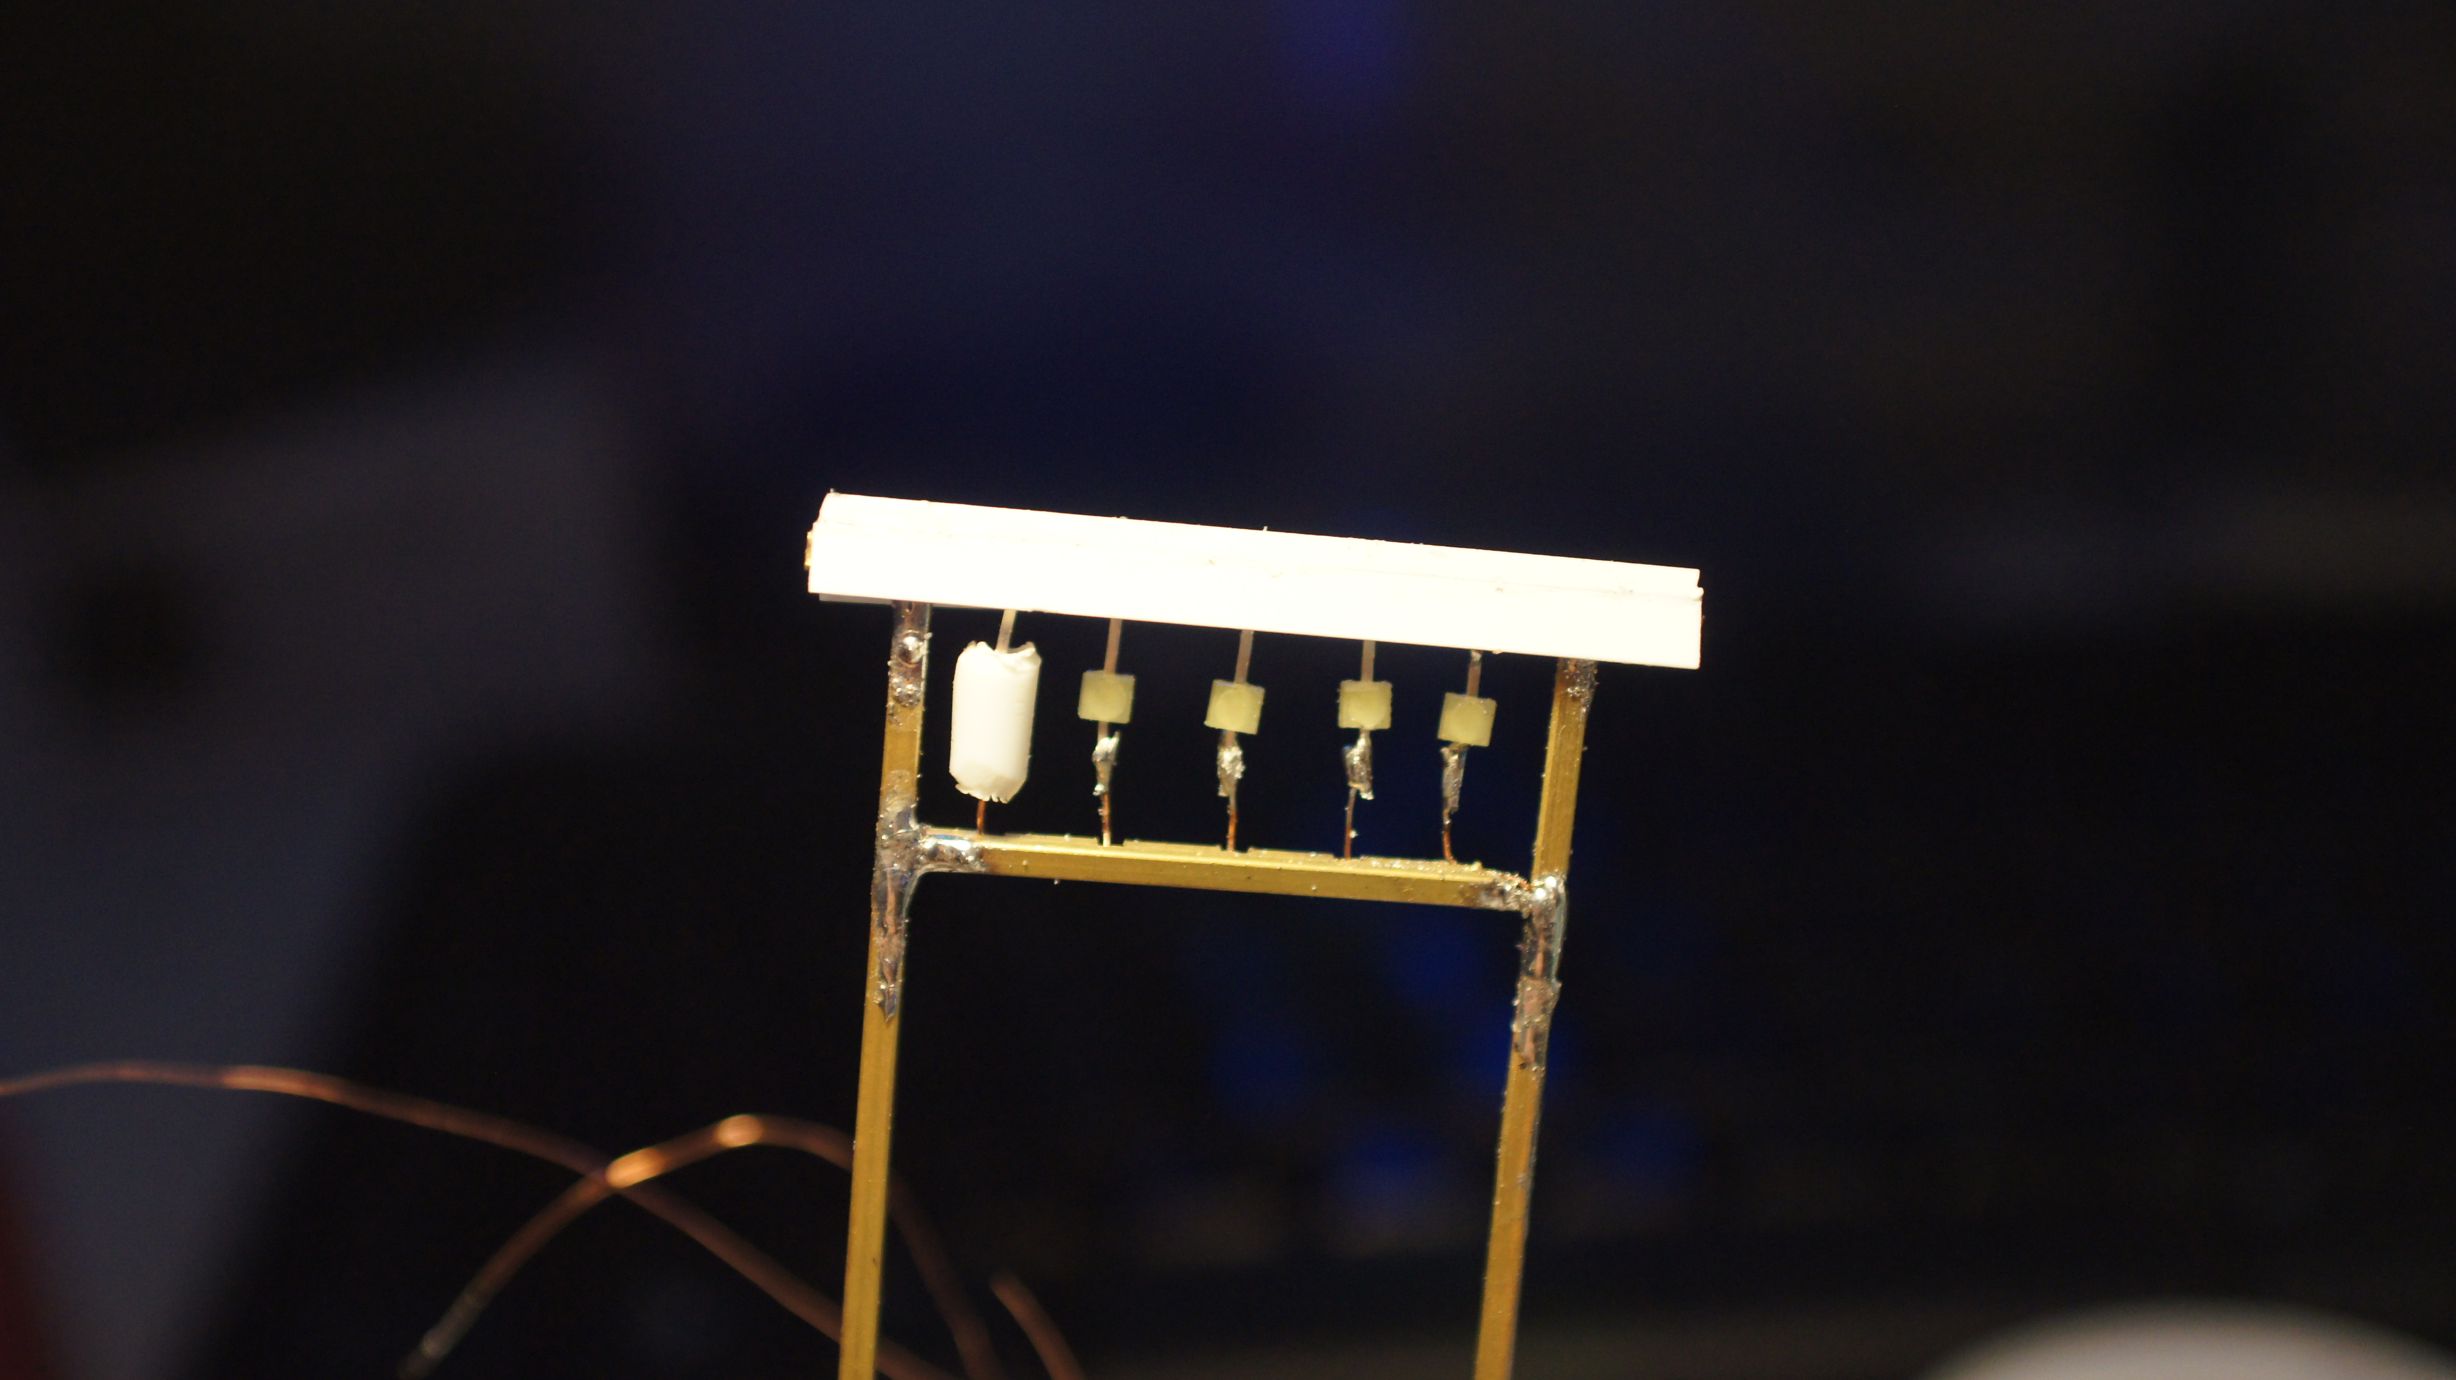
I also put two standard 3mm white LEDs in the center of the ceiling for building lights.
The finished product
After the glue had dried, I tested all the LEDs and found that I'd broken the front-left lantern. This was 24hours after starting the project and frustrating. I quickly removed it from the temple and filed another LED down. I left it dry again, overnight, after testing, gluing and testing again.
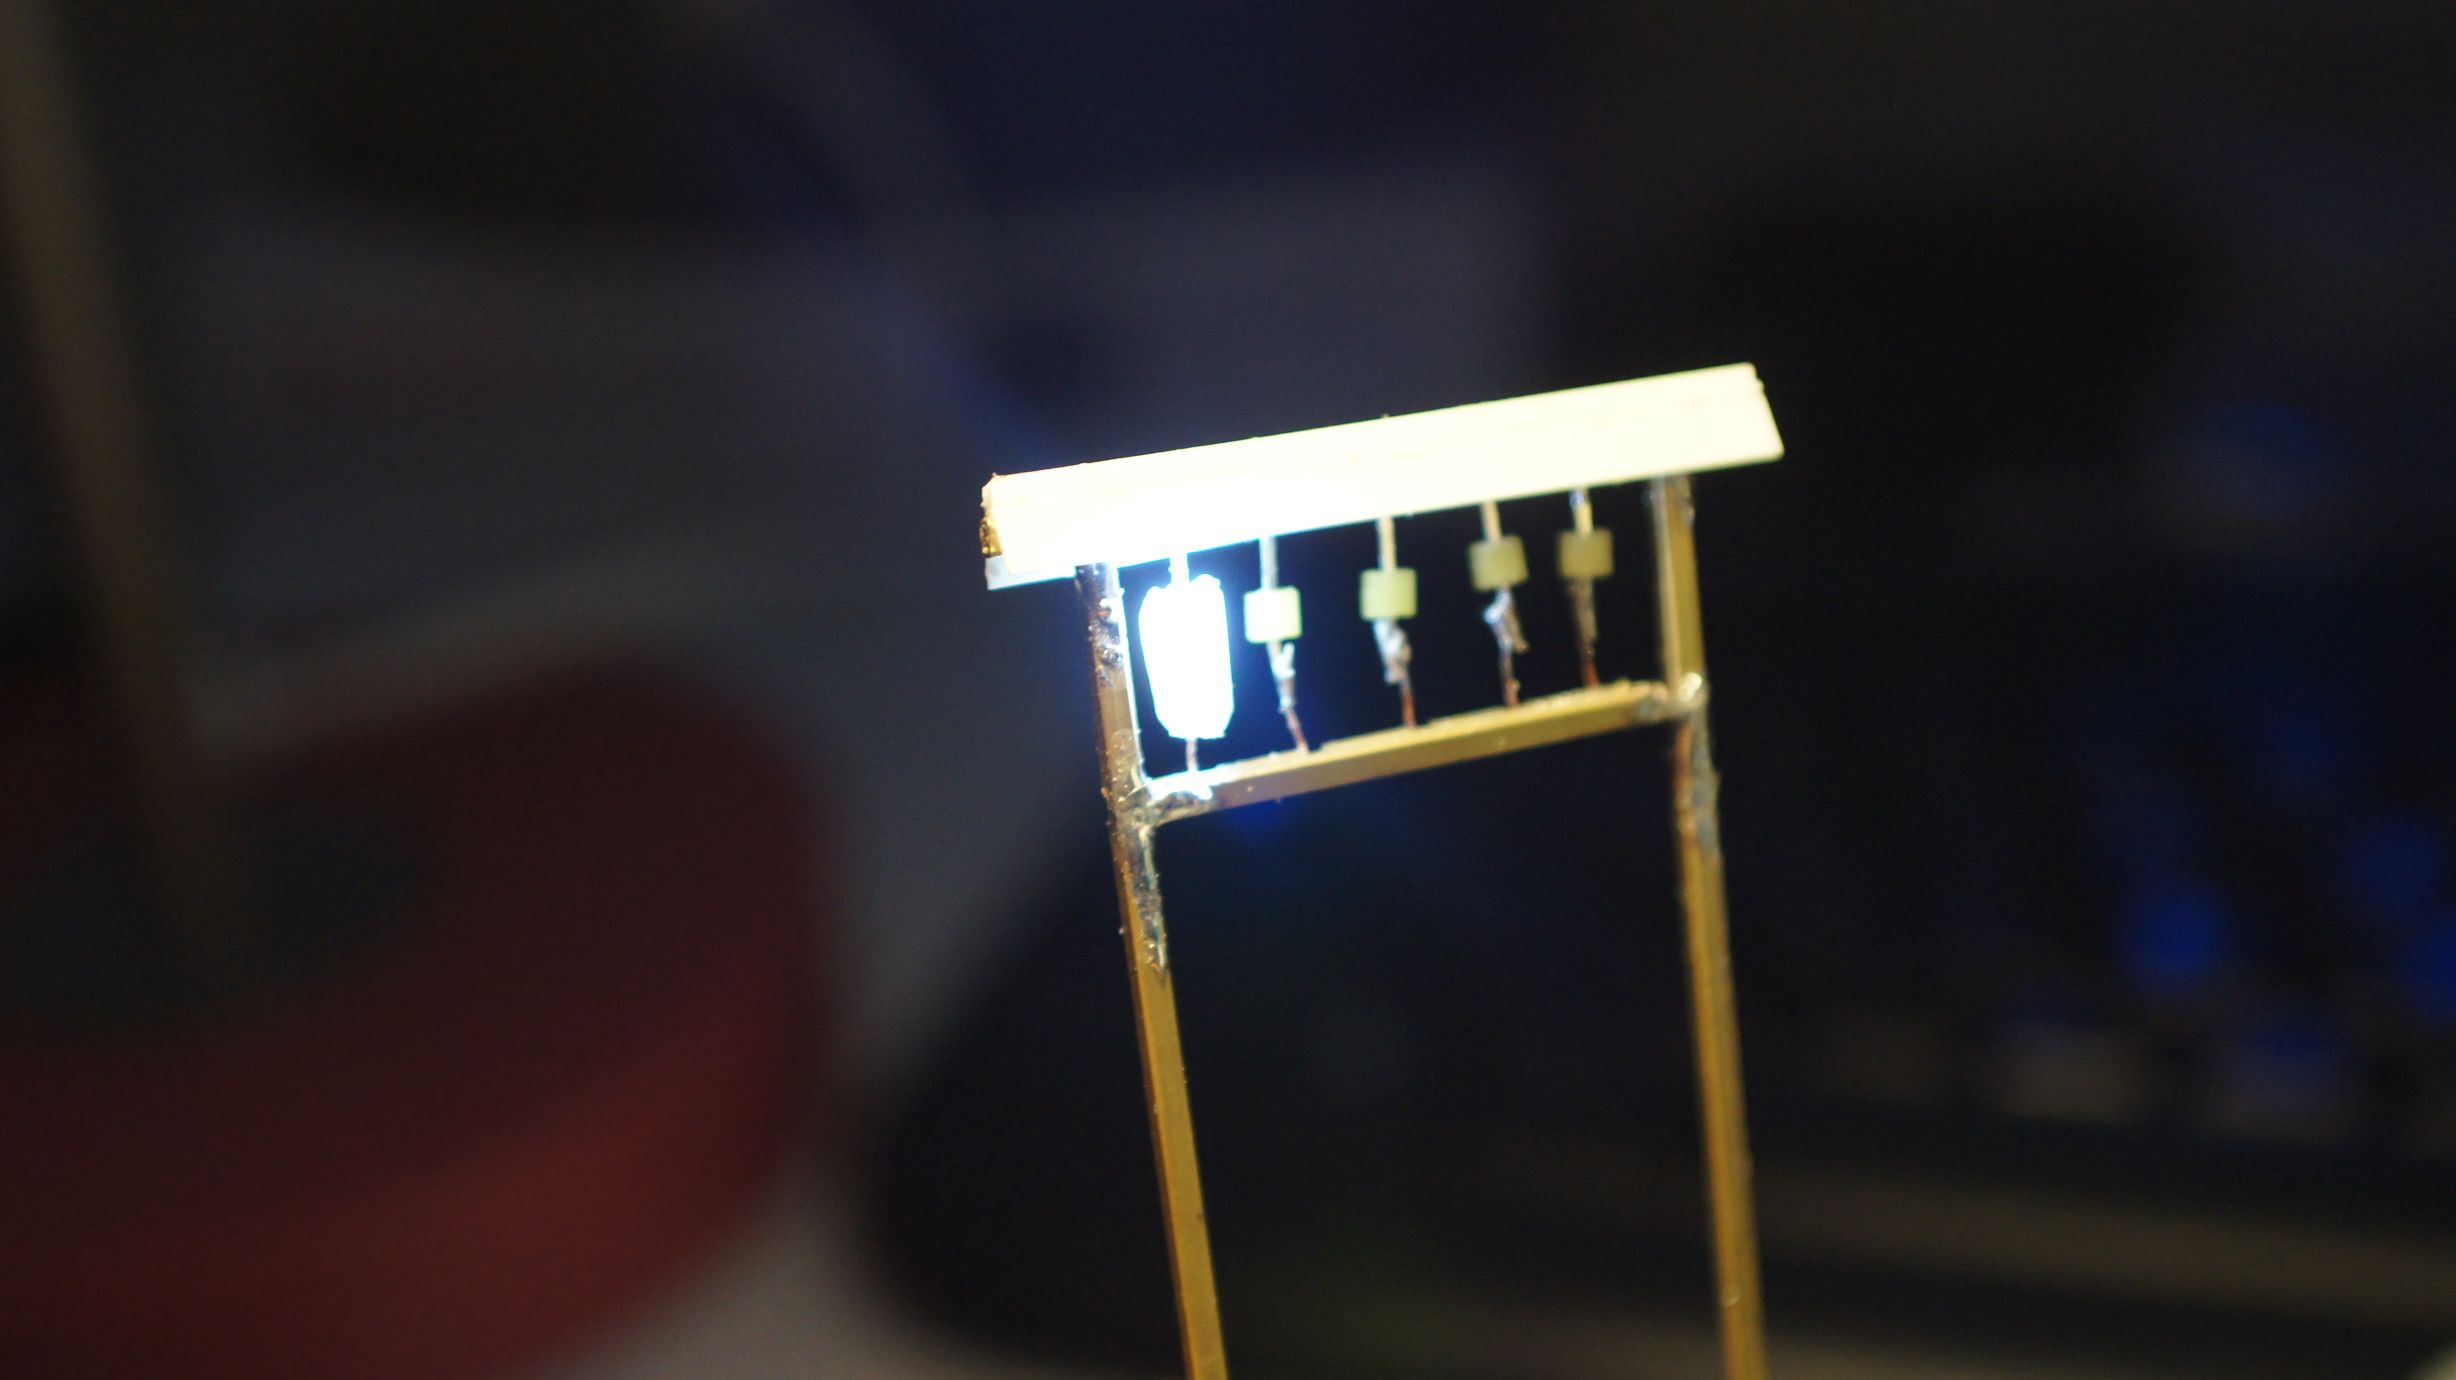
Finally, yesterday, I was able to hook it up to my Arduino LED Controller. It worked perfectly and I took the opportunity to test my night-time photography skills.
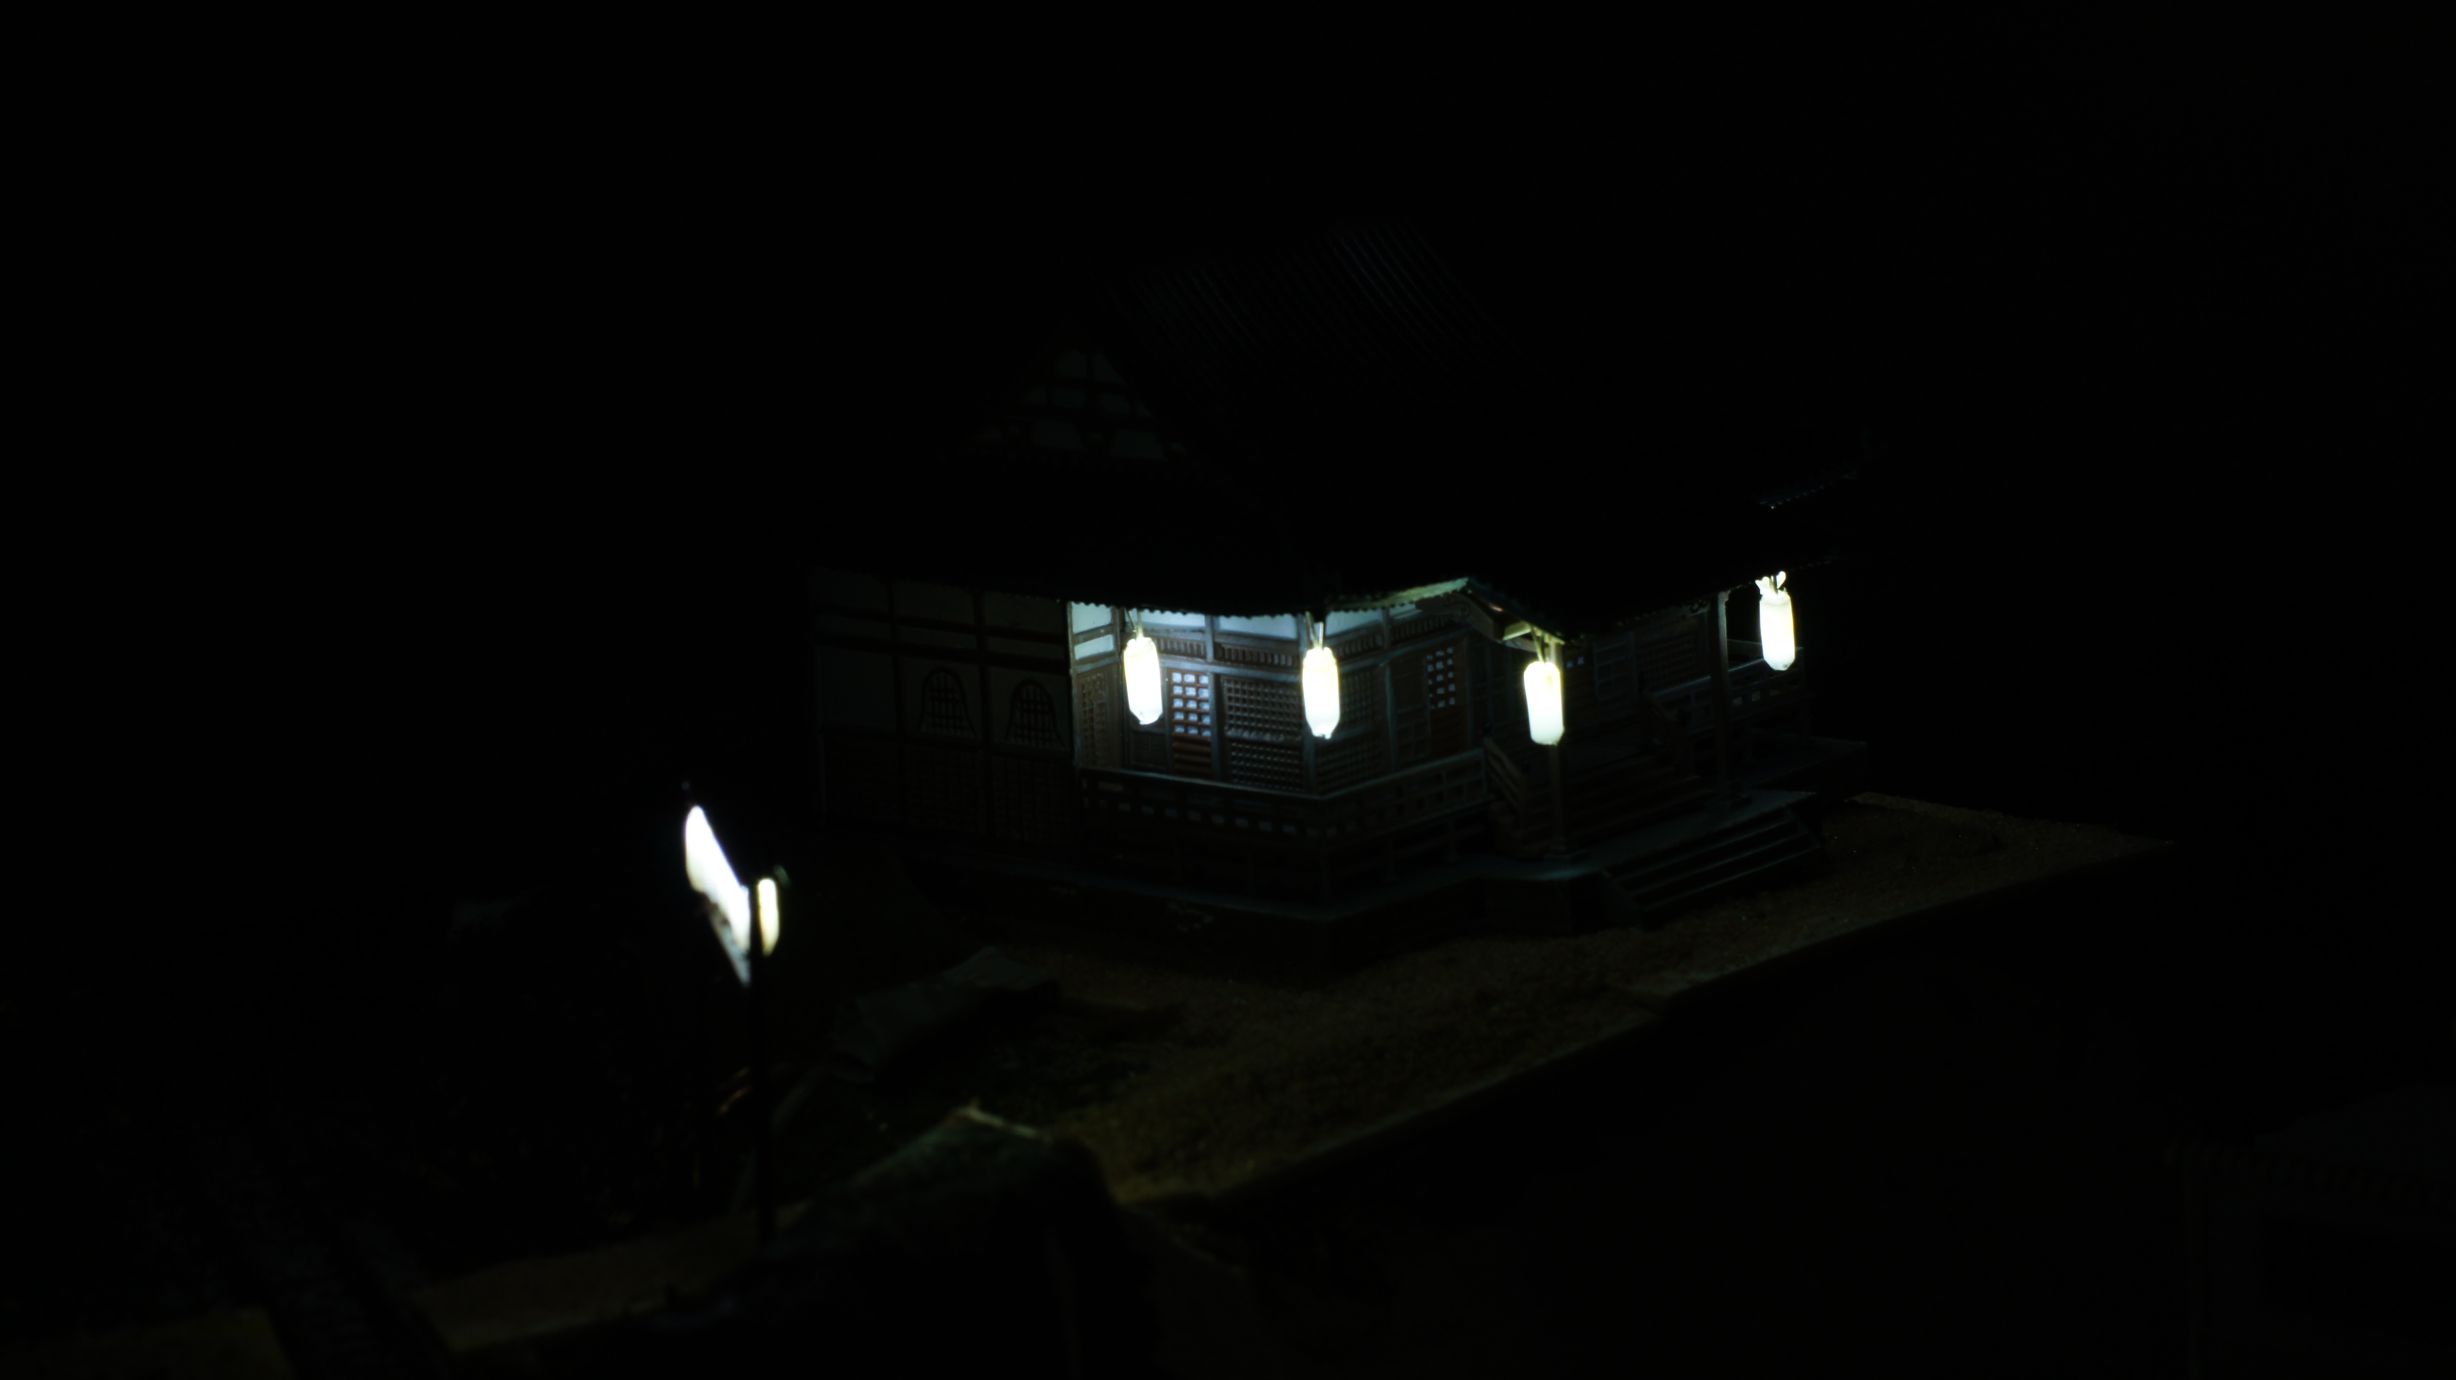

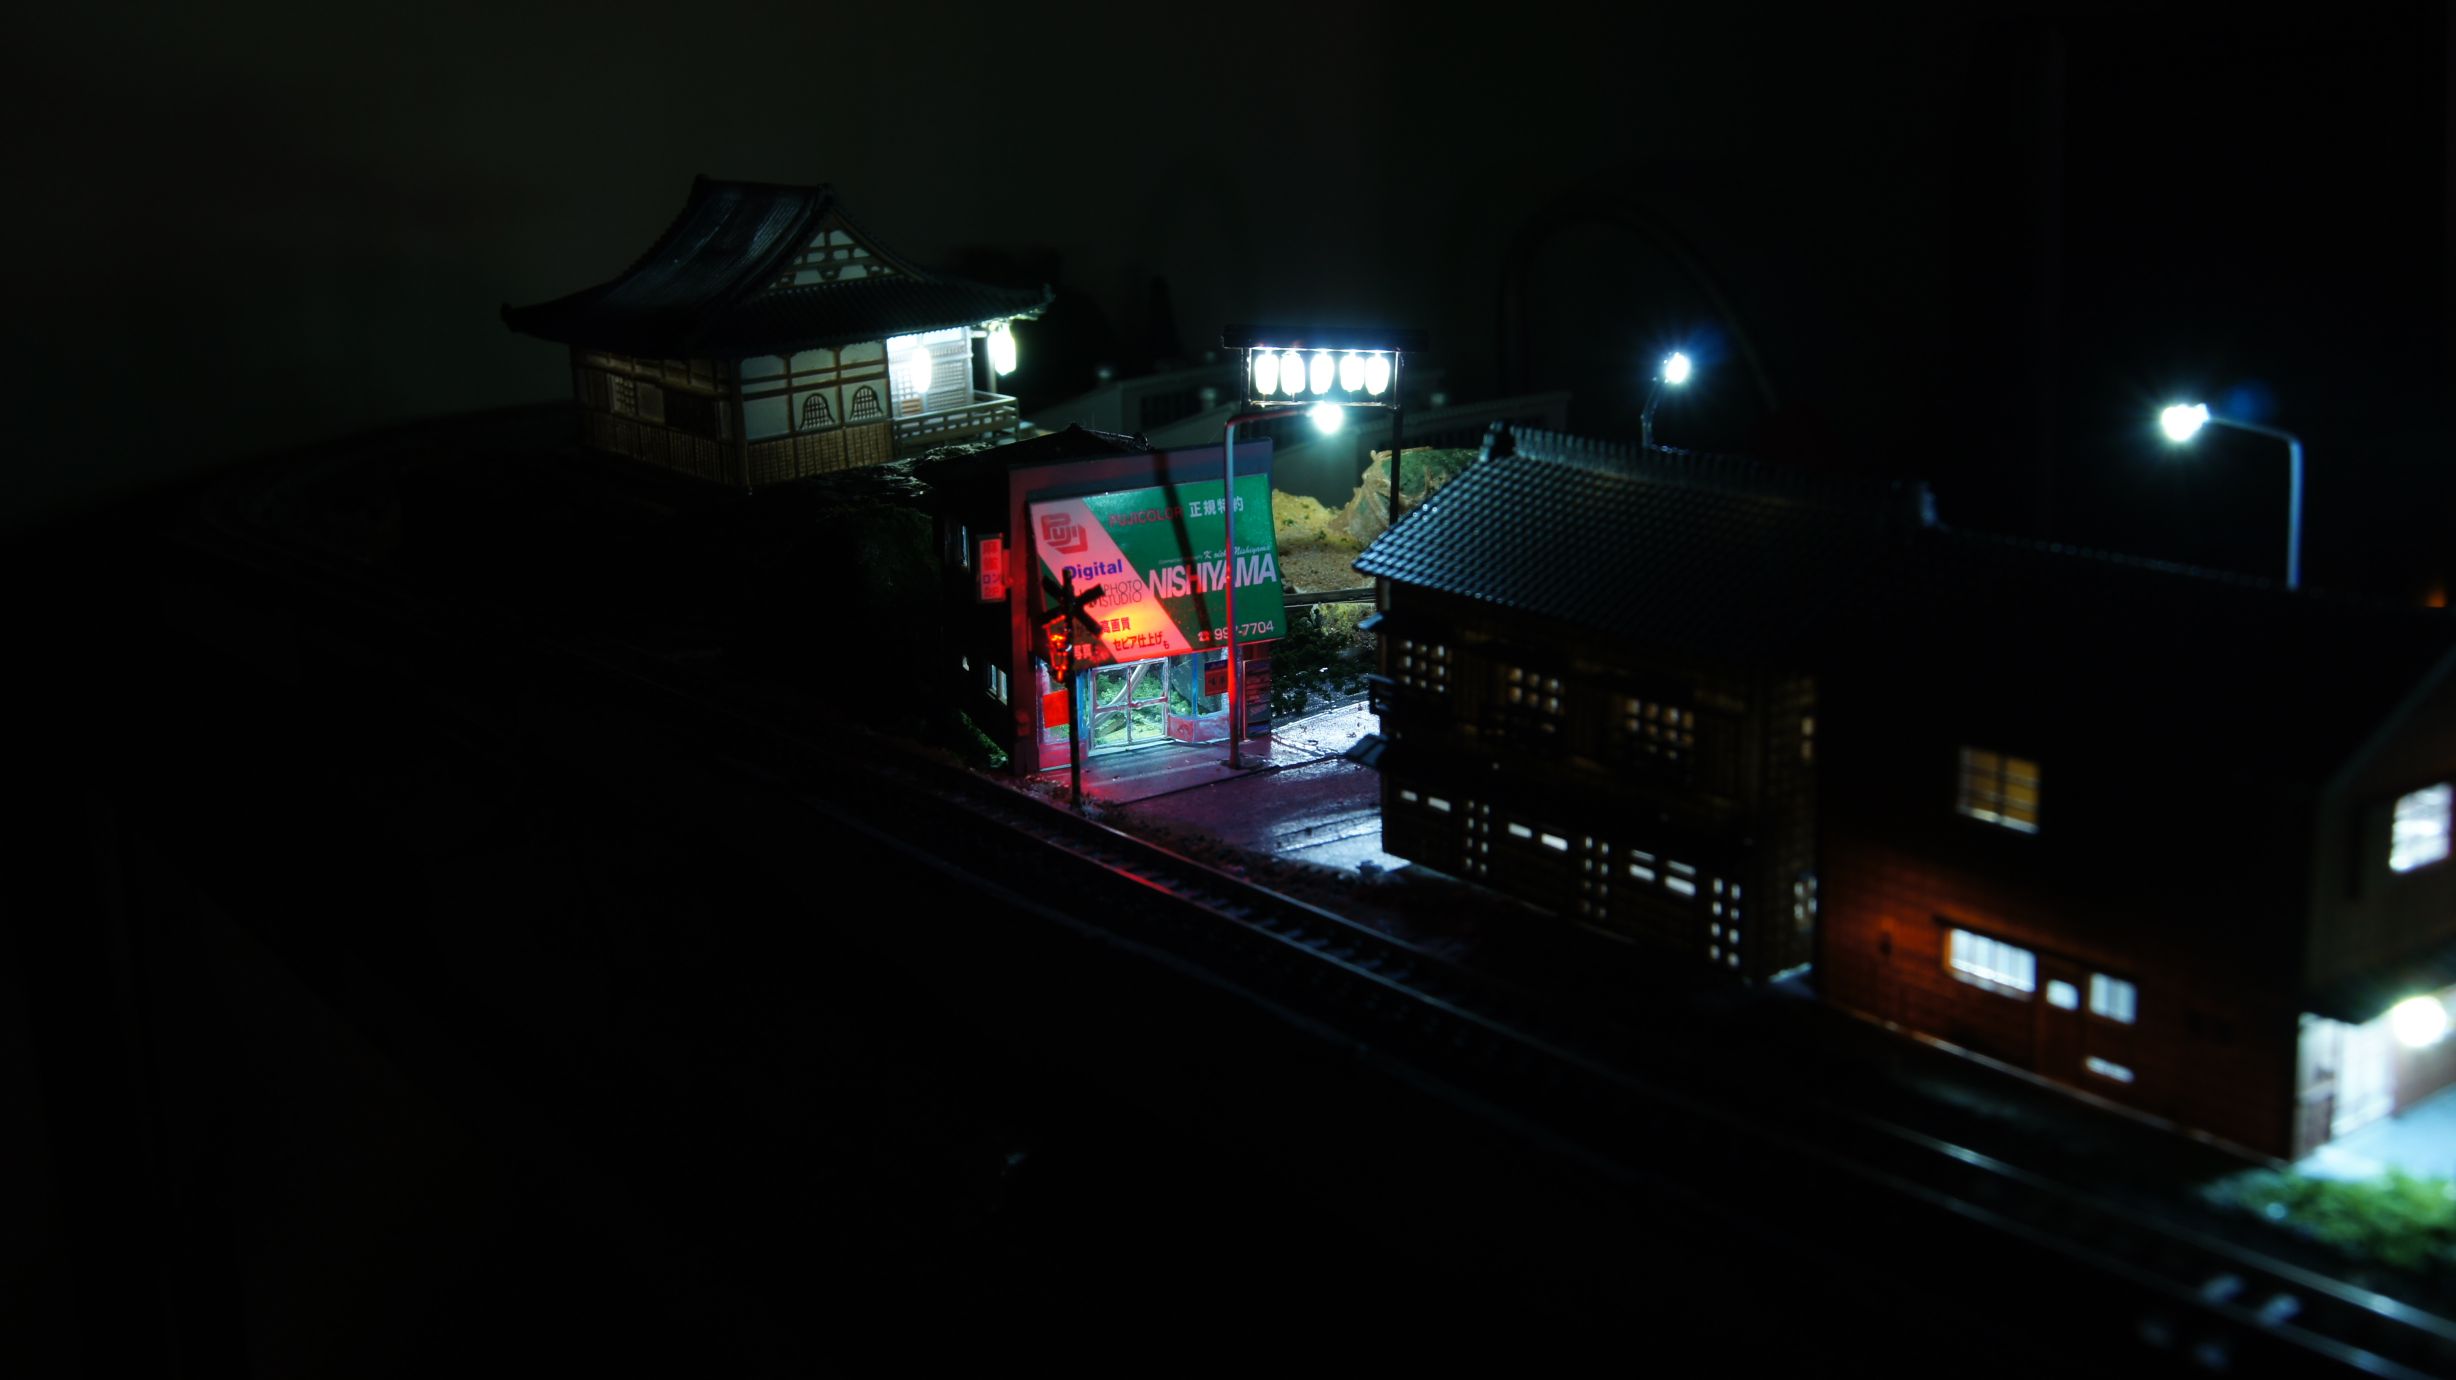
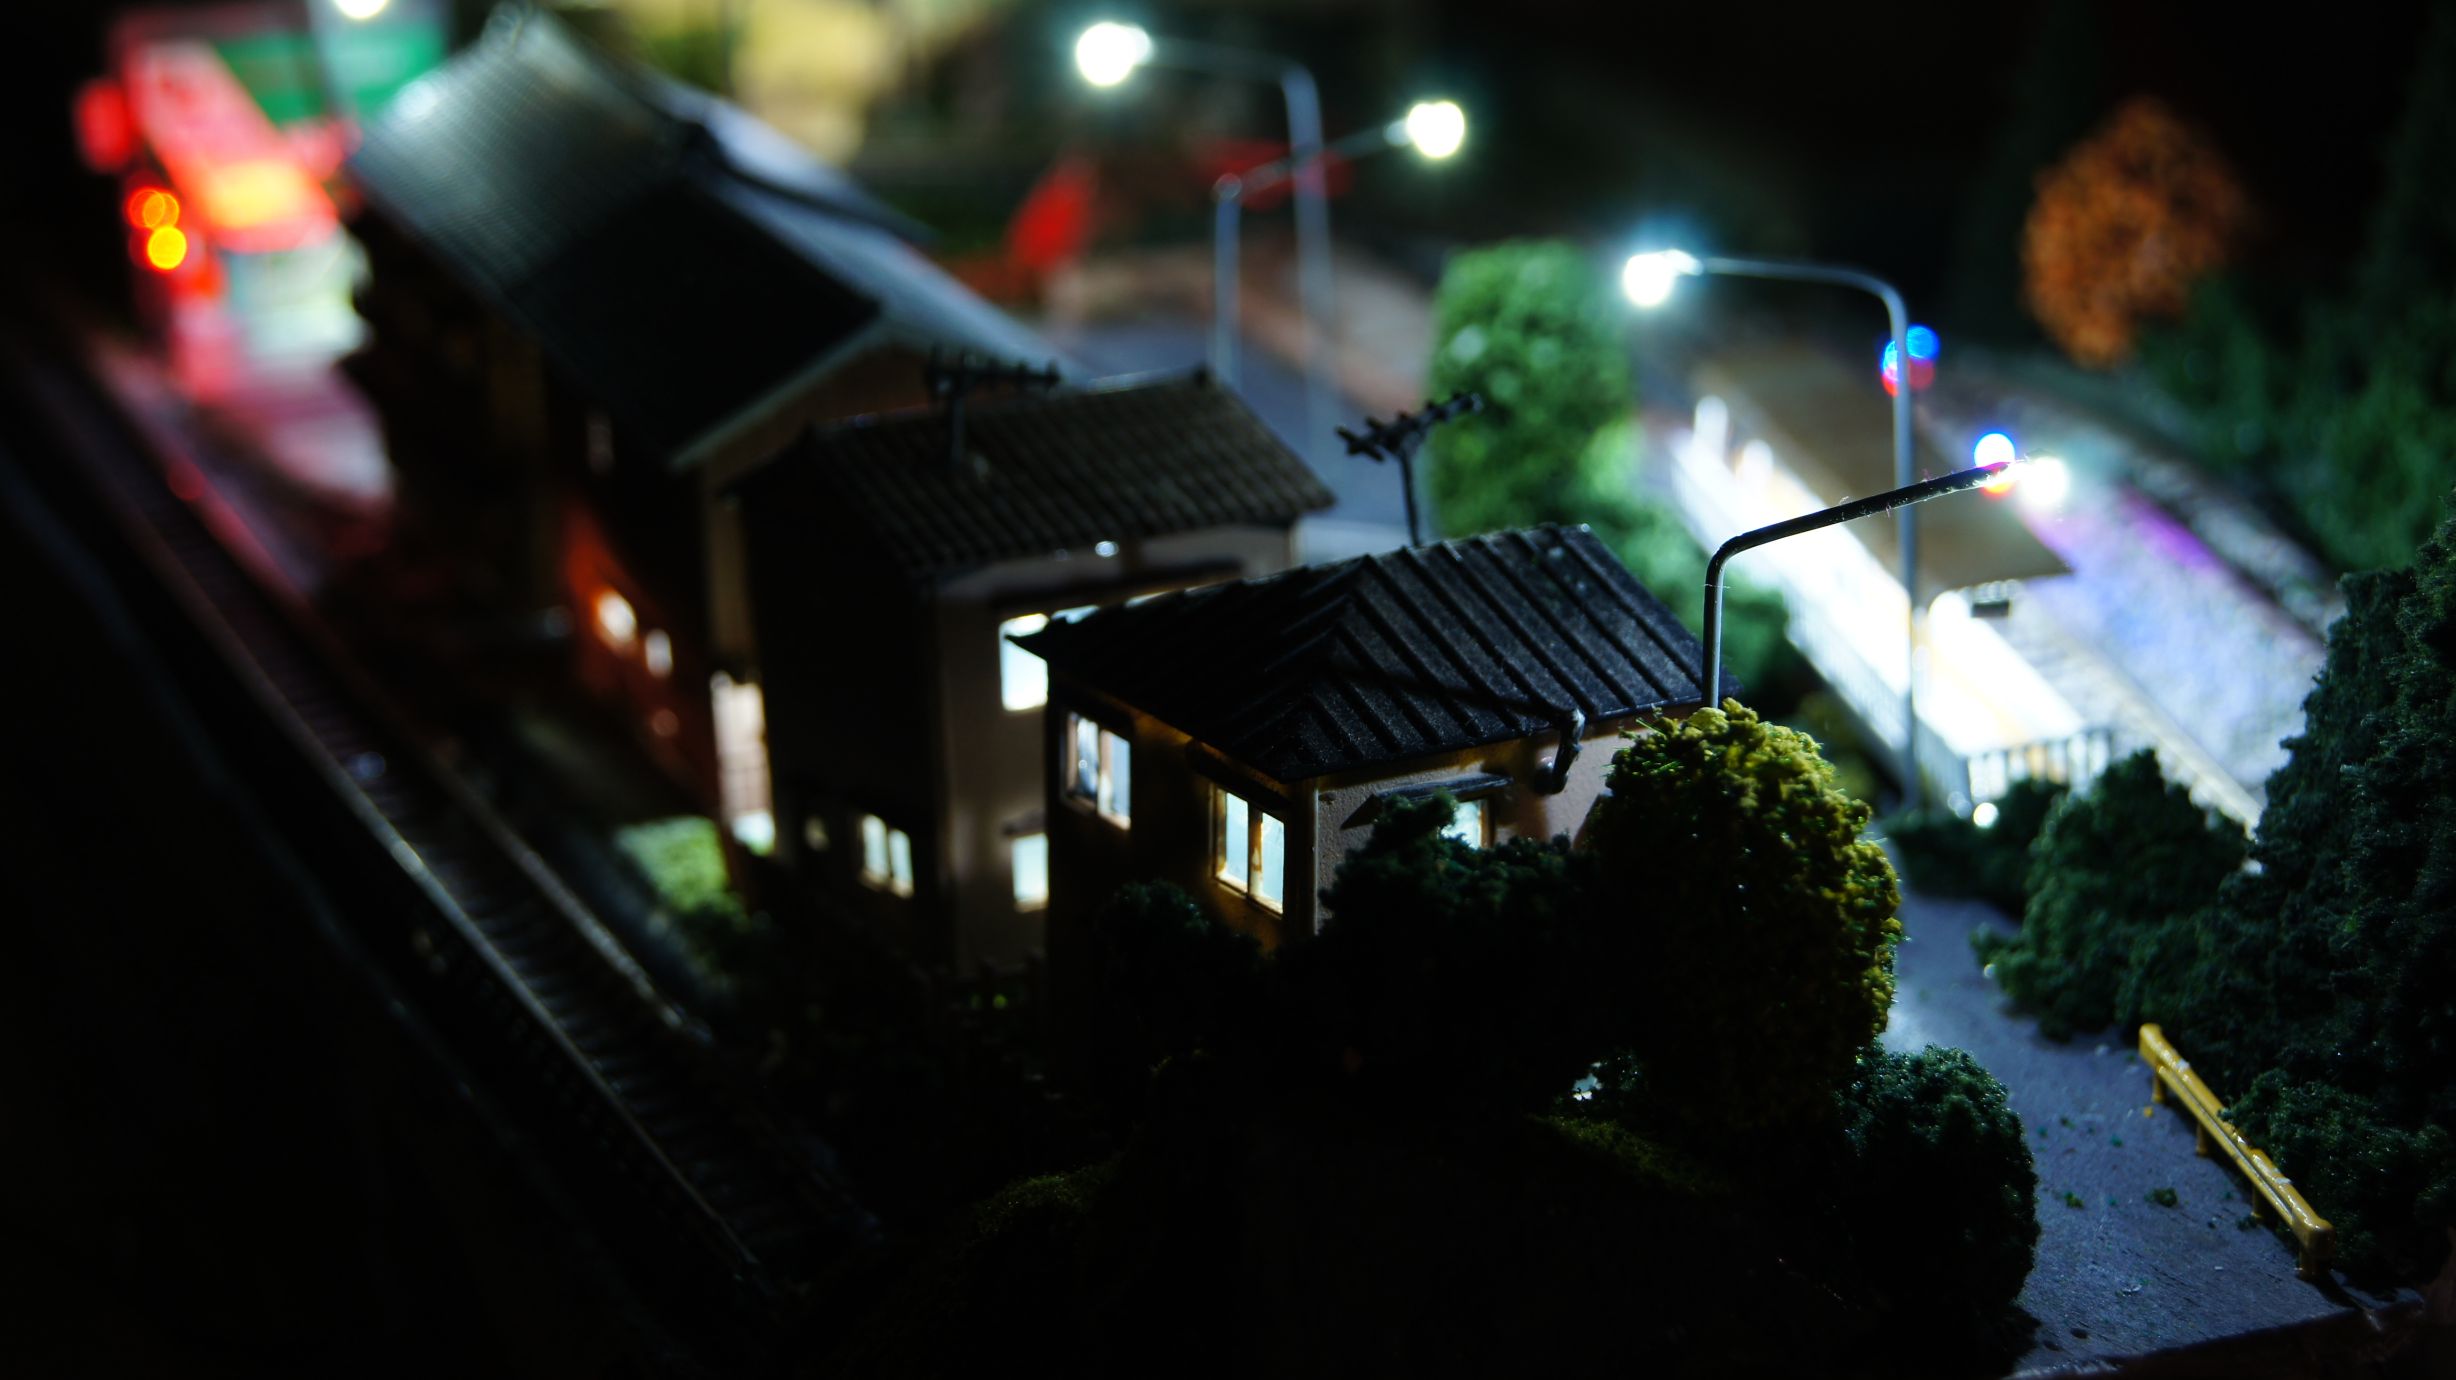
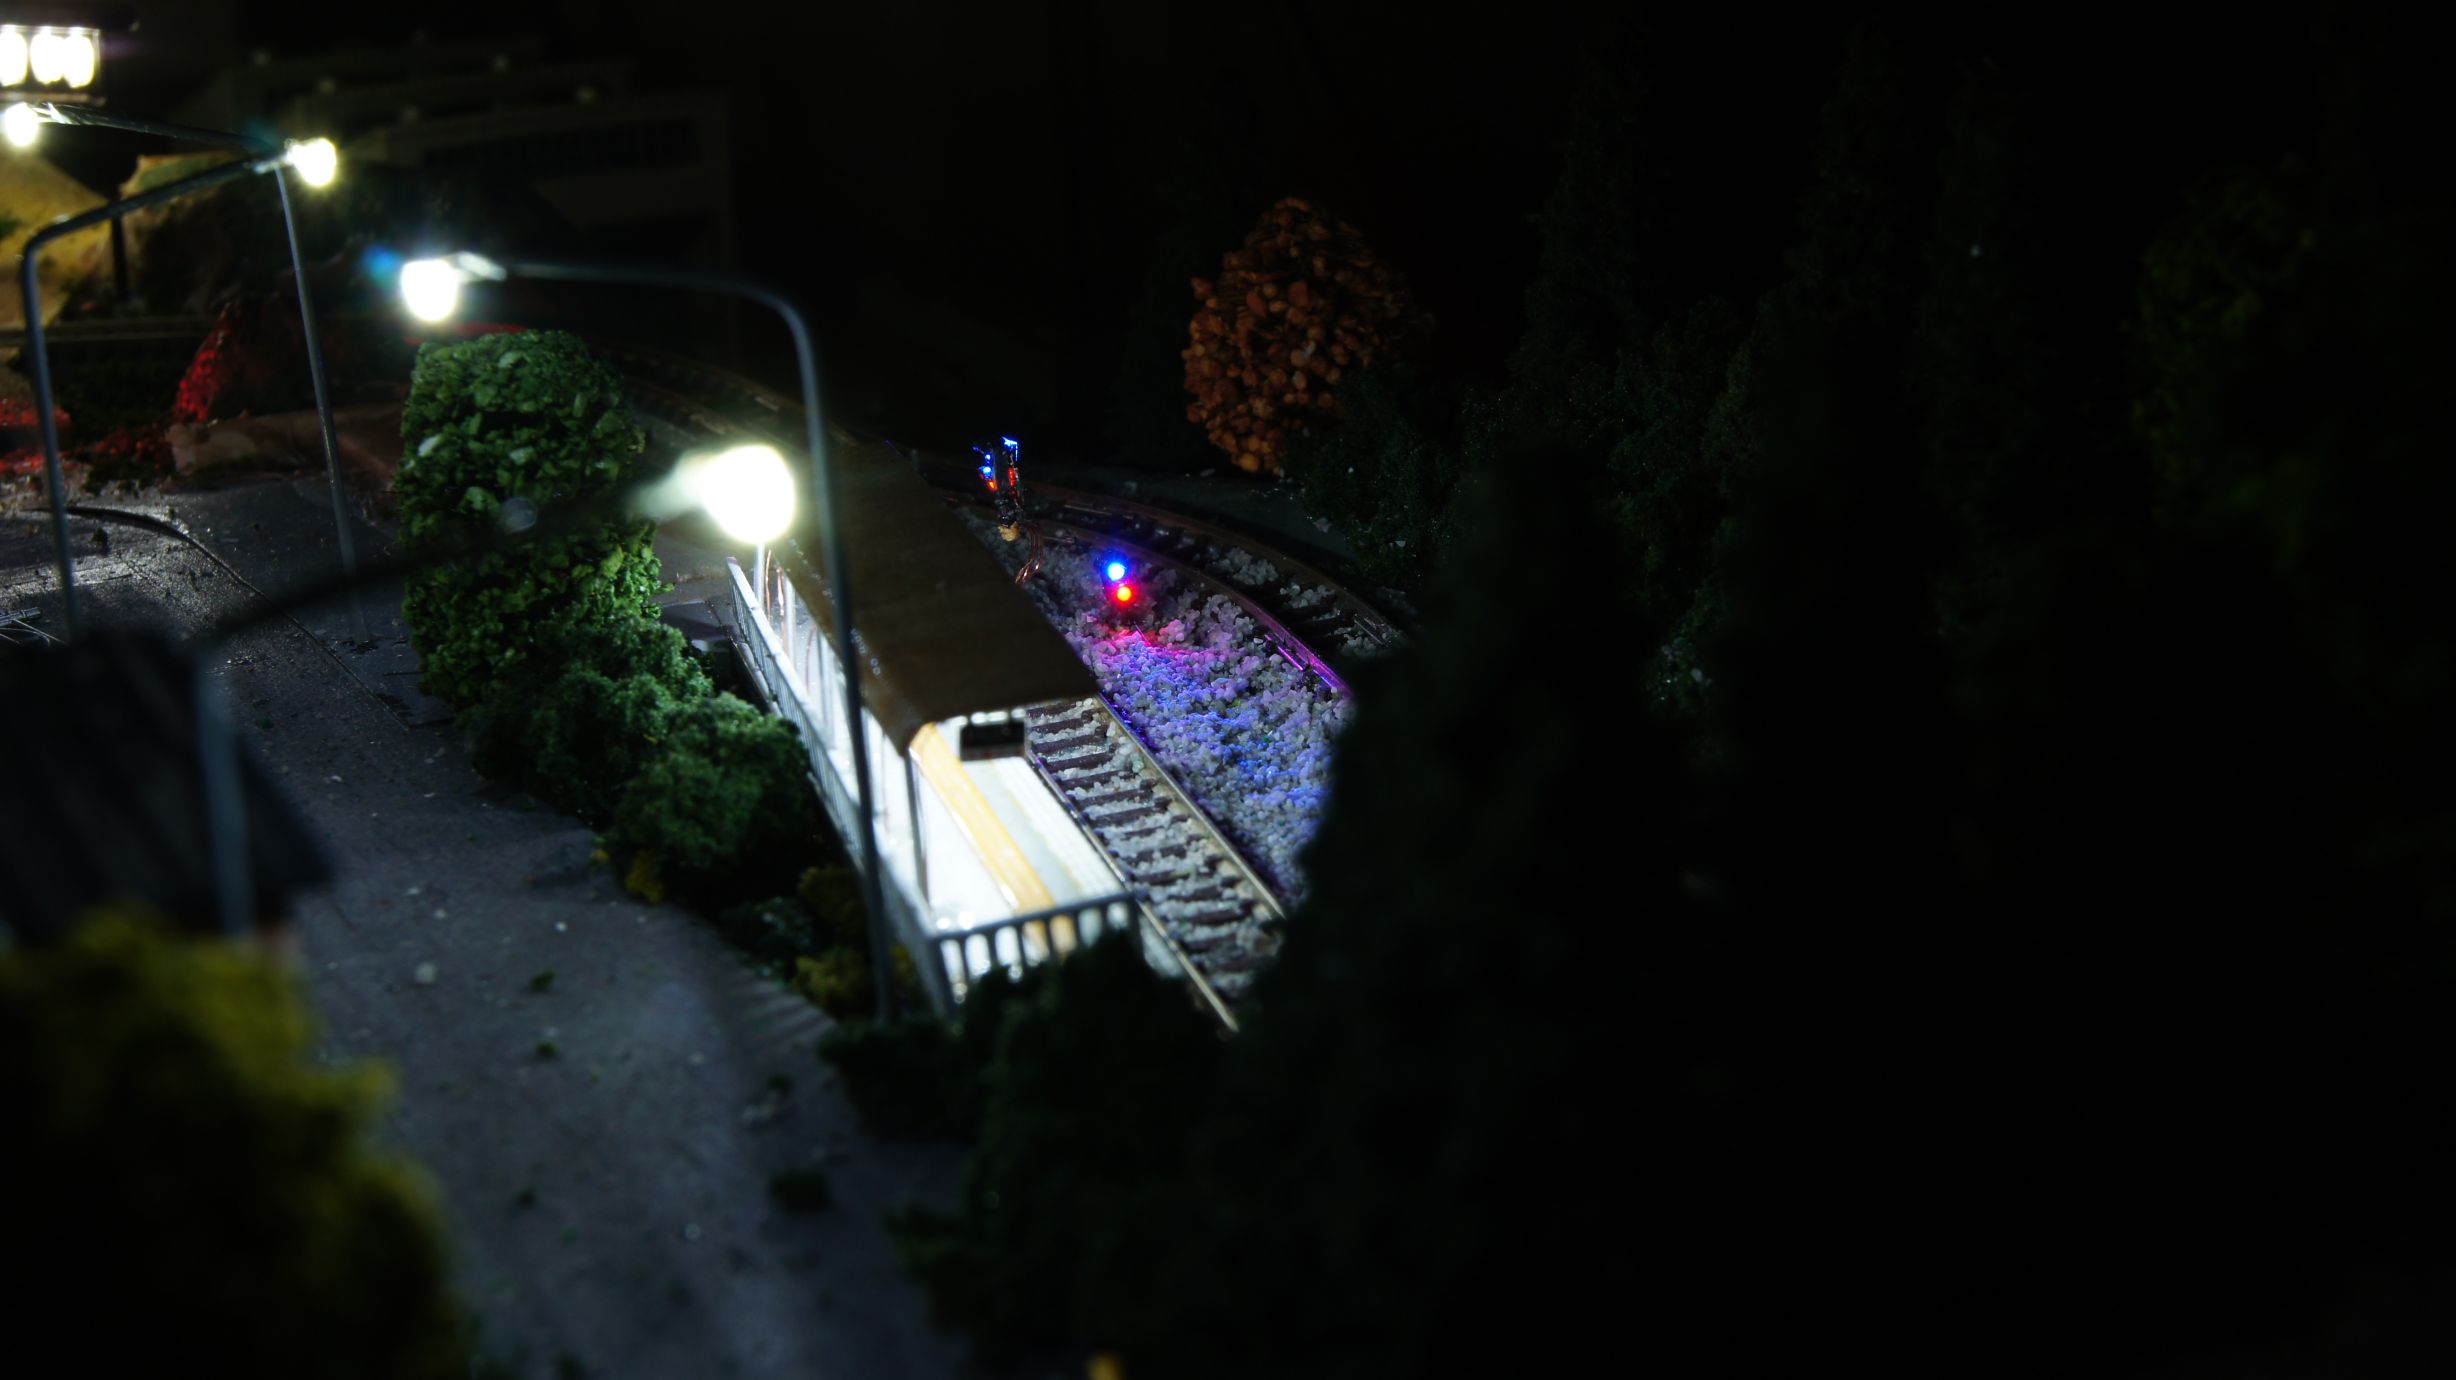
Now to settle the landscape around it.
Creating a Shrine Torii Entrance
After checking out more of the work by tanaka_ace on the Tounosawa Blog, I've decided to add a Japanese Shrine to my layout. I've extended the upper level to allow room for a kit I bought in Japan last September and have created a path back to the main town area.
As with any Shrine in Japan, the grounds are seen as sacred and insulated from the surrounding area; usually by either high walls or thick vegetation with a Torii gate for the entrance. I'll be adding the walls in soon enough, but prior to doing so I wanted to make sure I had all of the buildings and scenery effects in place.
The first thing to create was the Torii gate entrance. Tanaka_ace on his Tounosawa Blog had created a very nice gate with LED lanterns added. This is all based off a real-life location at the Tounosawa Station on the Hakone Tozan Railway. He had also created a blog post showing what he based the model off.
My version
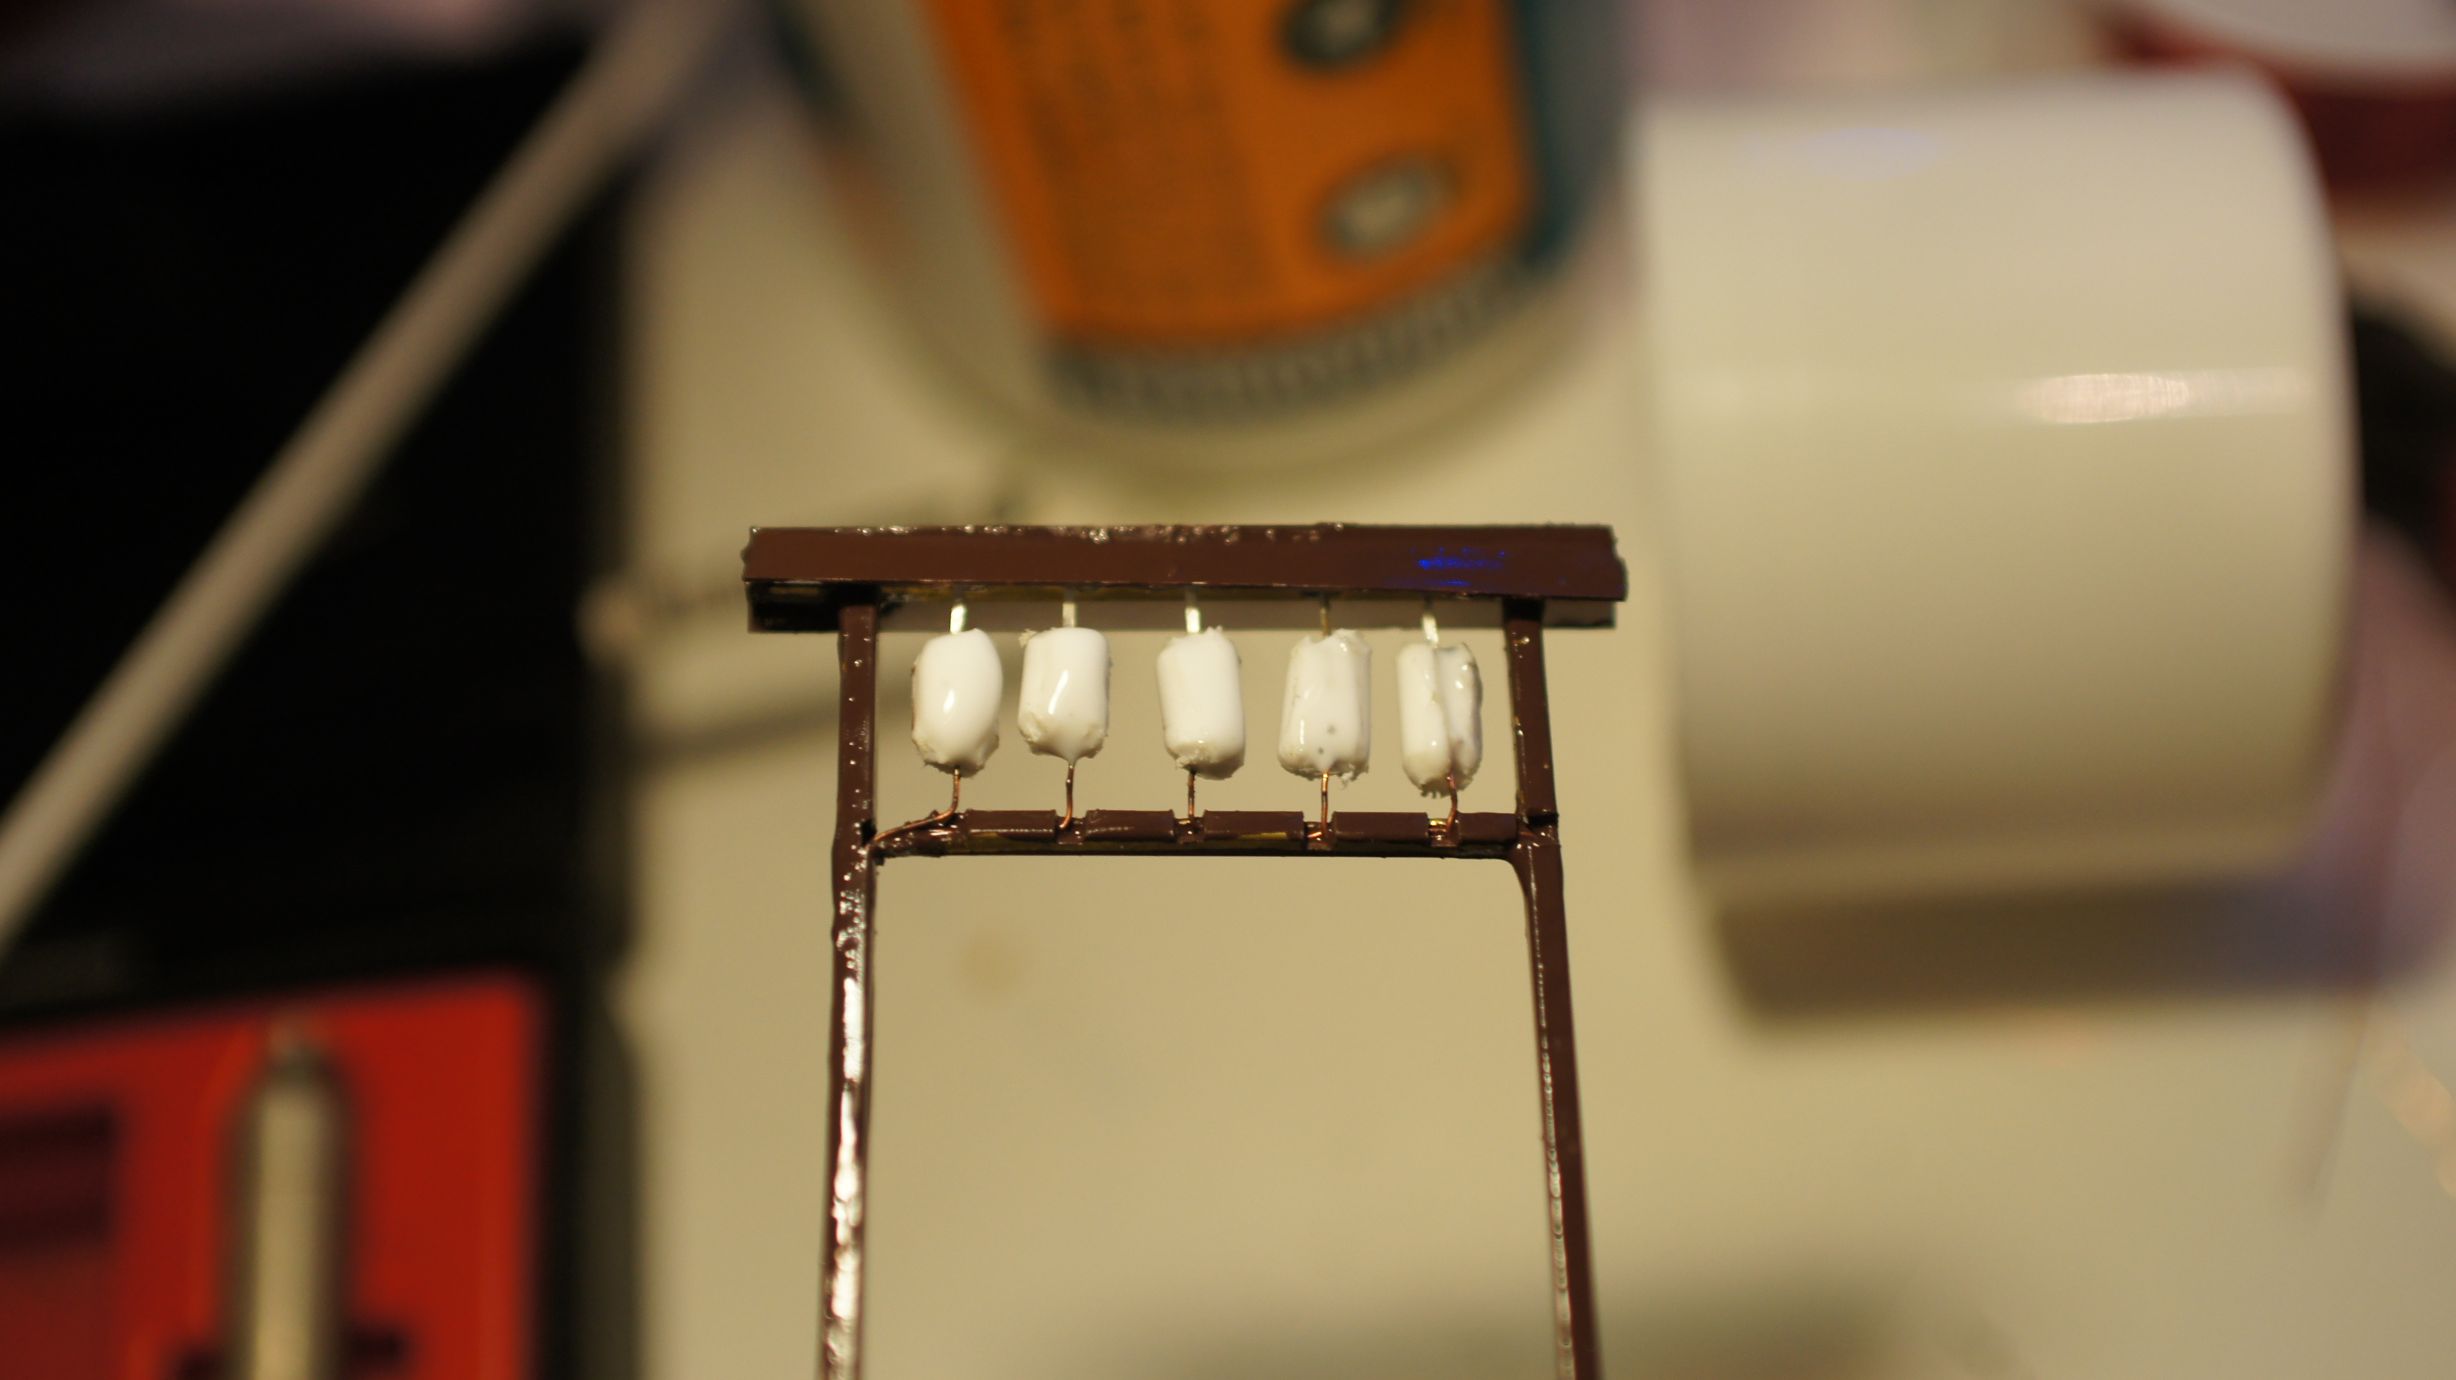
I've used the same gauge winding wire I'd used for my level crossing lights, streetlights and building lighting. With this I've also used 1/16" brass pole for the main frame of the gate because I wanted to emulate wood rather than a cylindrical concrete post this time. This also provided a little more room to squeeze the wires through. Each length needed to be cut down to size and then filed back. I used standard snips to cut the brass, a smaller saw would've been a better idea.


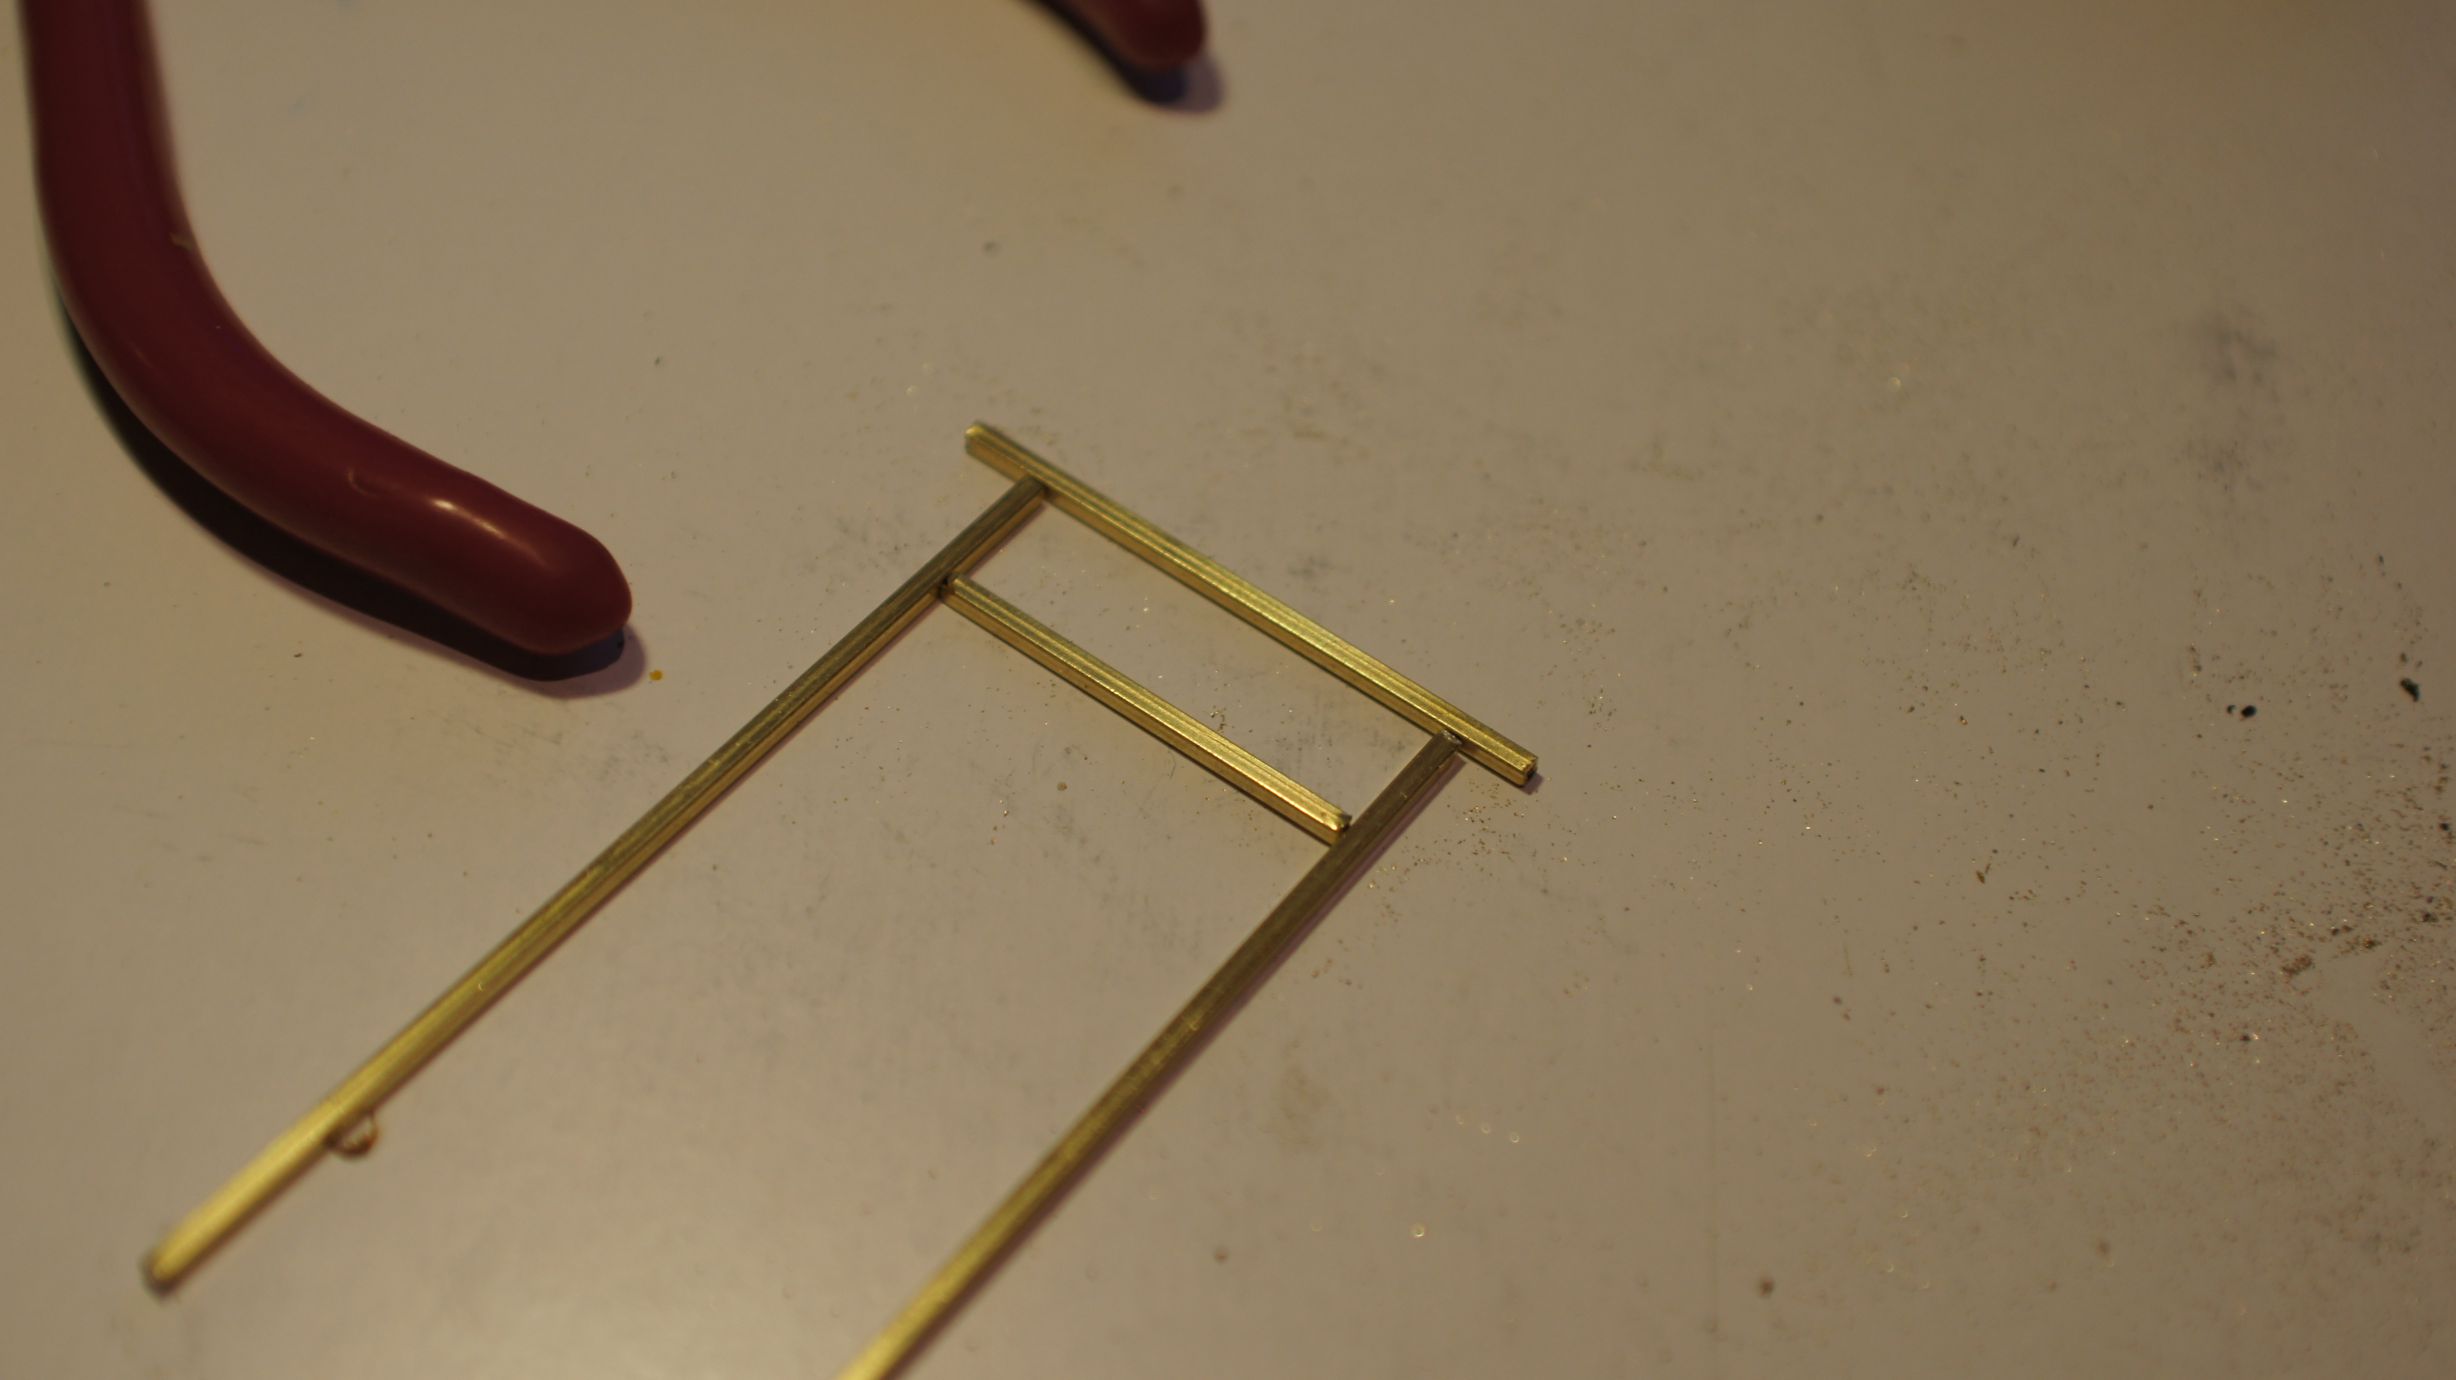
I based the size on the path that I had already created on the layout. I didn't really have a real-life prototype to work off and made a lot of it up as I went. The final size was around 50mm wide and I could fit 5 lanterns in. Below you can see the framing taking place.
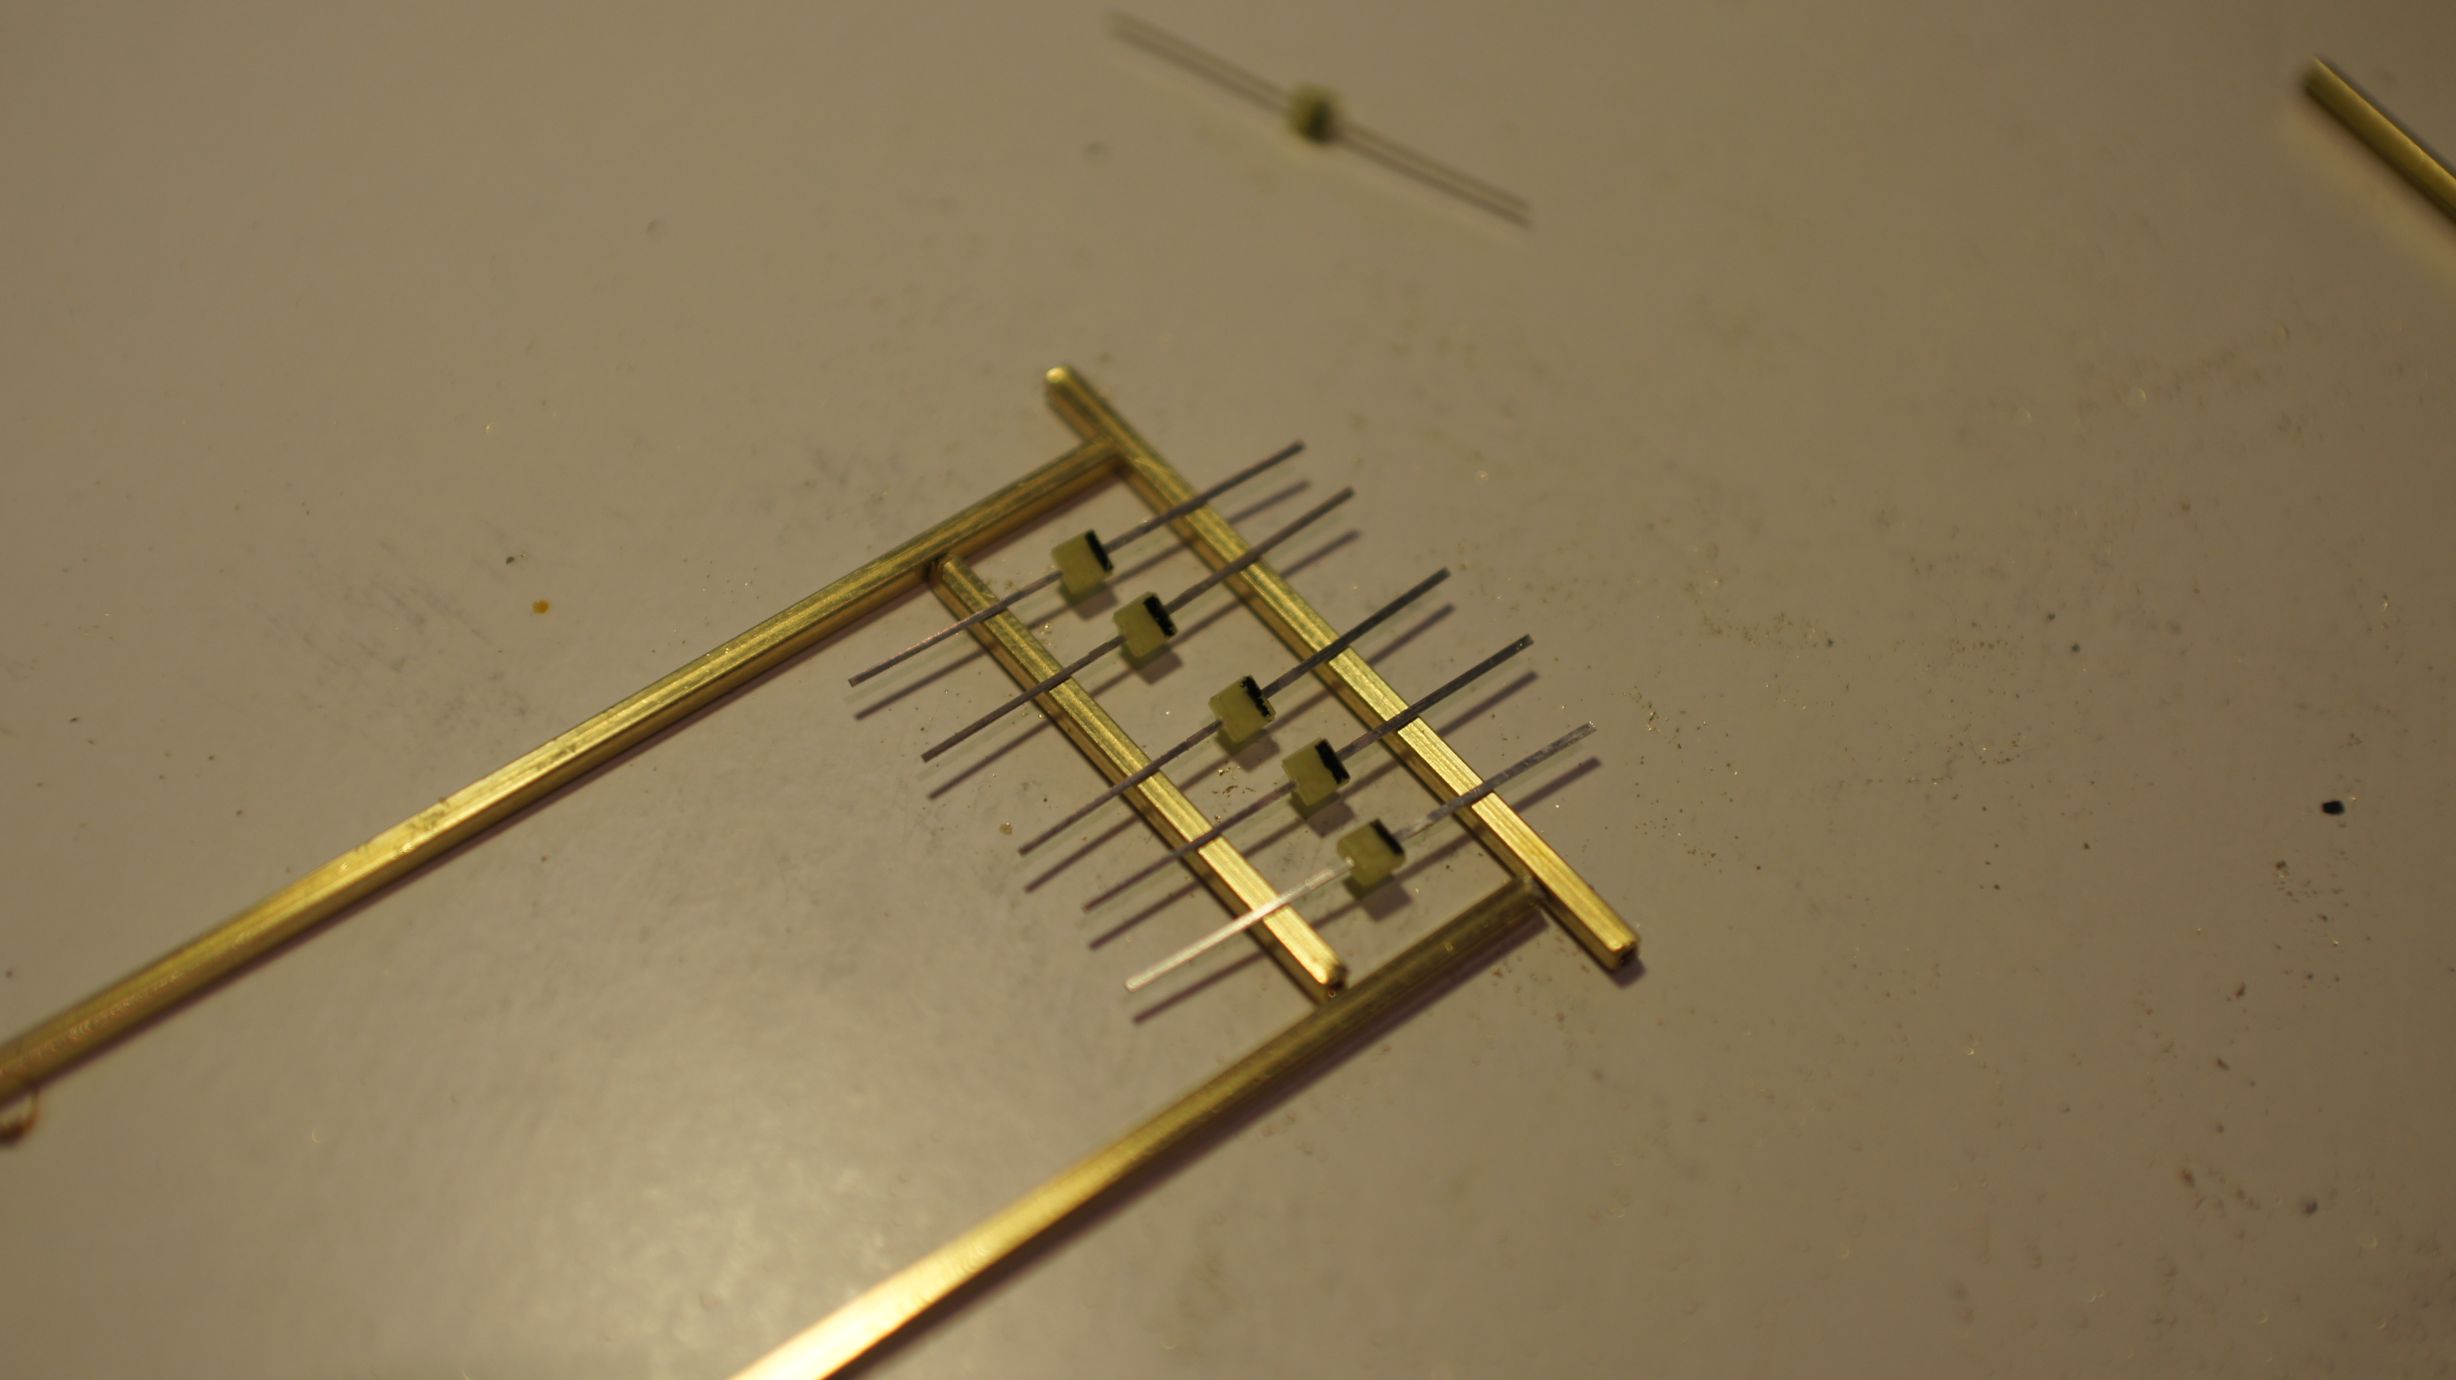

I then started cutting out the holes to feed the wire through. I used my trusty pocket-knife as the brass was quite soft. I also used a wire cut off a resistor to clean out the tubes of any metal shavings. The entrances created for the wires would have sharp edges and could scrape off the insulation on the wires, so I made the holes as big as possible.
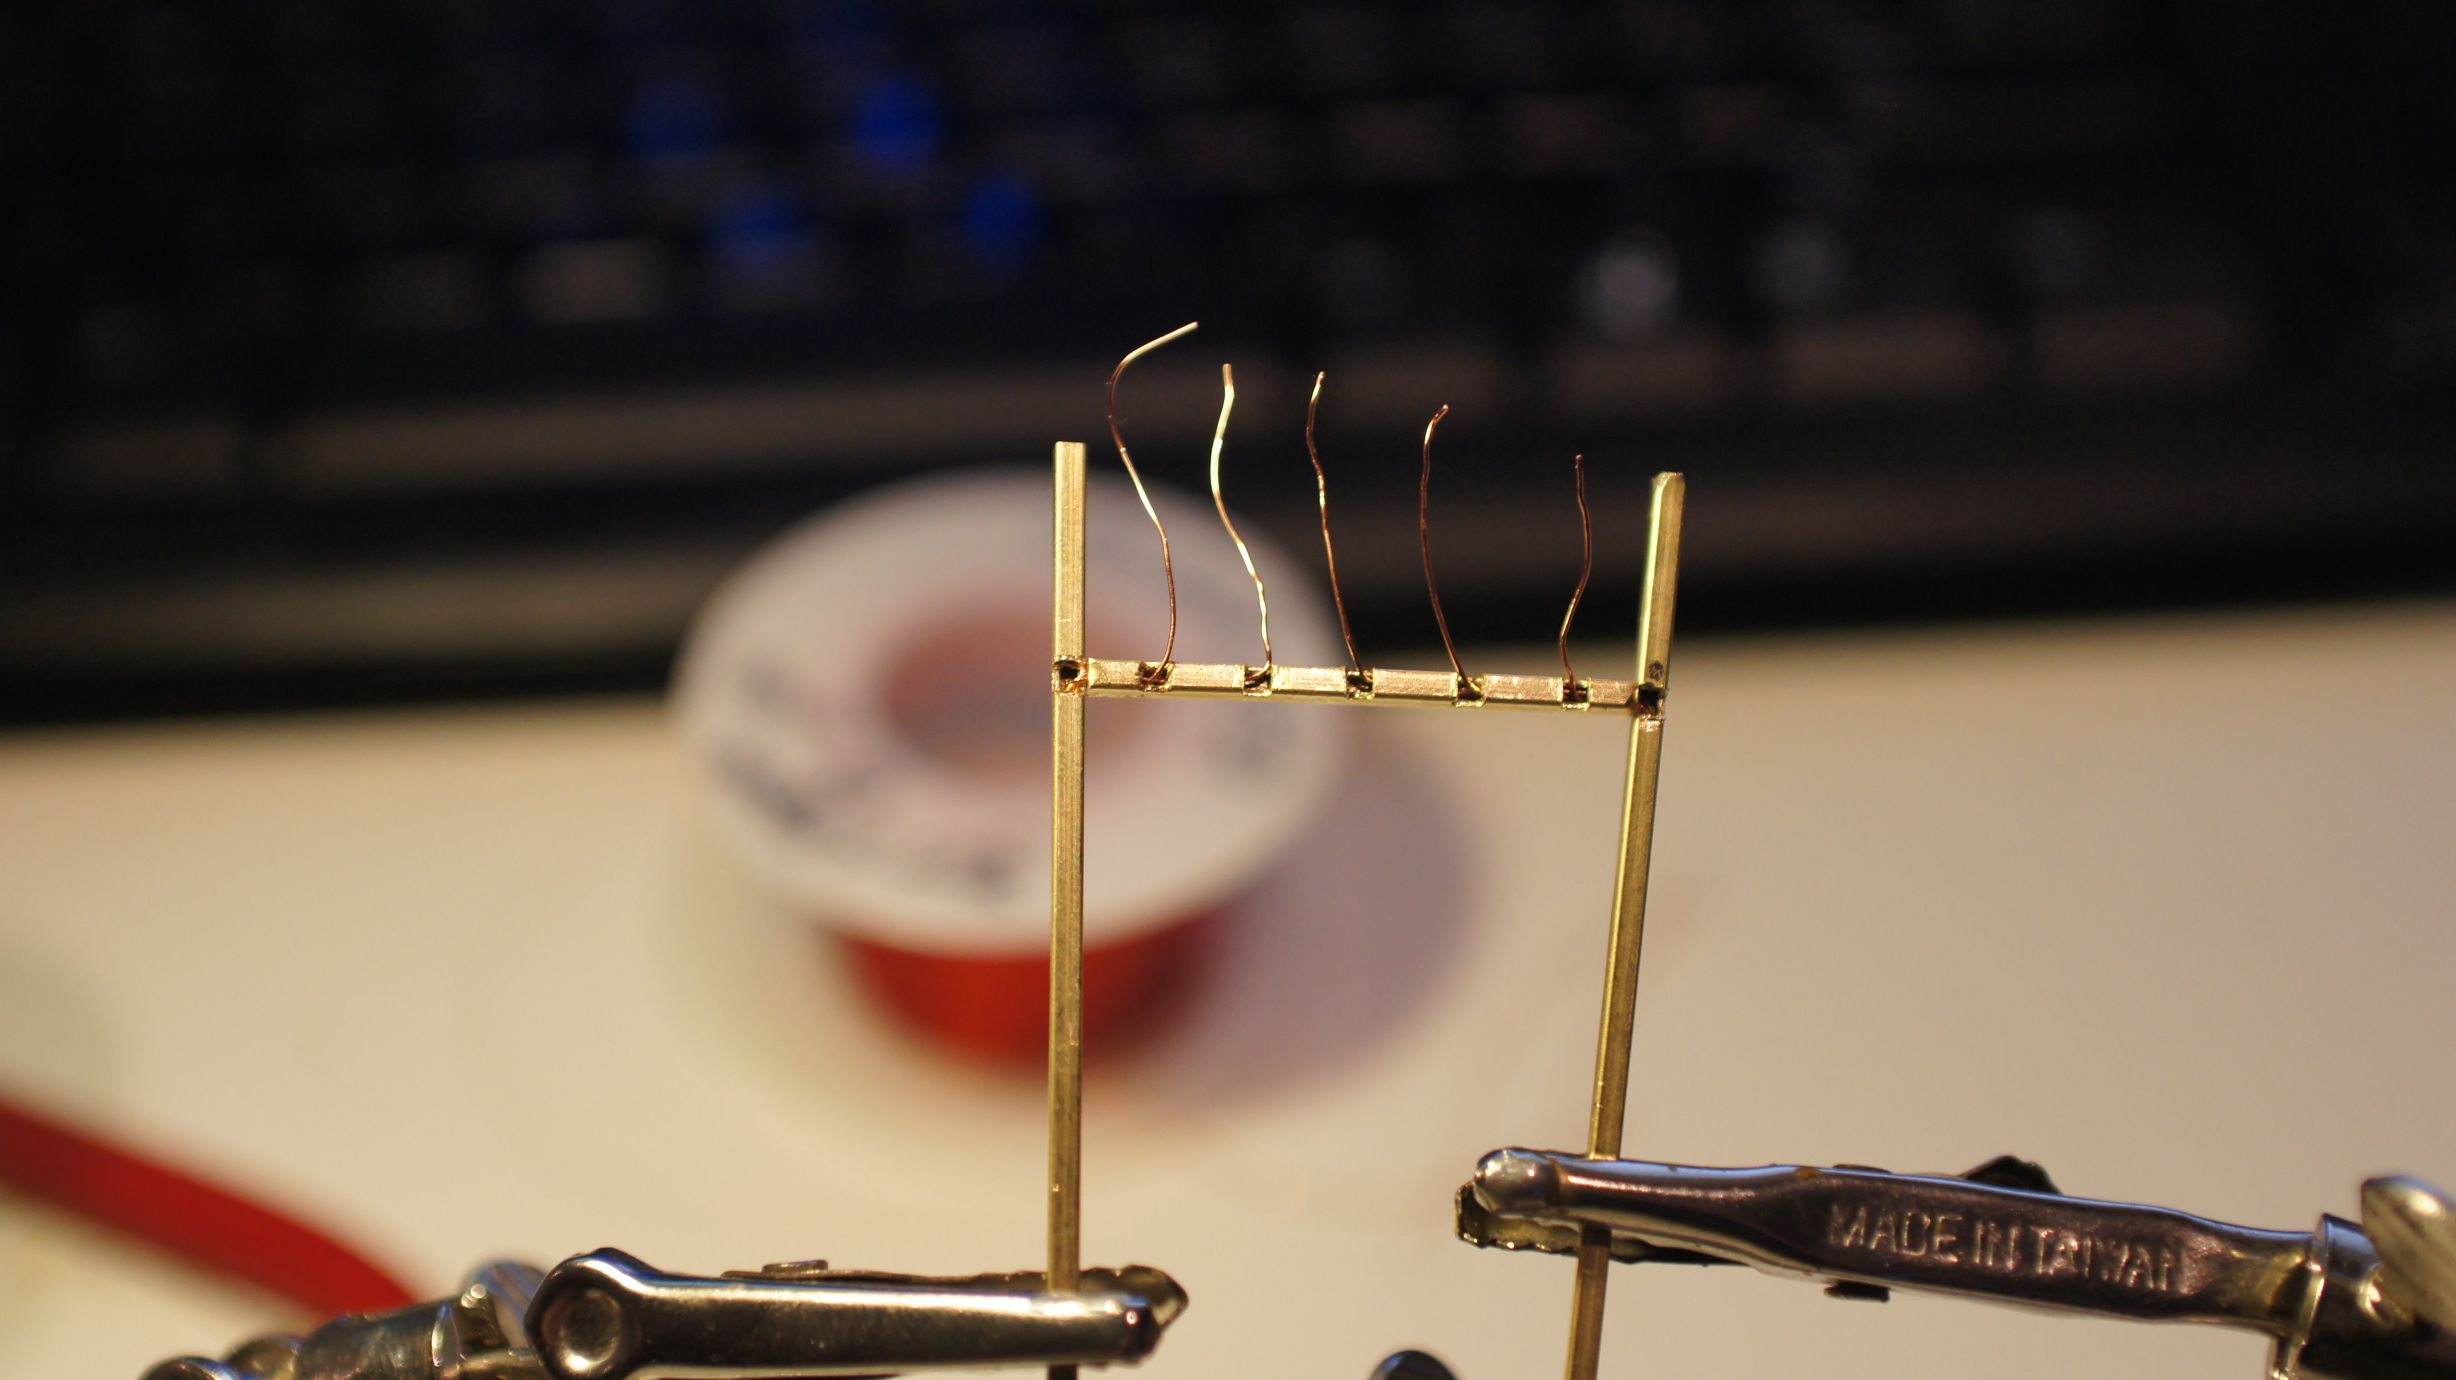
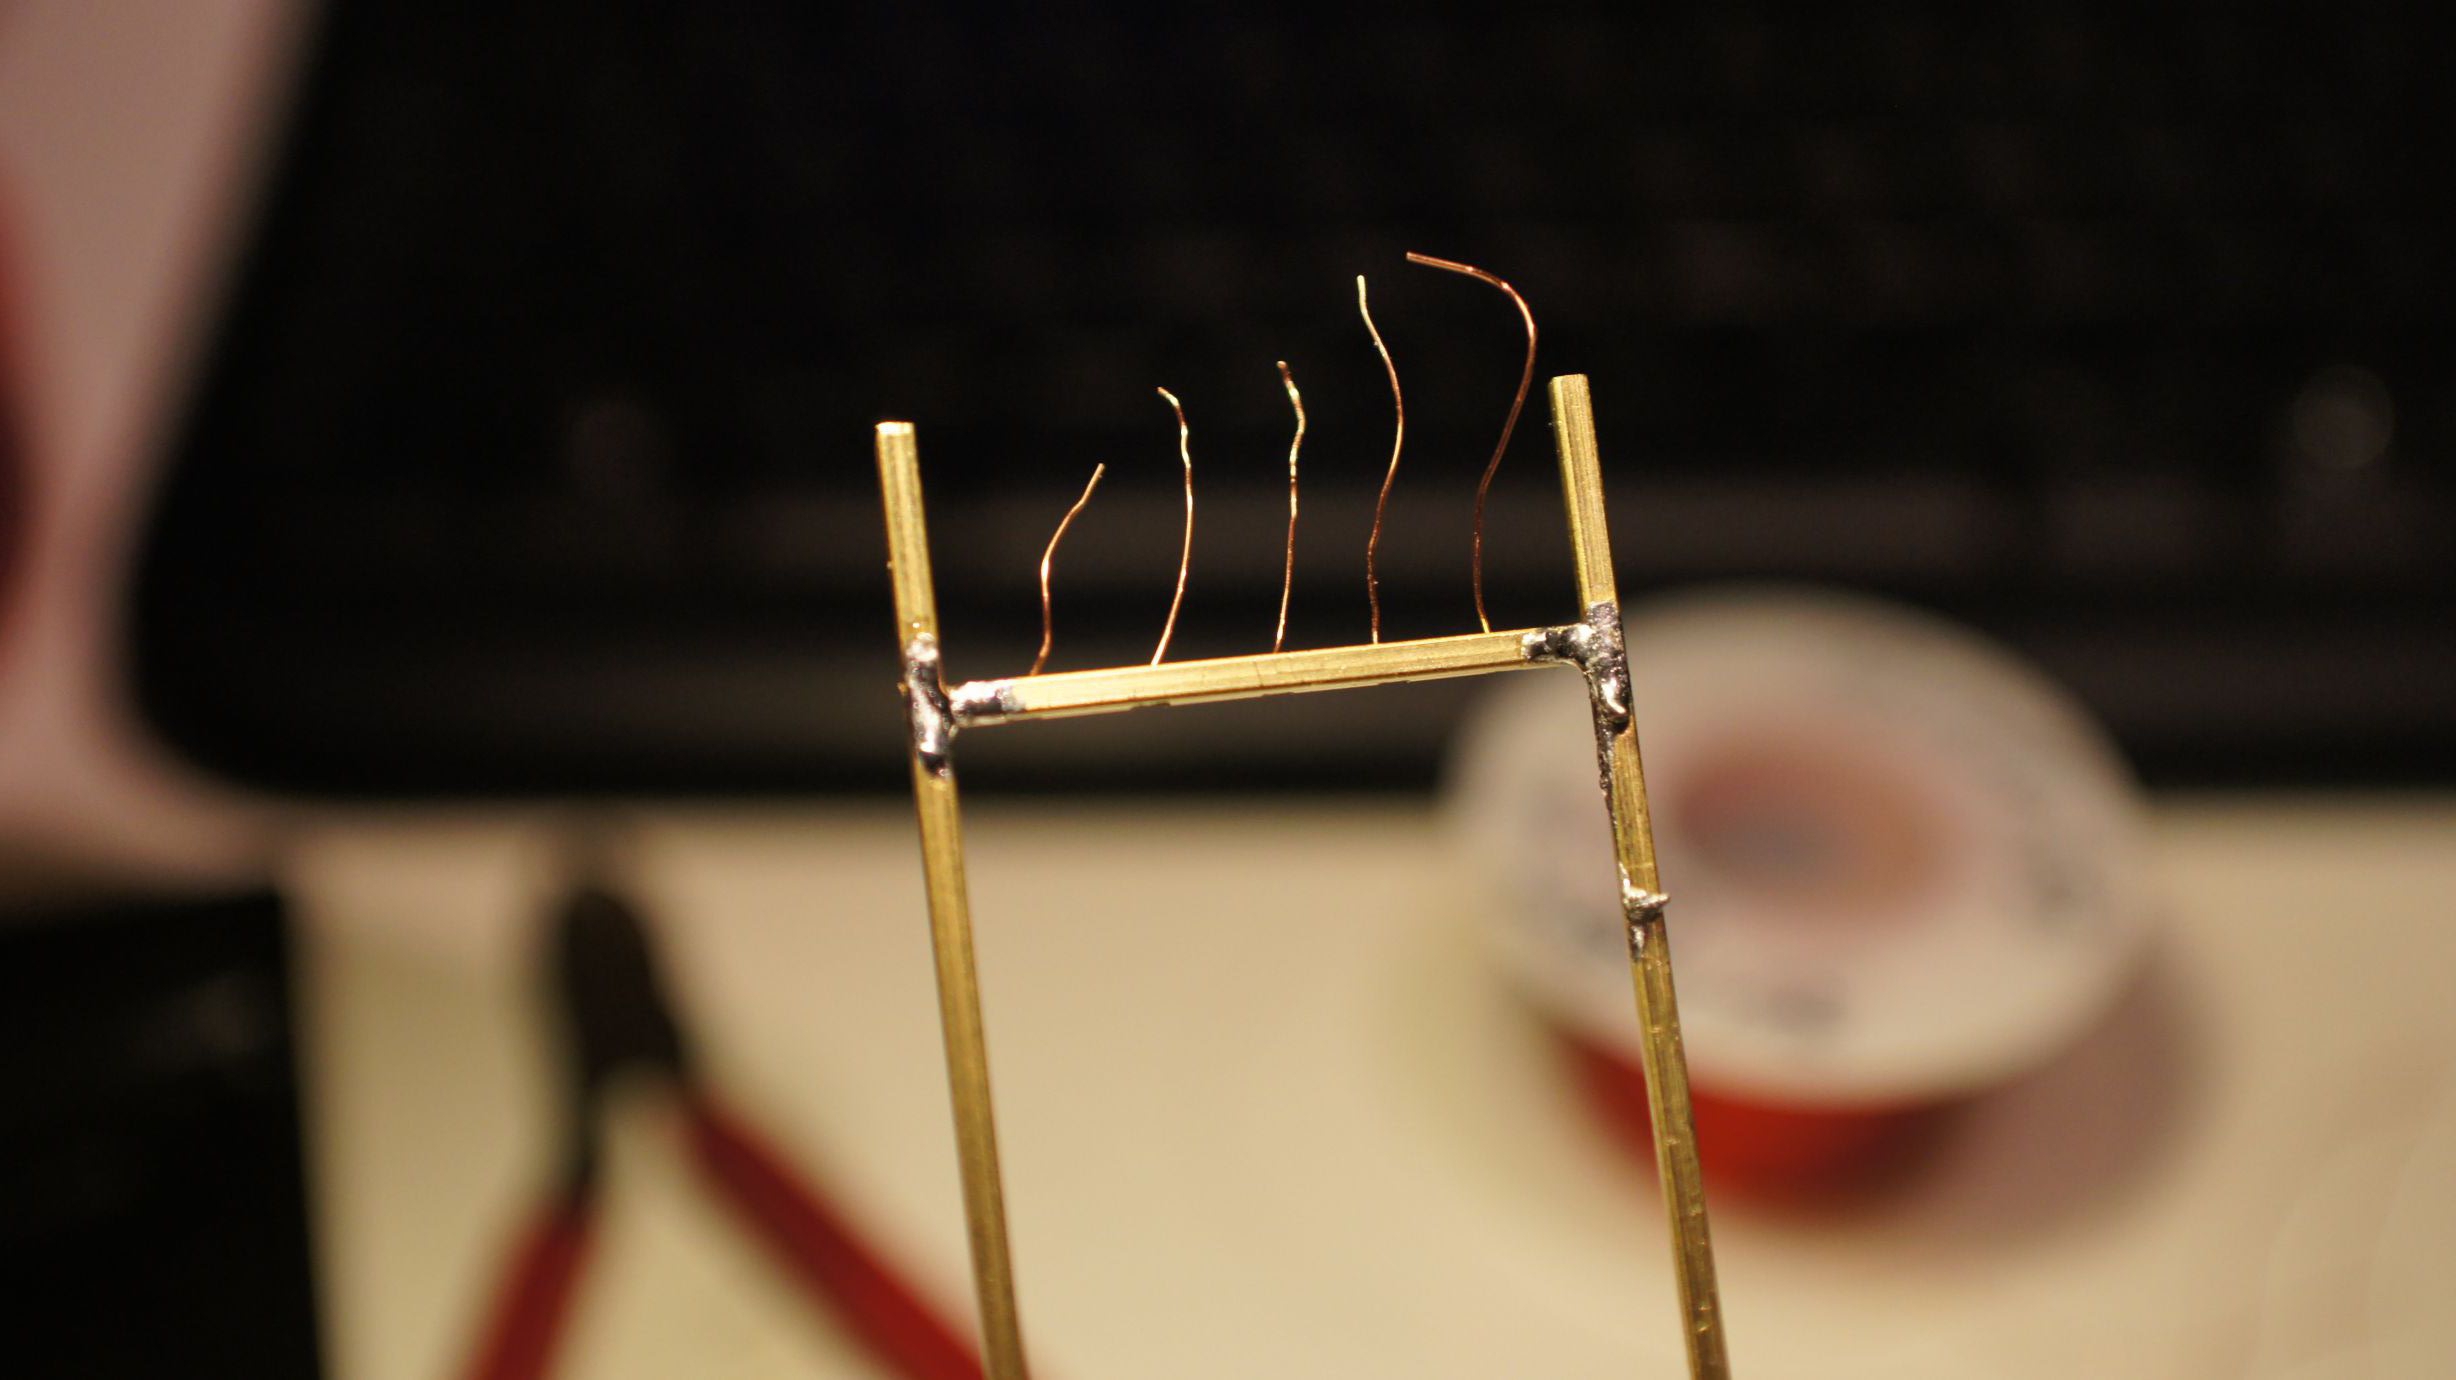
Once the holes were cut, I fed the wires through as a test. I then constructed the frame with solder. At this point I accidently overheated the wires on the left side. This caused one to ground and I then couldn't successfully light 1 of the 5 LEDs. I took more care the second time around when soldering the frame back together.

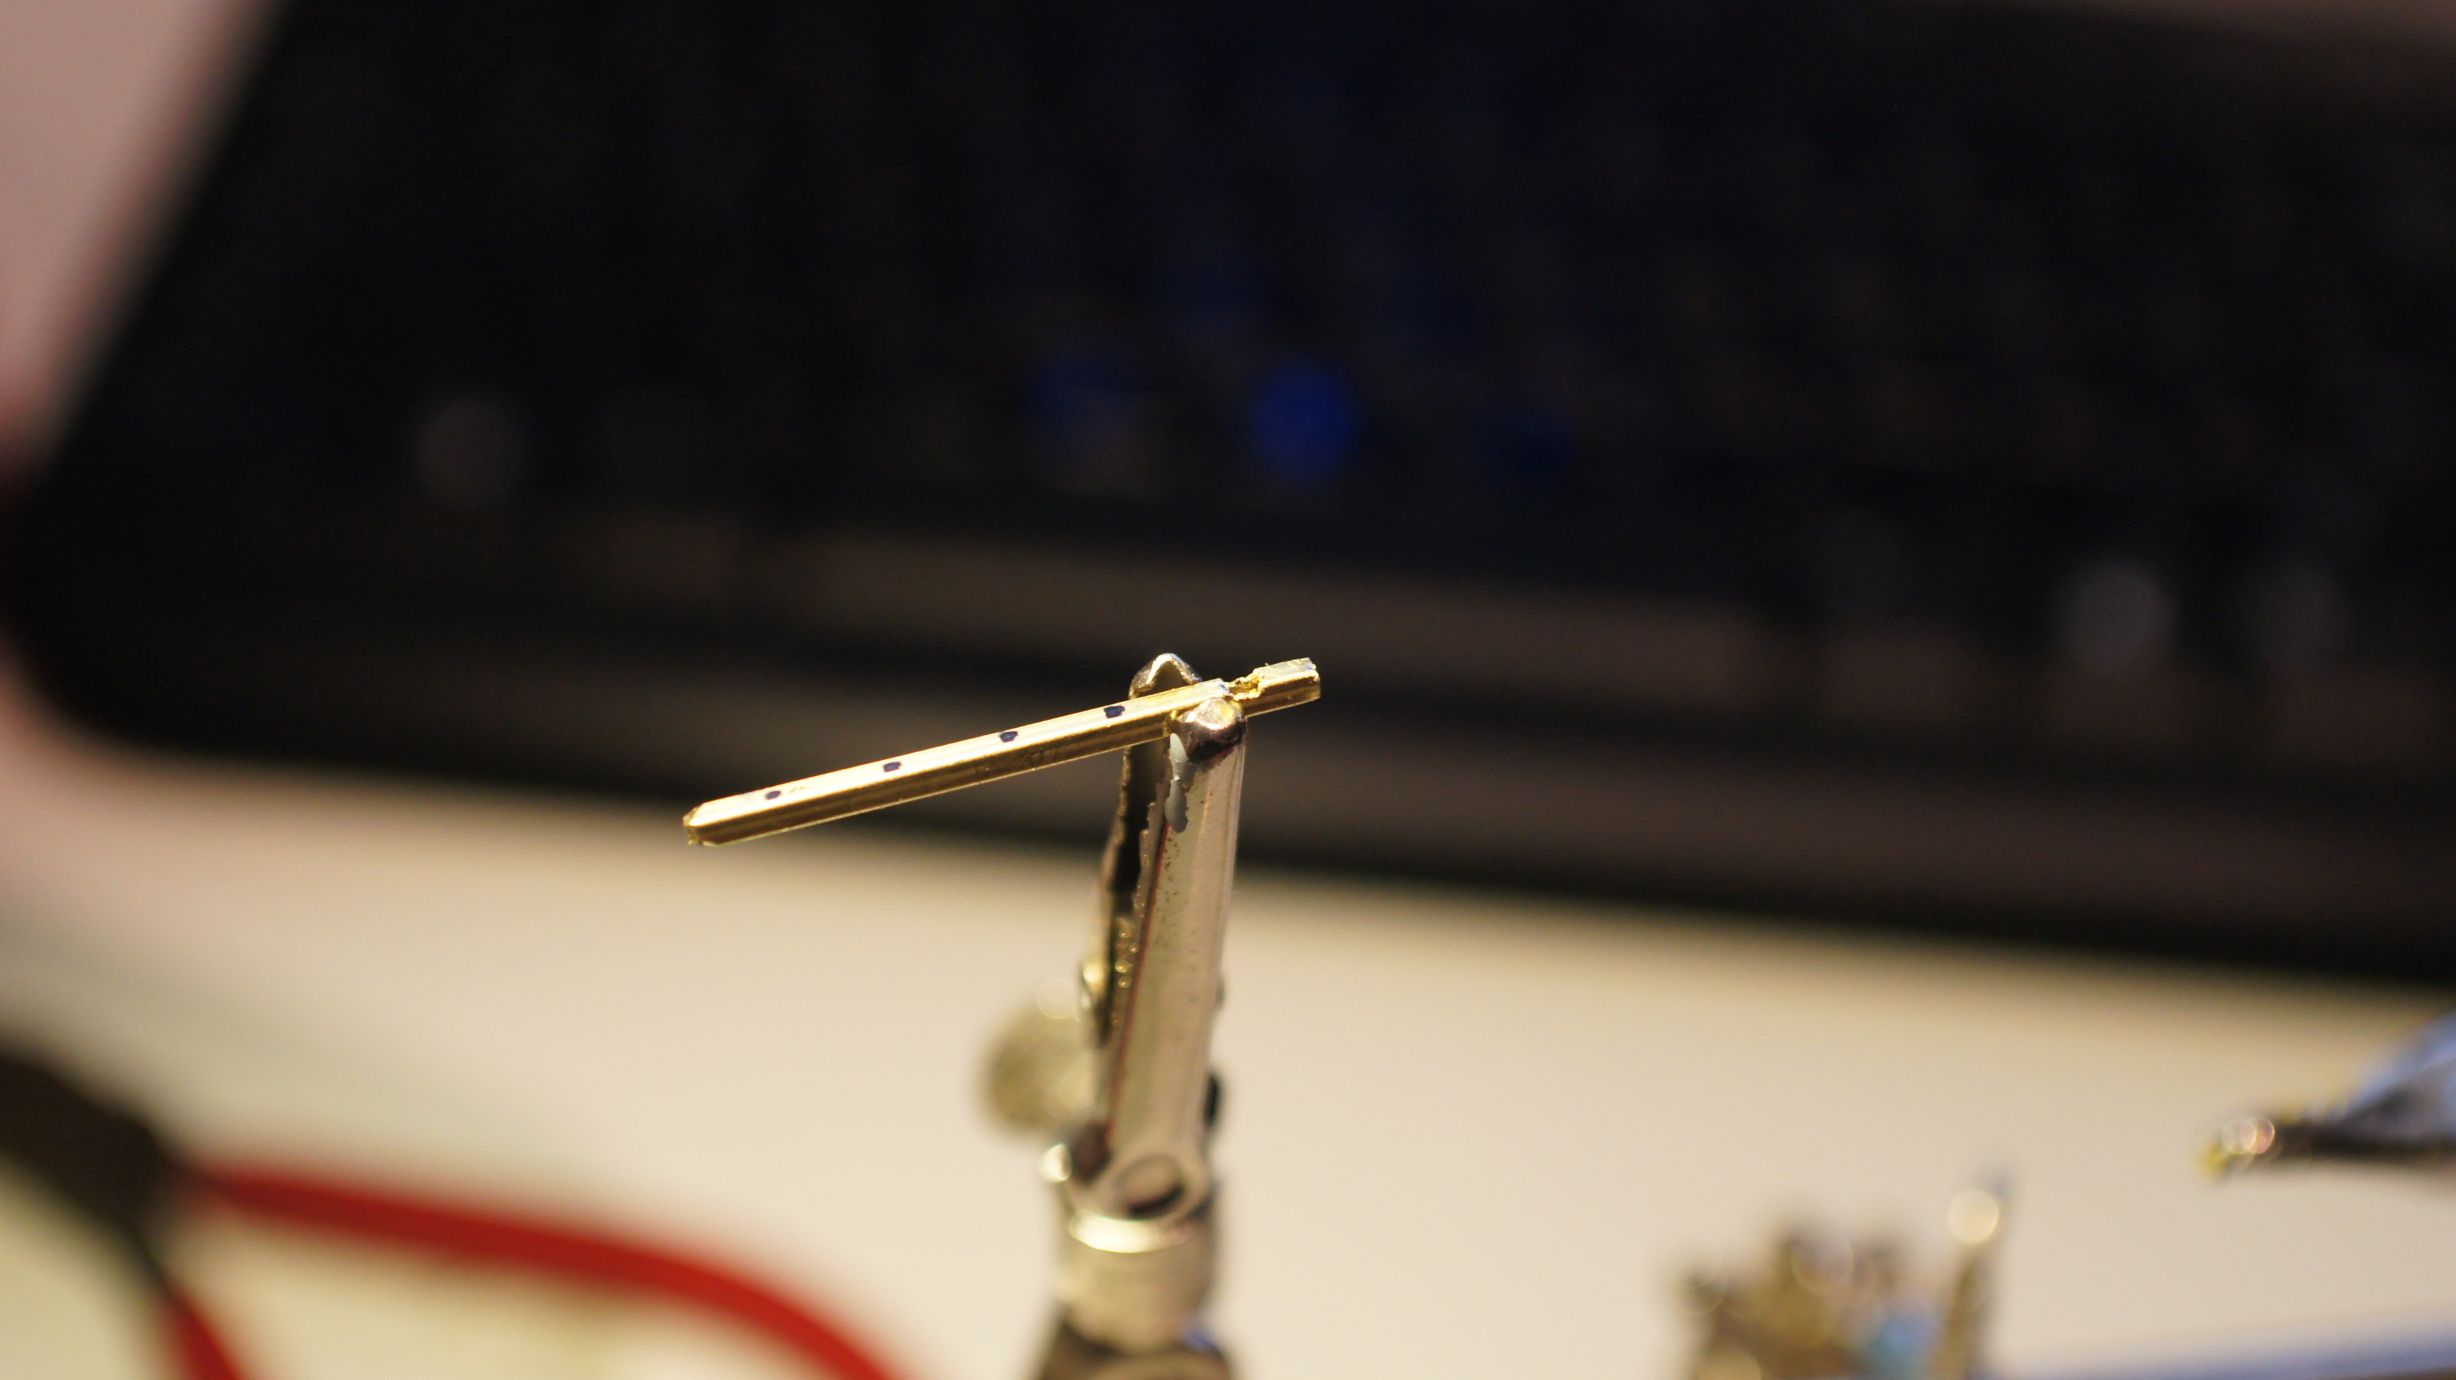
I added a quick roof to the frame as tanaka_ace had done with his second version.
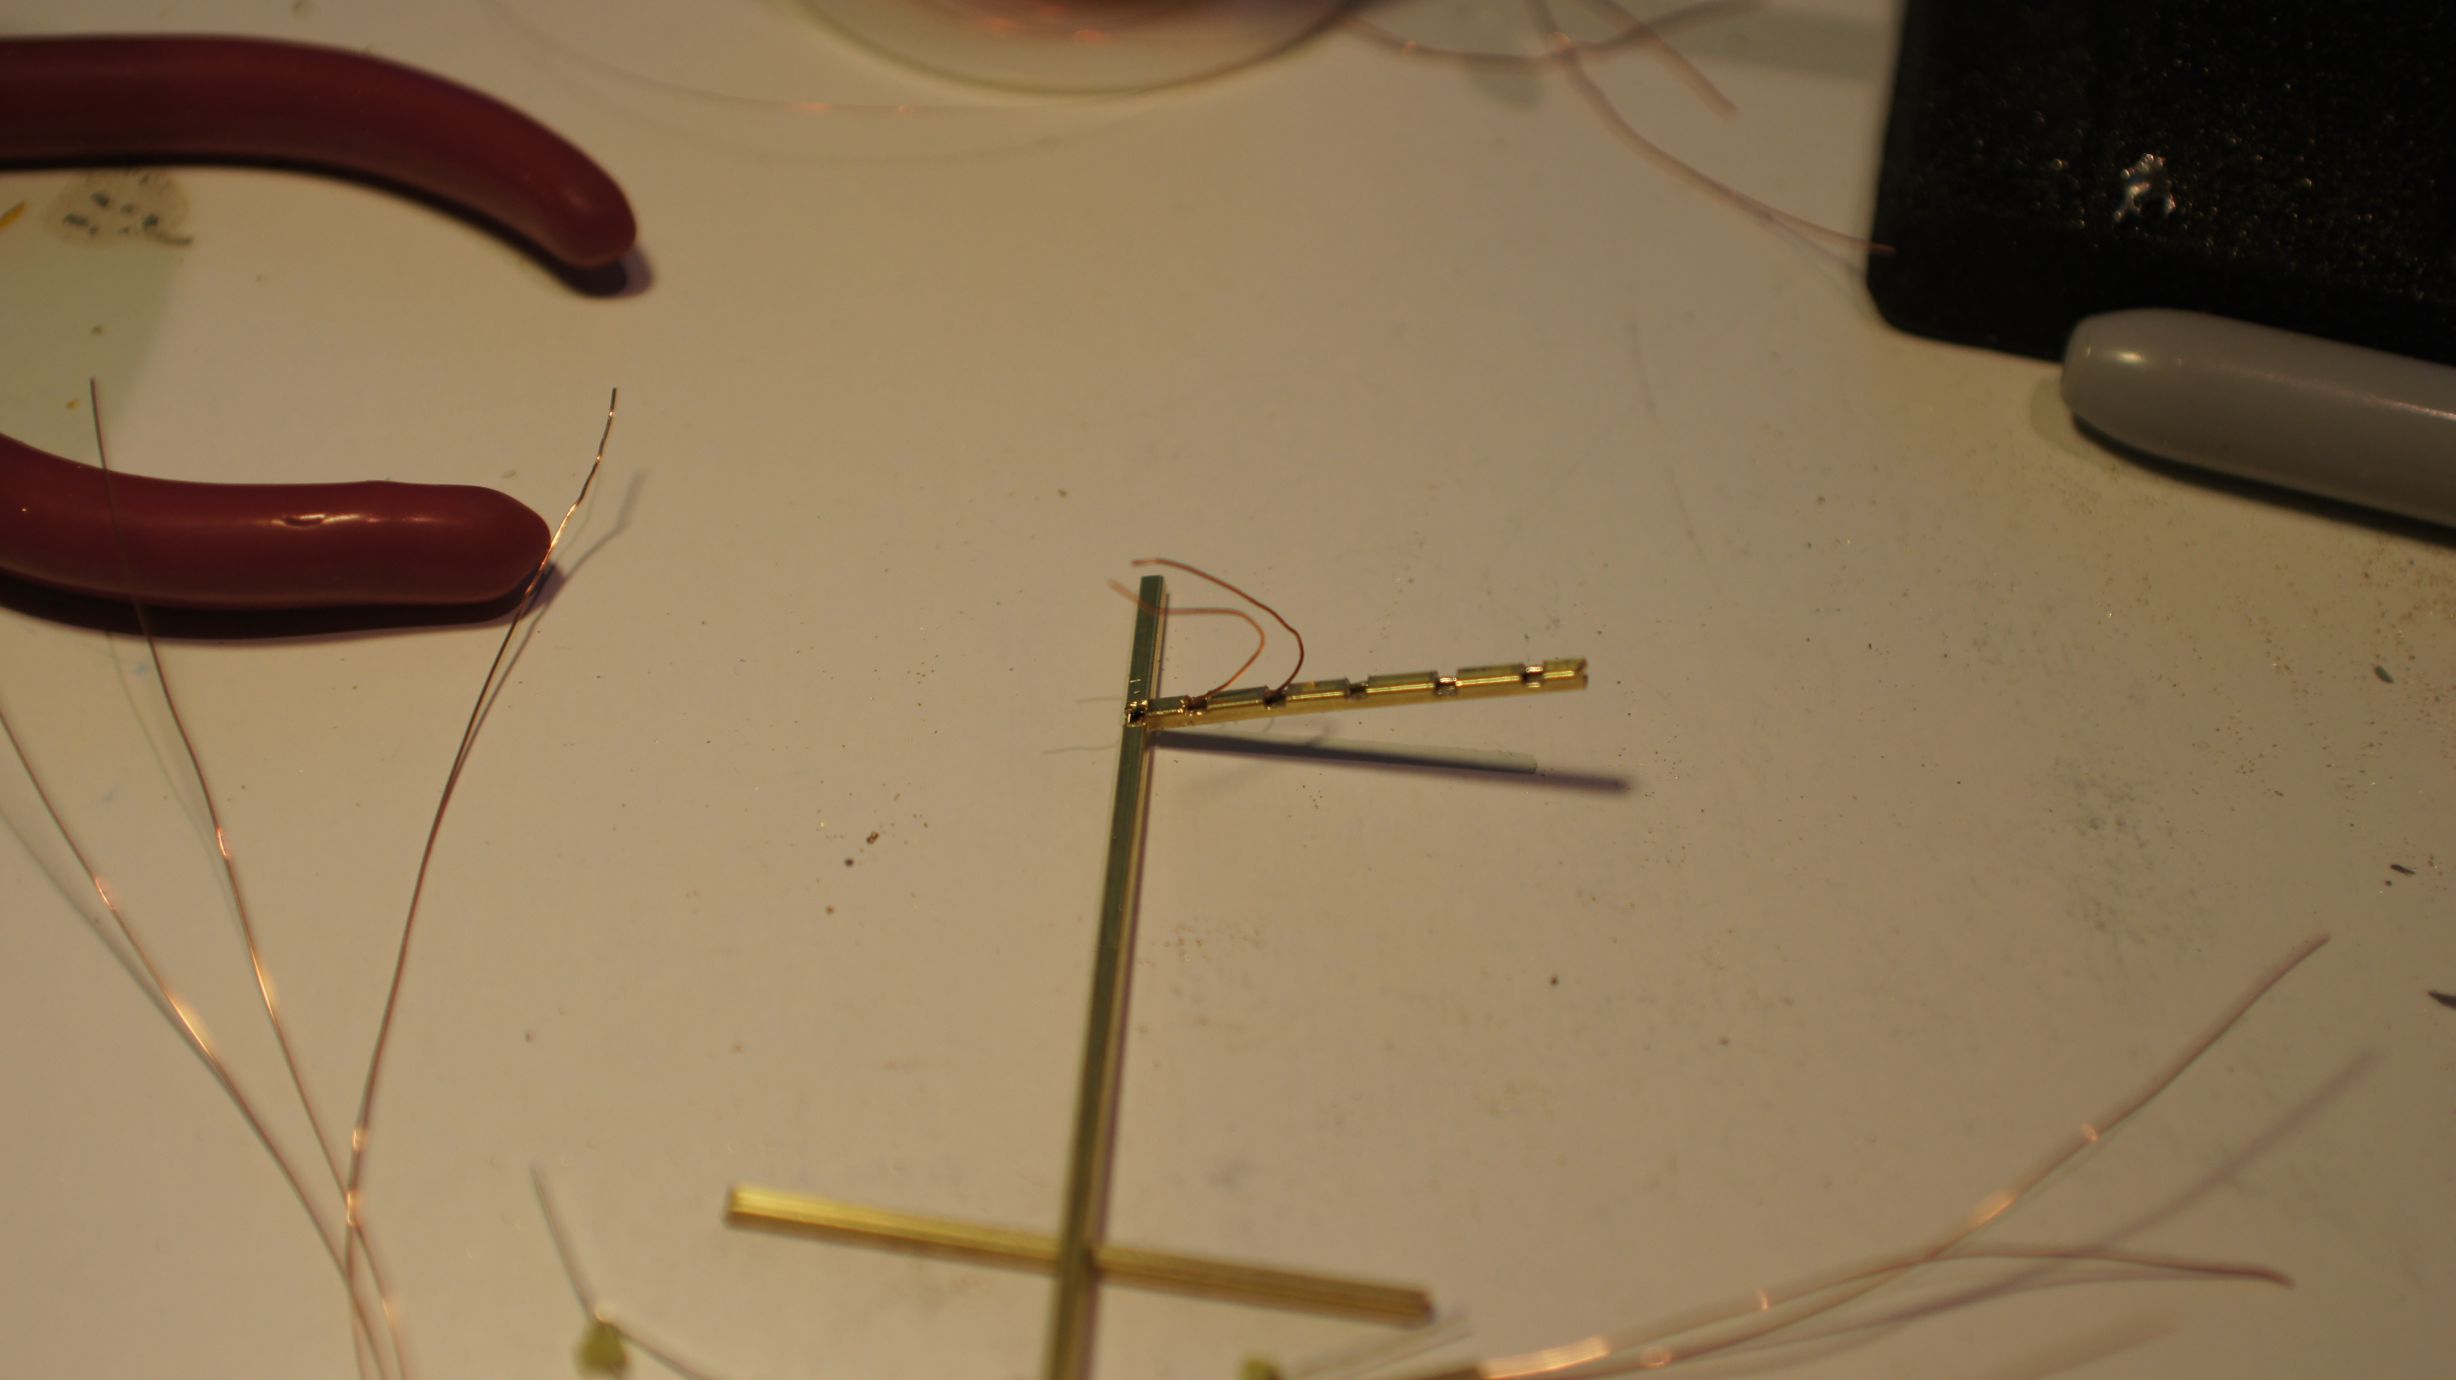
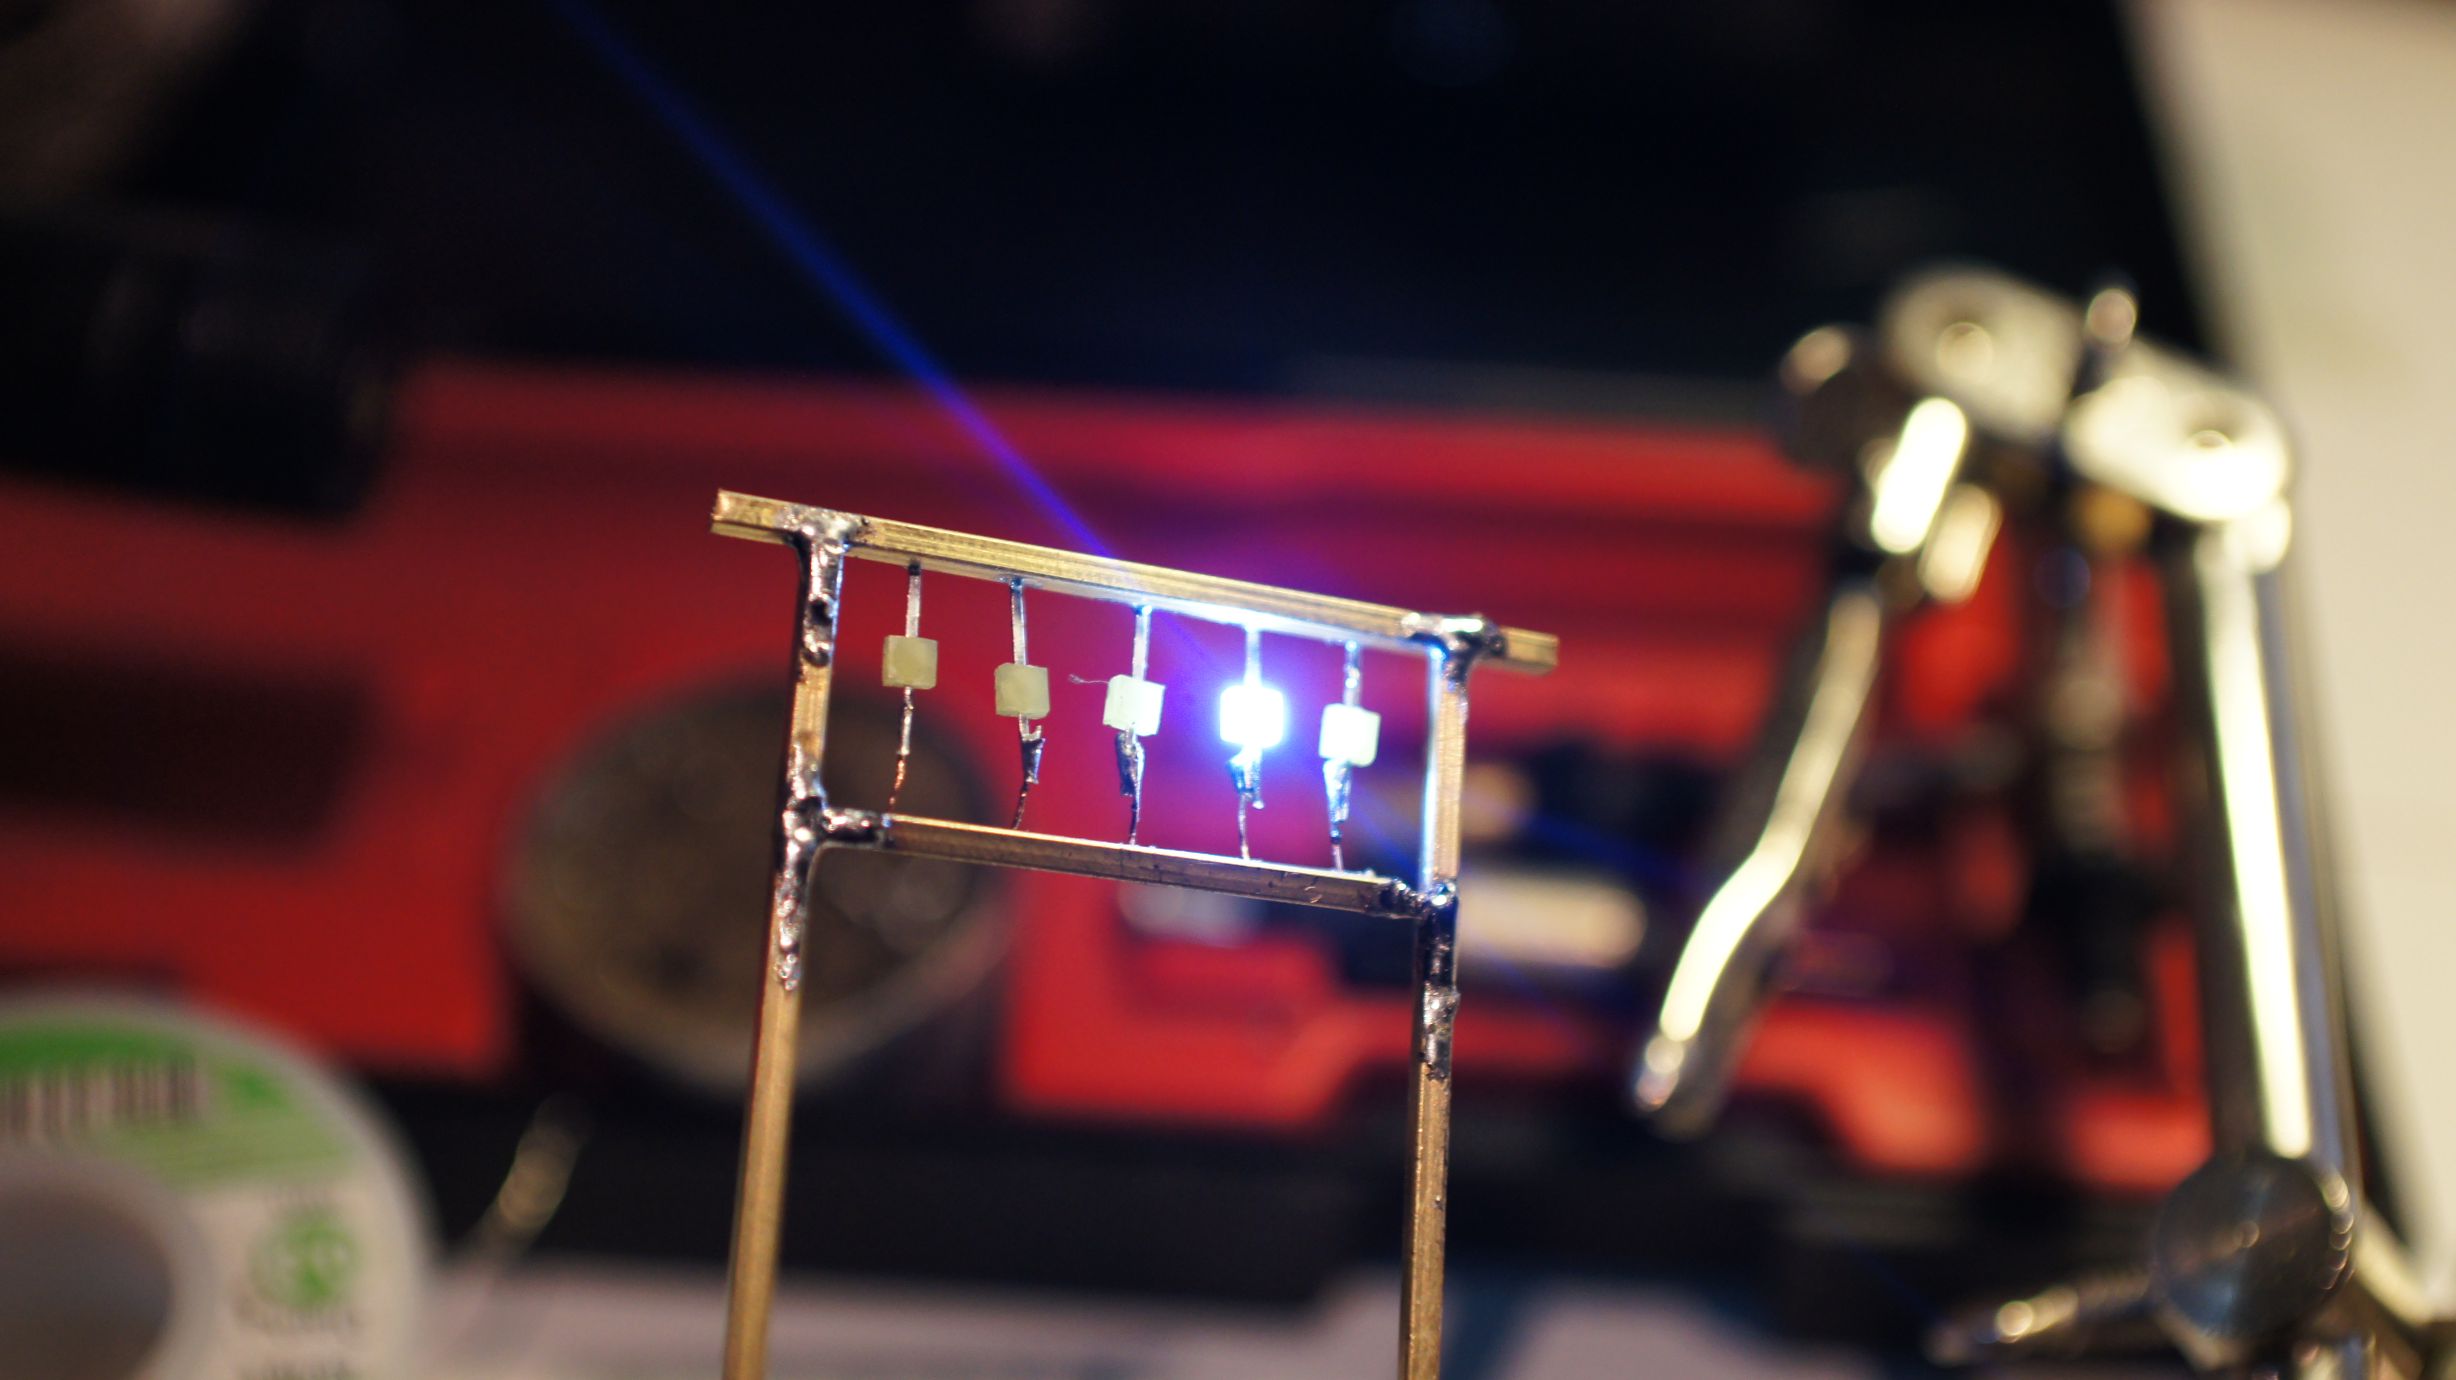
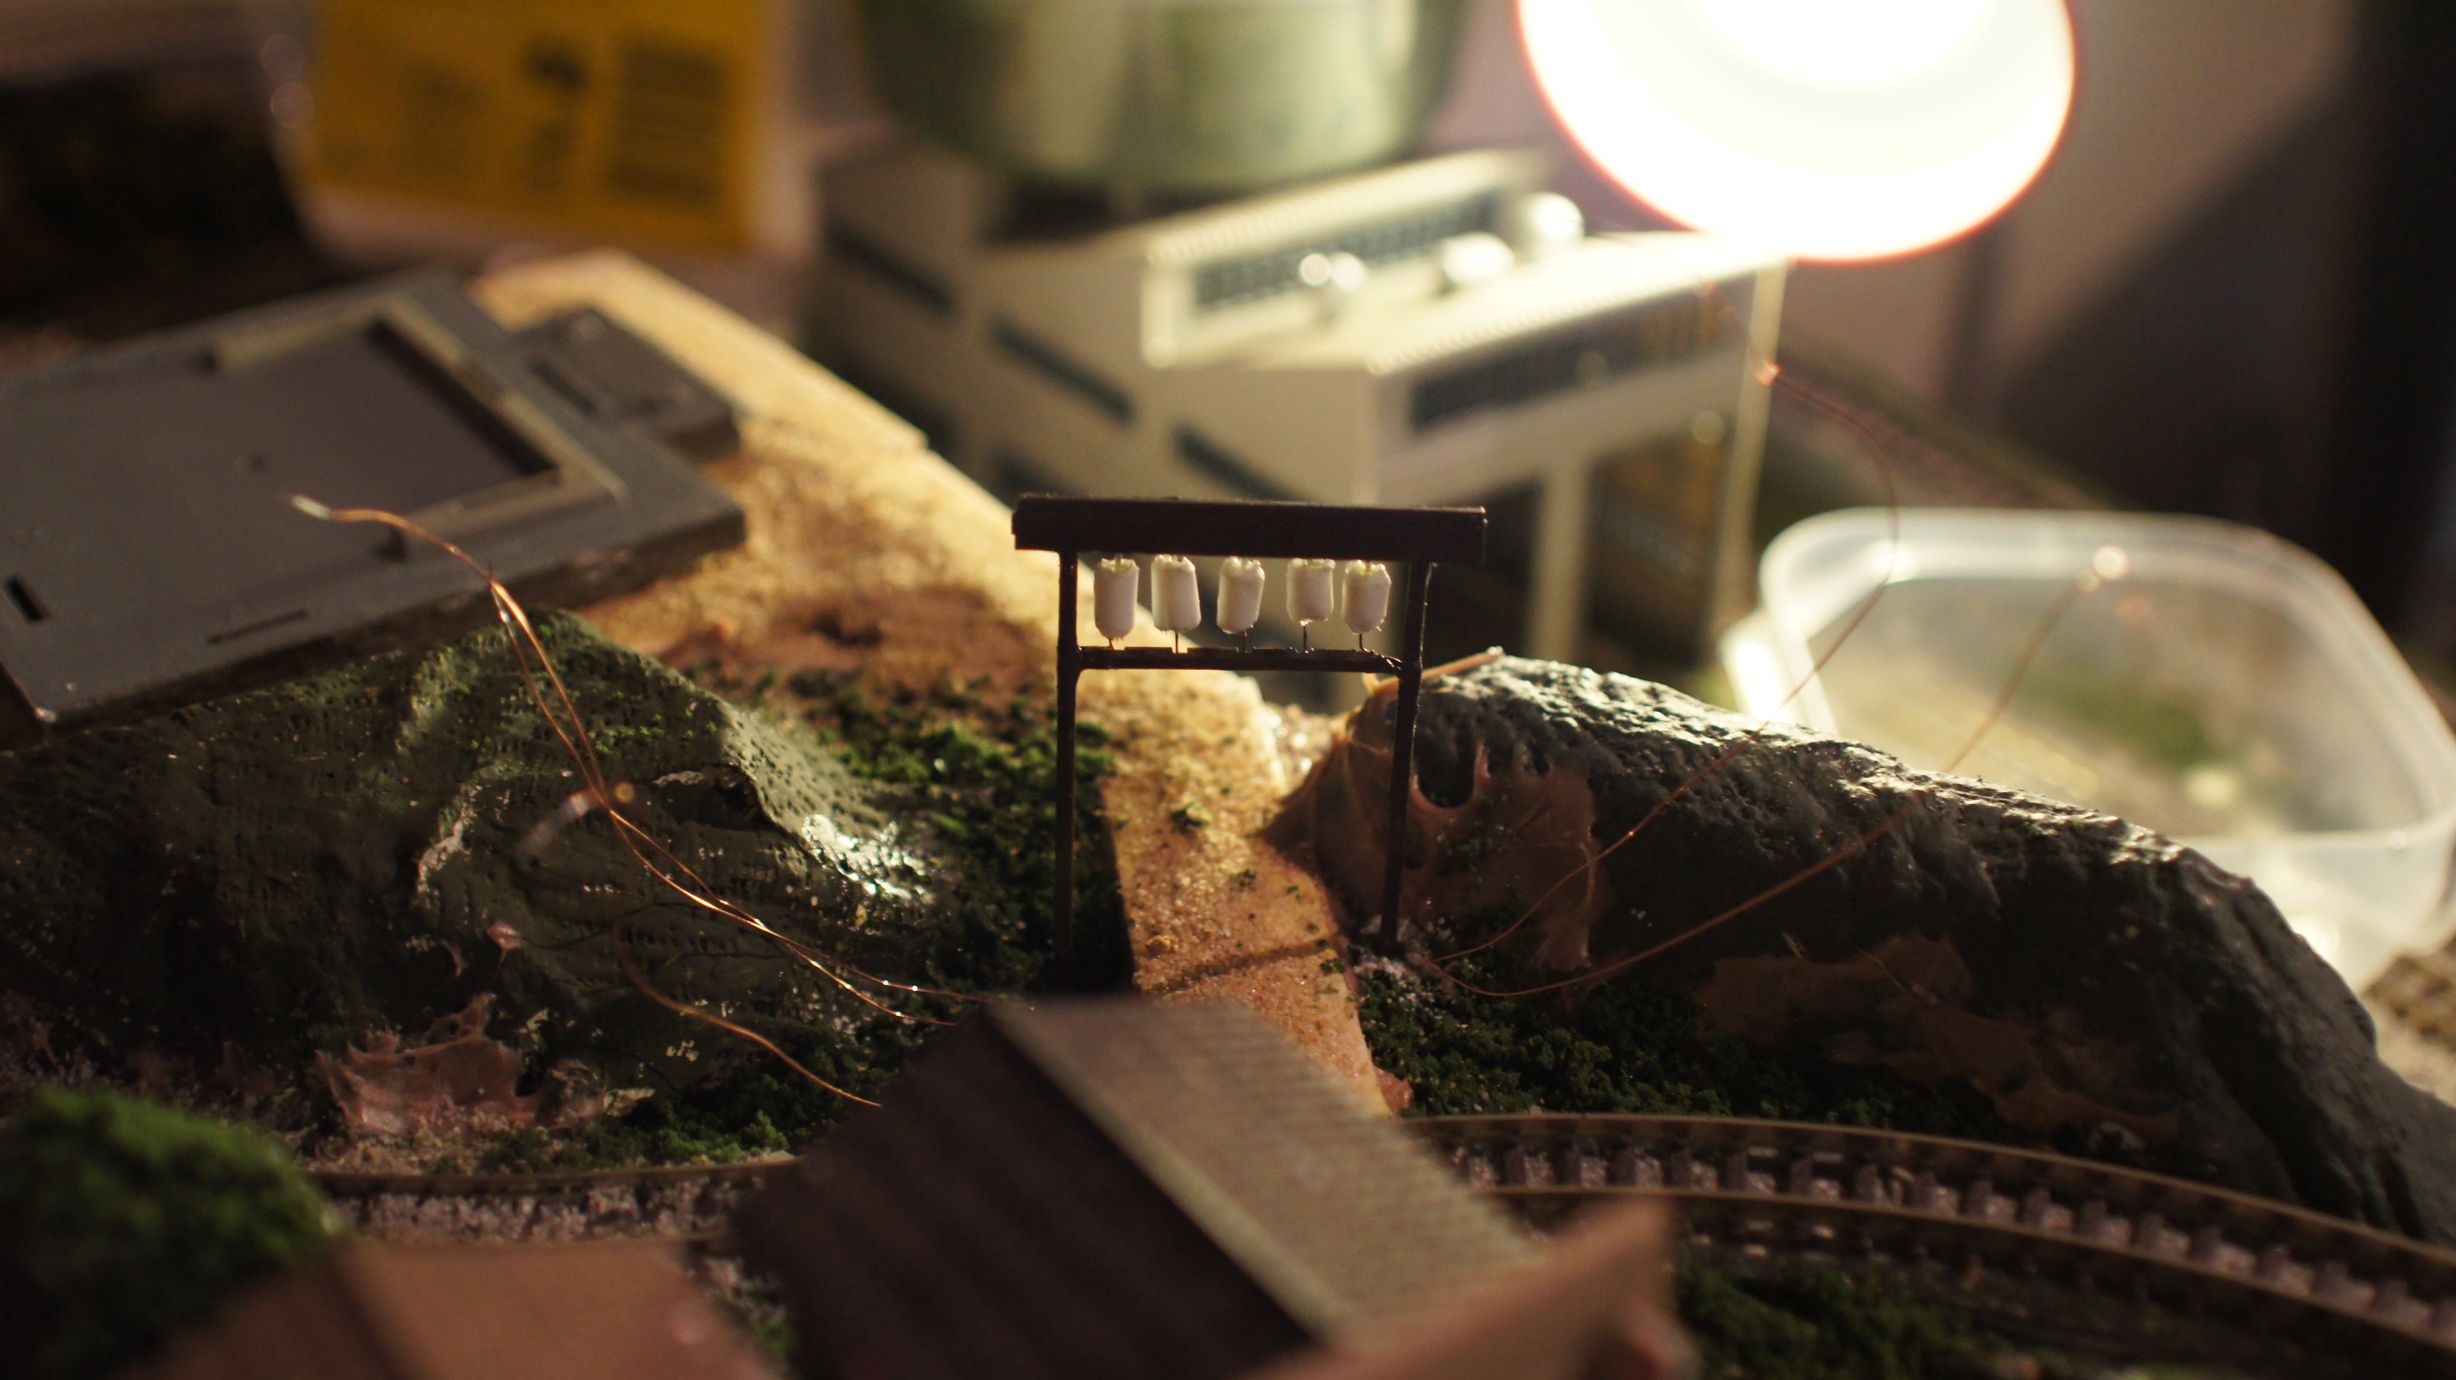
Now that the frame and LEDs were in place, I could go about turning them into lanterns. This would be done by putting plastic piping around them. I had already done this with a fixed lantern on a TomyTec Japanese Shop, but this time I had no existing lanterns to work with. I therefore used the same concept as tanaka_ace.
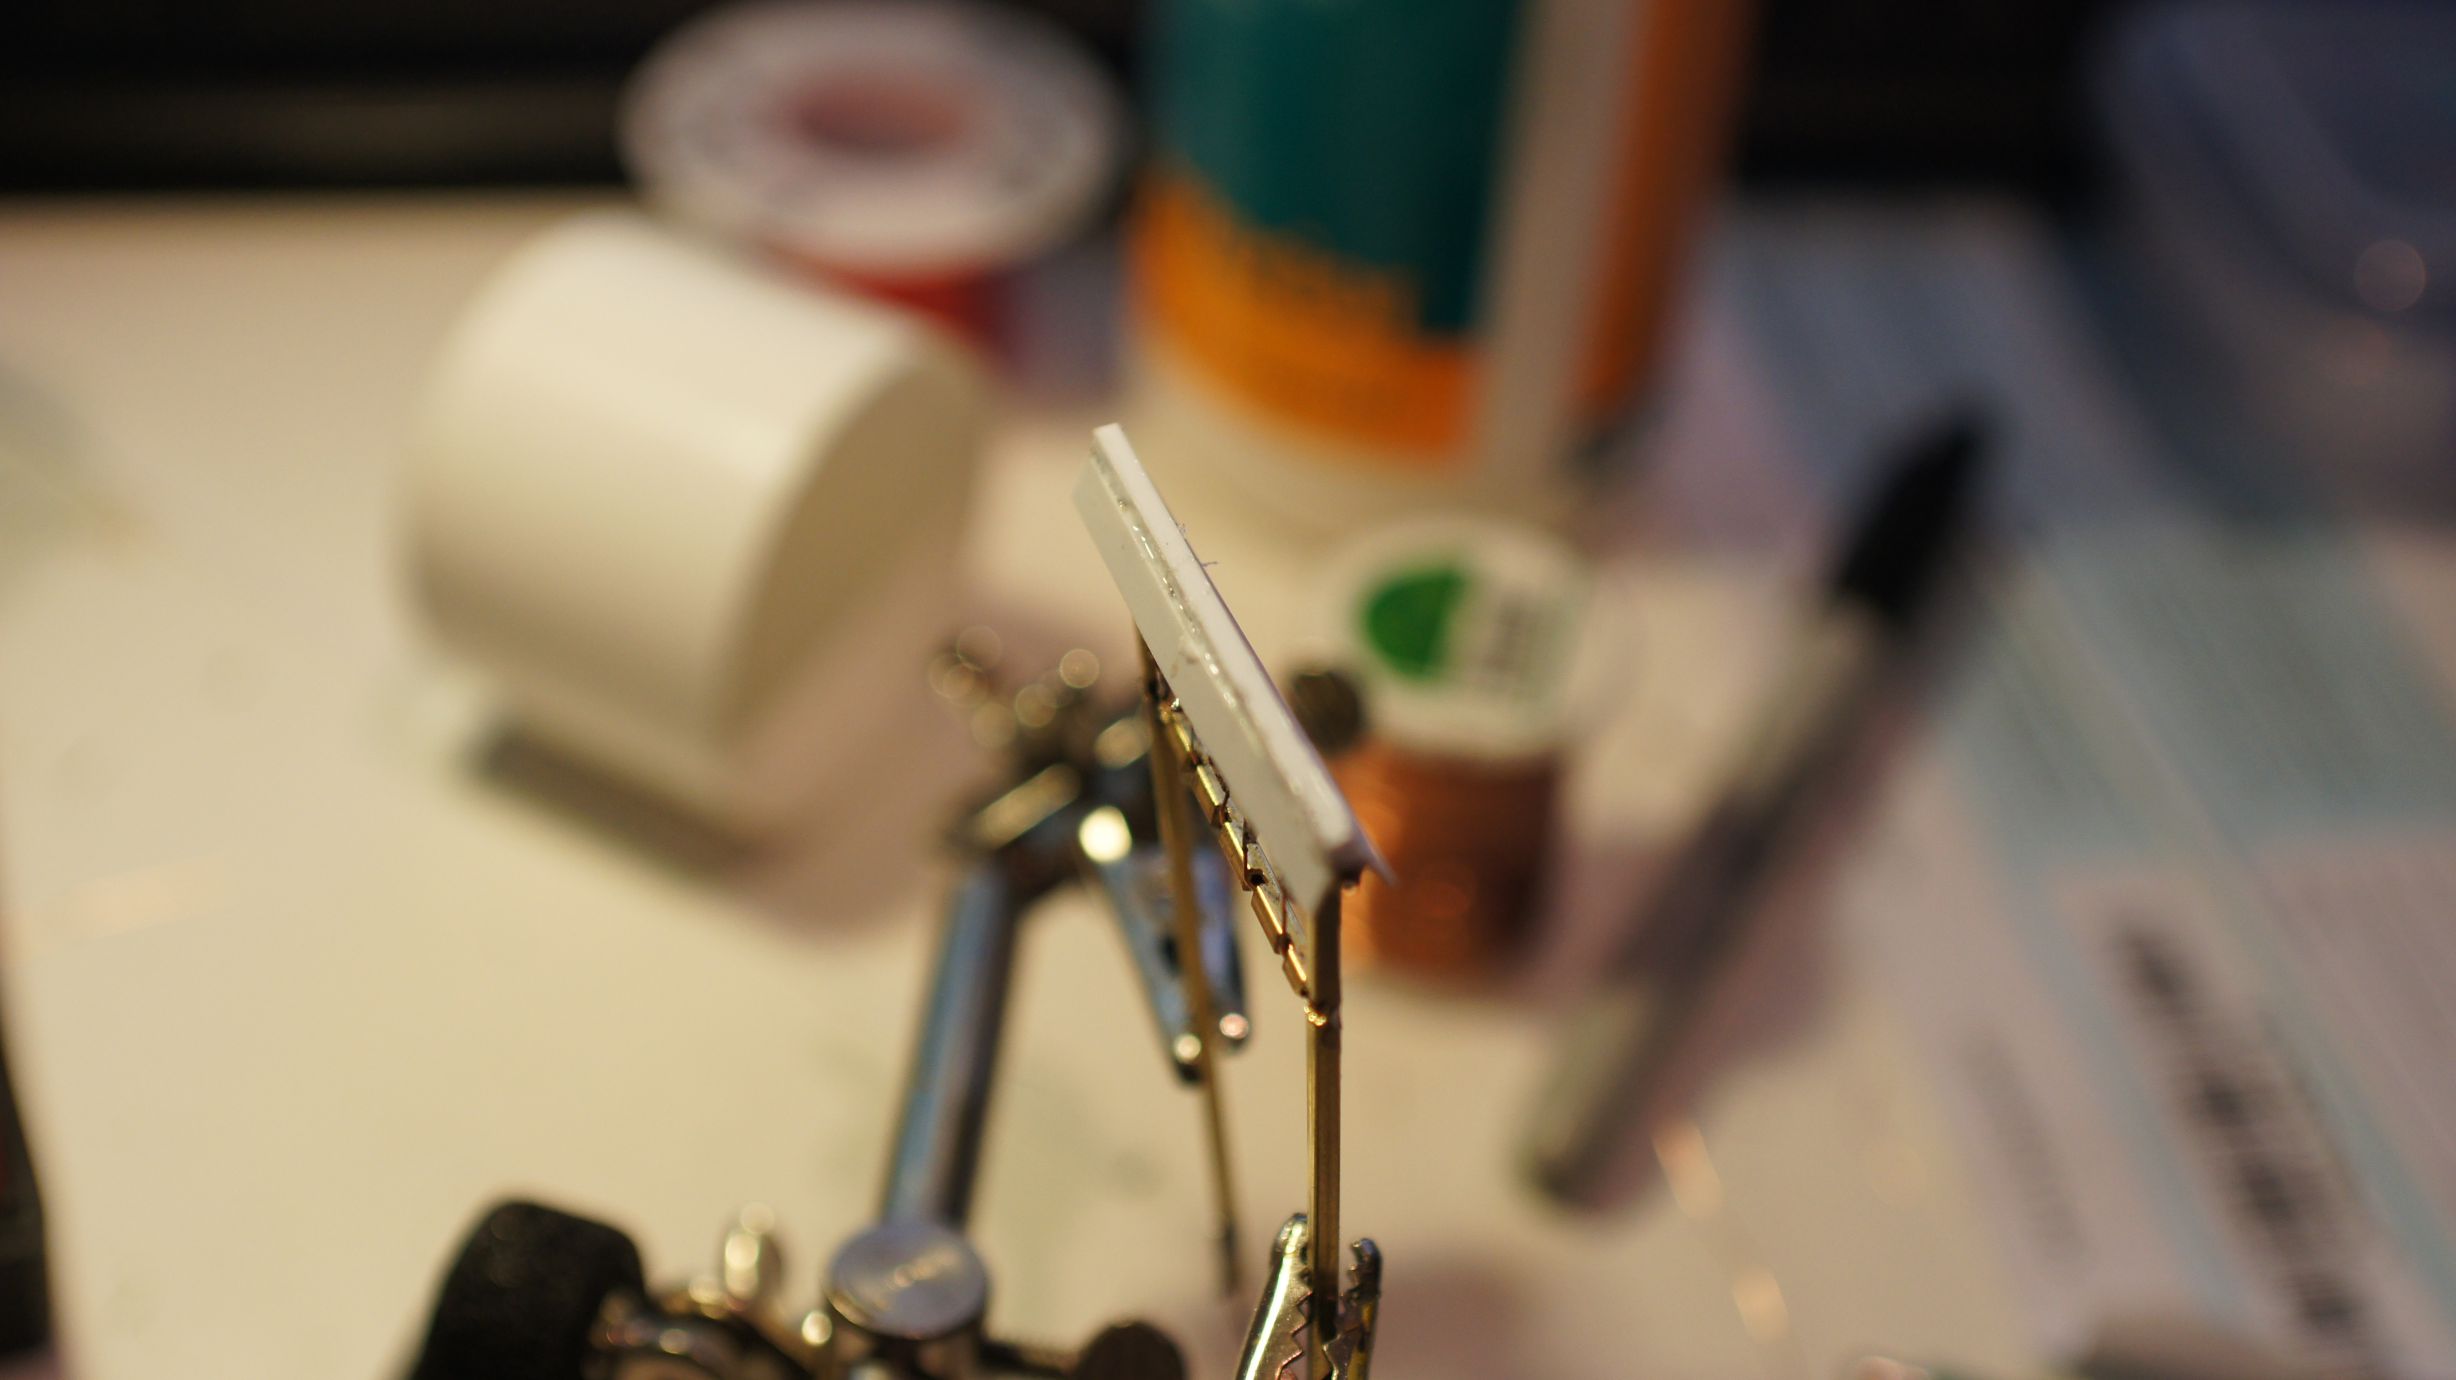
Thanks to globalisation, I was able to acquire the exact same "Evergreen Scale Models" poly-piping that he used. I happened to purchase 3.2mm pipe instead of the 2.4mm; but this worked out well as the LEDs that I was using were a little bigger. The pipe was cut into appropriate lengths and then the edges rounded down to create the lantern shape. The individual lanterns were then sliced at the back so that I could slide them over the LEDs. I then used stock-standard Shelleys Aquadhere to fill in the ends.
Once these were holding in place, I painted the frame a nice wood-brown. Torii gates can be made of wood or stone and painted a multitude of colours. You more often than not will see them in brown wood, but bright red, and even out in the ocean, is not uncommon.
And that was it... I still think I need to place some characters on the lanterns, but I need to work out what to write on them. I also should've taken more care to get the lanterns even, but I was happy enough with the outcome and, once in place on the layout, knew it would be good enough.
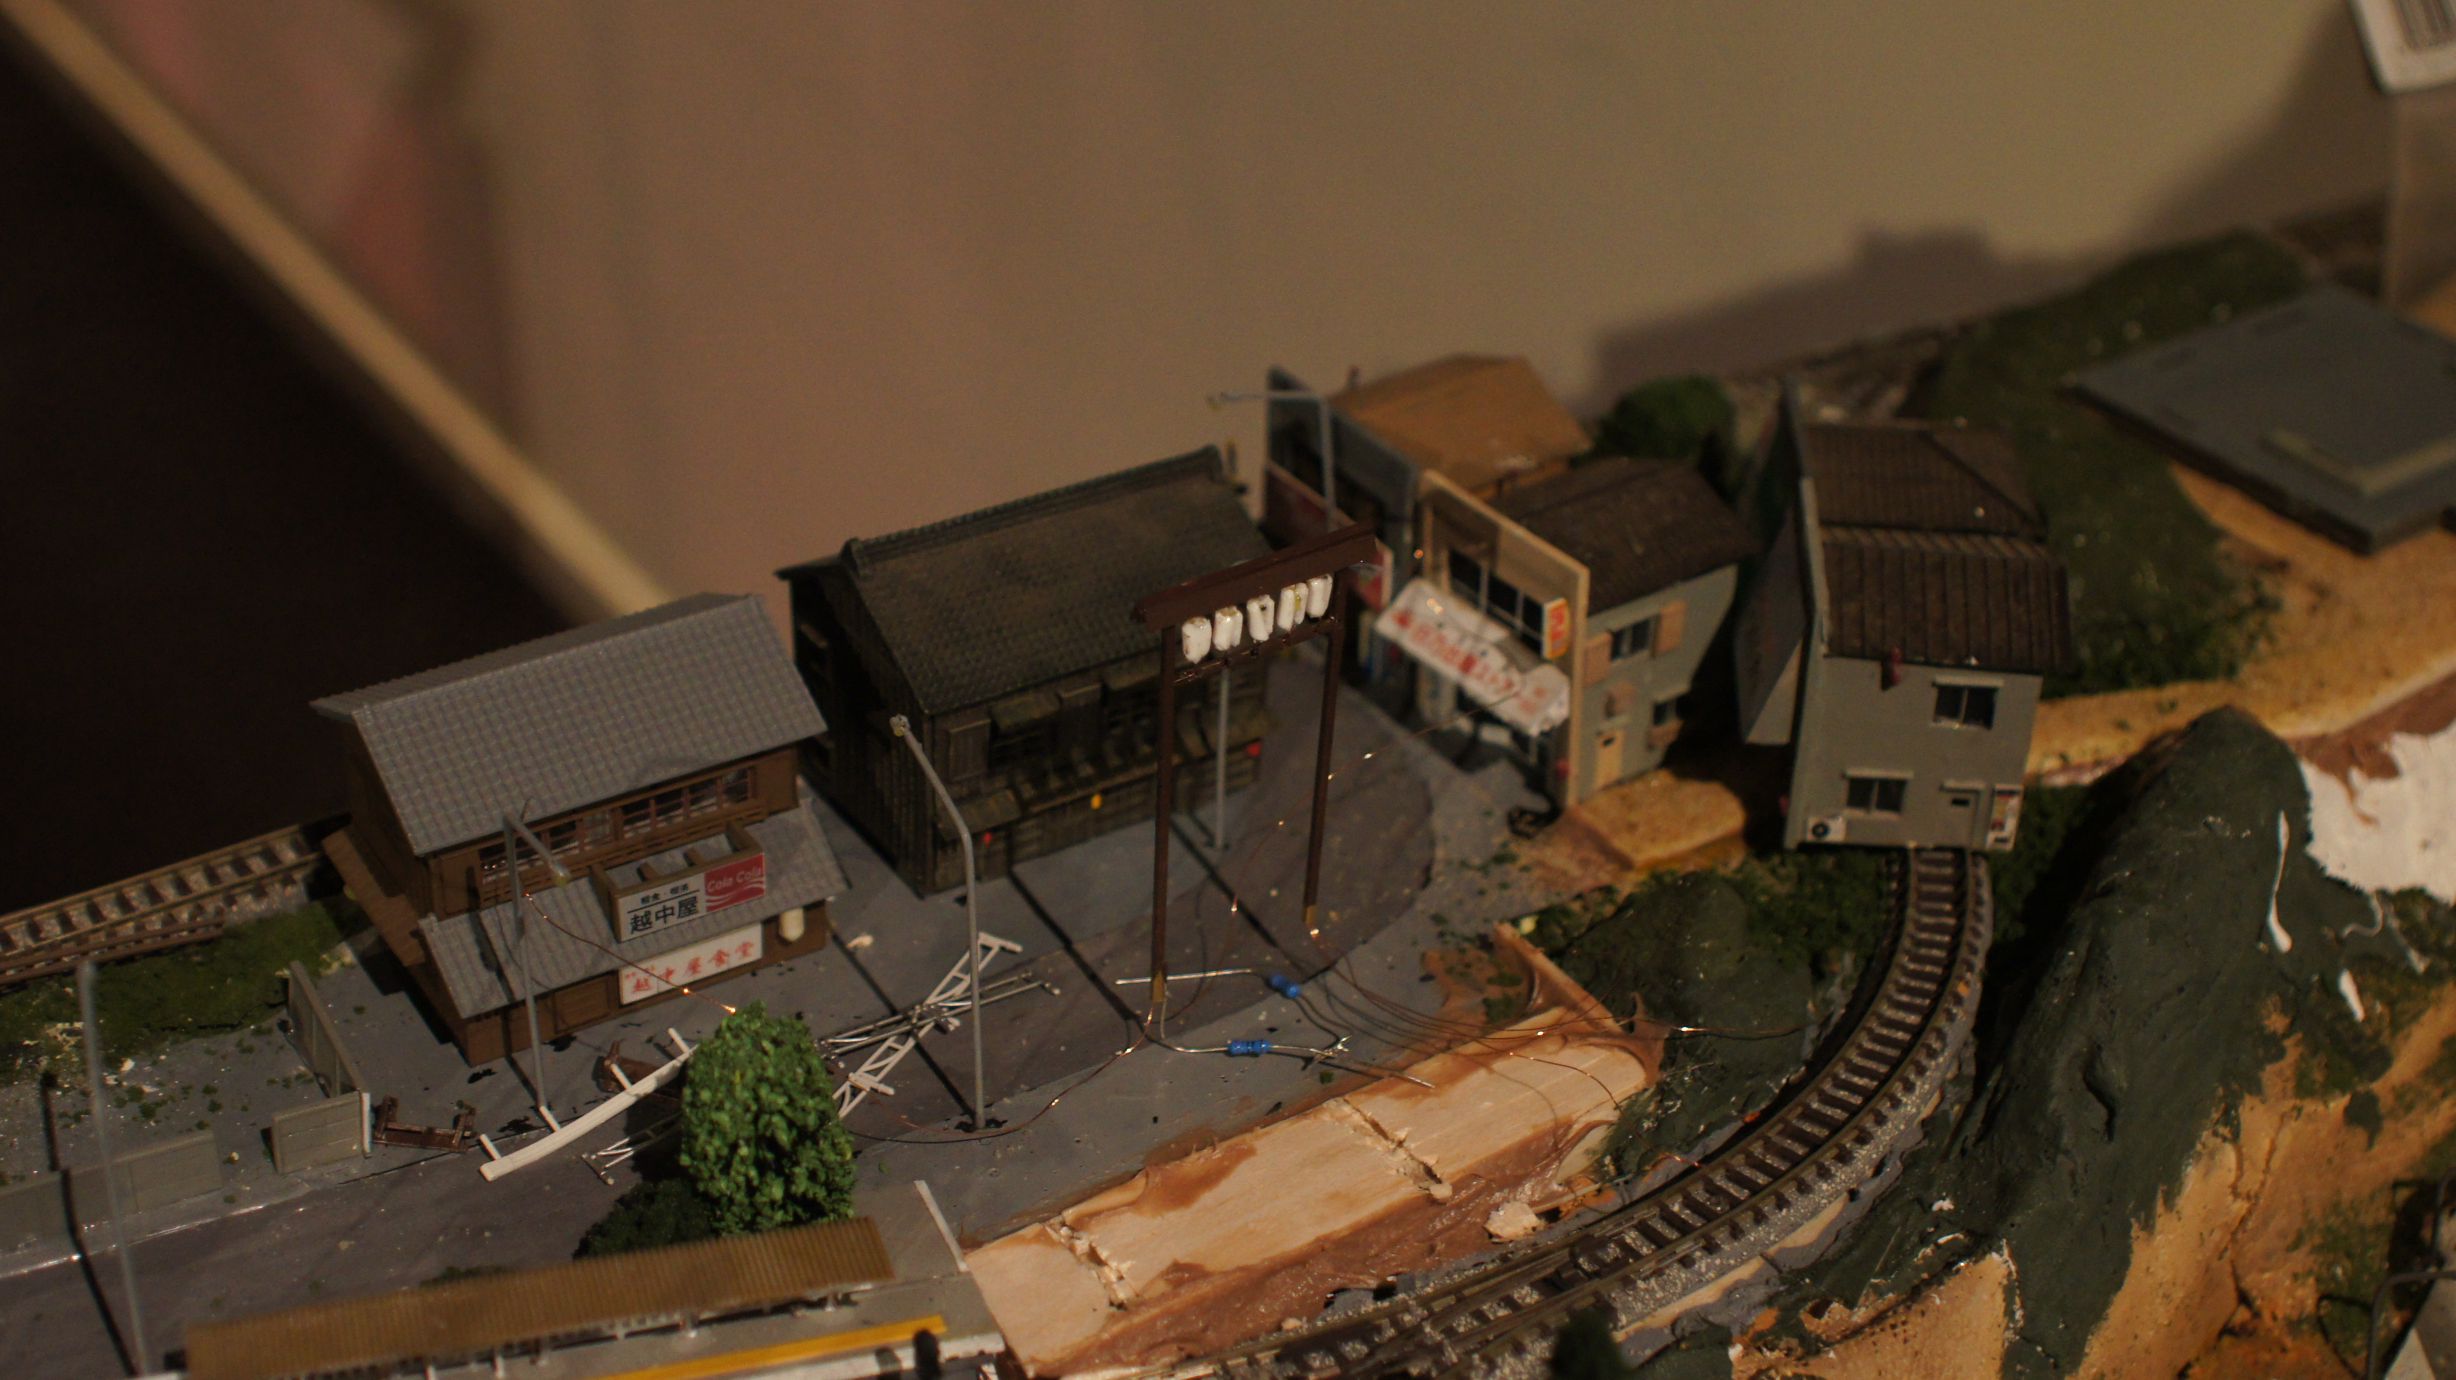
Now that the entrance is in place, it's time to get the fences and shrine in. As you can see, the foundations are there already and I'm currently working on adding lanterns and lights to the shrine.
Random Photos
Search
Tags
Links - Click for details
- Abandoned Rails (Japan)
- AIRLINE (Shinkansen Photography)
- Akihabara Station
- annexpressのブログ
- Australian Model Railway Magazine
- DCC普及協会ホームページ (Japanese DCC)
- Dead Section (Japanese Track Diagrams)
- Delicious Things (Japanese N Scale DCC)
- Densha Wotorou
- Digital Direct for Windows (DCC Server)
- Don's Dream World – AMAZING N Scale Japanese Layout
- Hatena::Diary
- Japanese N-Scale Modeling Forum
- JR Chiisai
- Kaz-T's blog レインボーライン (Rainbow Line)
- LED Resitance Calculator
- Masioka
- Poppondetta Blog
- RailFan Magazine, Japan
- Railmind
- Railway Travelers' Room
- Serenity Valley
- Shashinka Ichiban
- Shuzuku
- Sumida Crossing
- The next station is…
- Tomix N Gauge Track and Japanese N Gauge Trains
- TT Forums (Transport Tycoon Deluxe)
- 名鉄尾西線の貨物列車 (Nagoya: Meitetsu Freight)
- 日本型Nゲージ DCC改造例のご紹介 (Okiraku DCC)
- 泰 茅 轍 道 (Taichi Railway)
- 箱庭登山鉄道製作記 (Hakone-Tozan Layout Blog)
Archive
- May 2026
- April 2026
- March 2026
- February 2026
- January 2026
- November 2025
- October 2025
- September 2025
- August 2025
- July 2025
- June 2025
- February 2025
- January 2025
- November 2024
- September 2024
- August 2024
- July 2024
- June 2024
- May 2024
- April 2024
- March 2024
- February 2024
- December 2023
- October 2023
- September 2023
- August 2023
- July 2023
- June 2023
- May 2023
- April 2023
- March 2023
- December 2022
- November 2022
- October 2022
- April 2022
- March 2022
- February 2022
- January 2022
- December 2021
- November 2021
- September 2021
- August 2021
- July 2021
- May 2021
- March 2021
- February 2021
- January 2021
- October 2020
- September 2020
- August 2020
- July 2020
- June 2020
- May 2020
- April 2020
- March 2020
- January 2020
- December 2019
- November 2019
- October 2019
- September 2019
- August 2019
- July 2019
- June 2019
- April 2019
- March 2019
- February 2019
- January 2019
- December 2018
- November 2018
- October 2018
- September 2018
- August 2018
- July 2018
- June 2018
- May 2018
- April 2018
- March 2018
- January 2018
- December 2017
- November 2017
- October 2017
- September 2017
- August 2017
- July 2017
- June 2017
- May 2017
- March 2017
- February 2017
- January 2017
- December 2016
- November 2016
- October 2016
- September 2016
- August 2016
- July 2016
- June 2016
- May 2016
- February 2016
- November 2015
- October 2015
- September 2015
- August 2015
- July 2015
- June 2015
- May 2015
- April 2015
- March 2015
- February 2015
- January 2015
- December 2014
- November 2014
- August 2014
- July 2014
- May 2014
- April 2014
- March 2014
- December 2013
- November 2013
- October 2013
- June 2013
- August 2012
- April 2012
- March 2012
- February 2012
- November 2011
- October 2011
- September 2011
- July 2011
- June 2011
- May 2011
- April 2011
- March 2011
- February 2011
- January 2011
- December 2010
- November 2010
- October 2010
- September 2010
- August 2010
- June 2010
- May 2010
- April 2010
- March 2010
- February 2010
- January 2010
- December 2009
- November 2009
- October 2009
- August 2009
- January 2009
- December 2008
- November 2008
- October 2008
- September 2008
- July 2008