


 Melbourne BG SCS Train Timetable


DCC “Directional” Lighting without a Decoder
So, you have a 16-Car, 12-Car, 8-Car, 6-Car or 3-Car consist and you want to get the tail/head lights functioning correctly? Of course, you've already installed the expensive decoder in the engine car of the consist and if this is anything like all of the Japanese models I've dealt with, then it's somewhere in the middle and getting the power to the headlights is not really an option.
Ok, So companies like Kato have created smaller, feature-less decoders specifically for headlight and taillights in end cars... these are still the best option... the advantage to what I'm about to show you is that the lights will switch between backwards and forwards.
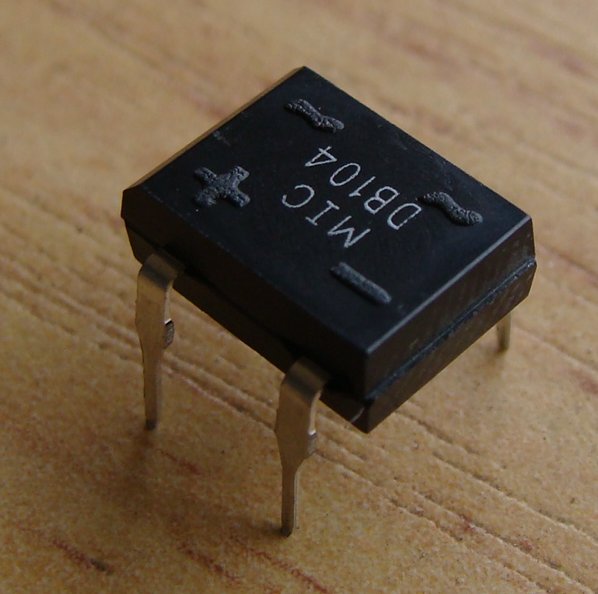
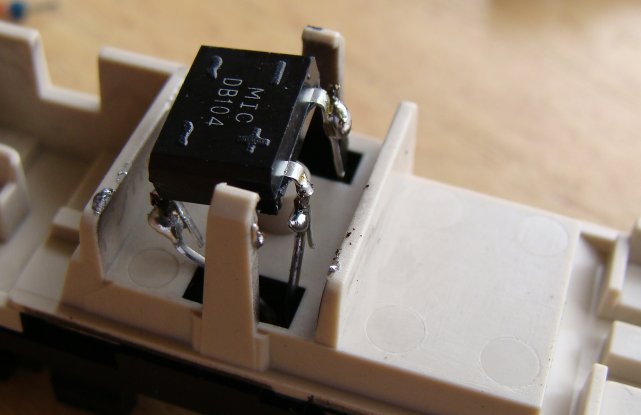
Anyway, if you can't, or are morally obliged not to, install the end-car decoders then you can cheat and install an AC/DC rectifier diode to 'fix' the direction of the train (and lights).
This, of course, means that the train you are going to install this into should really be only every traveling in one direction 'prototypically'. You'll be able to swap the end cars when you want the train to travel in the opposite direction, but this could be tedious and so it is entirely recommended this method only be used for consists where you intend on running them in one direction.
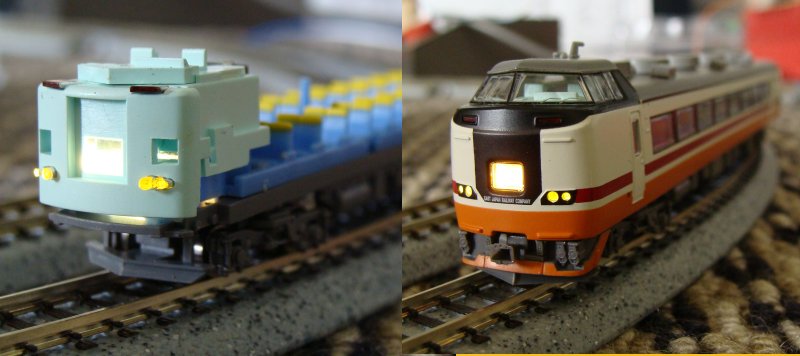
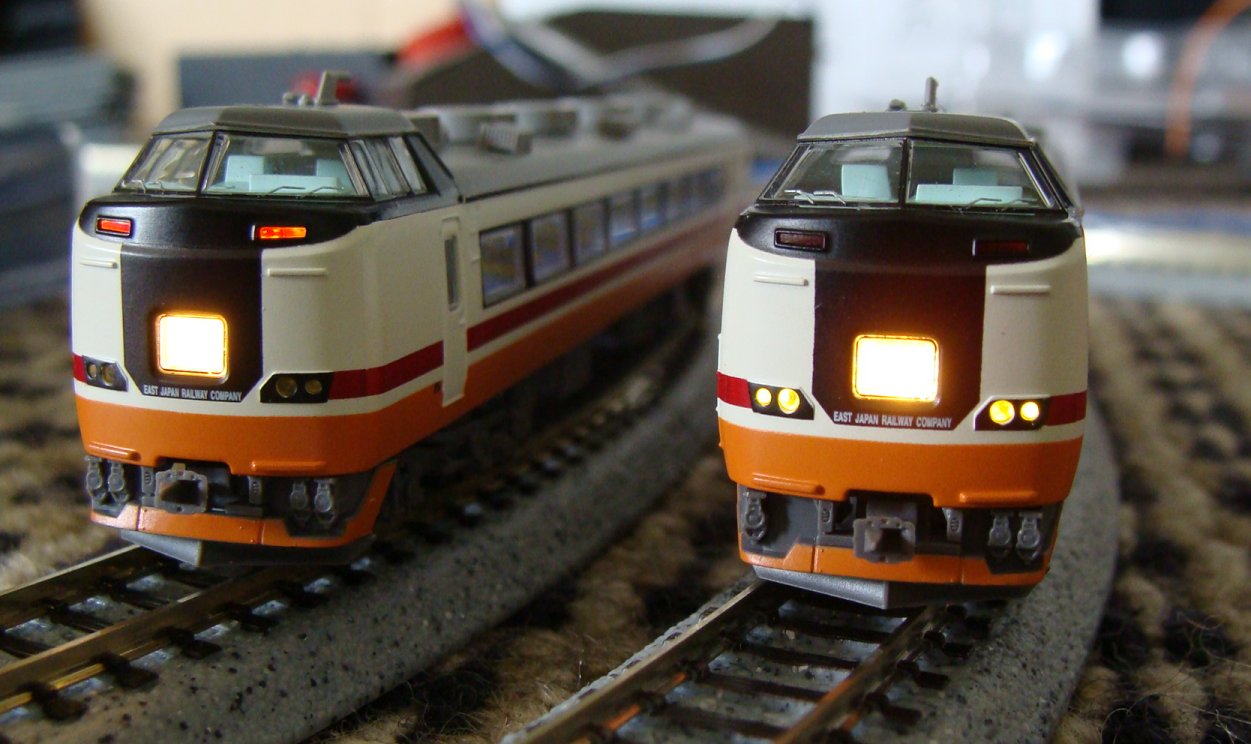
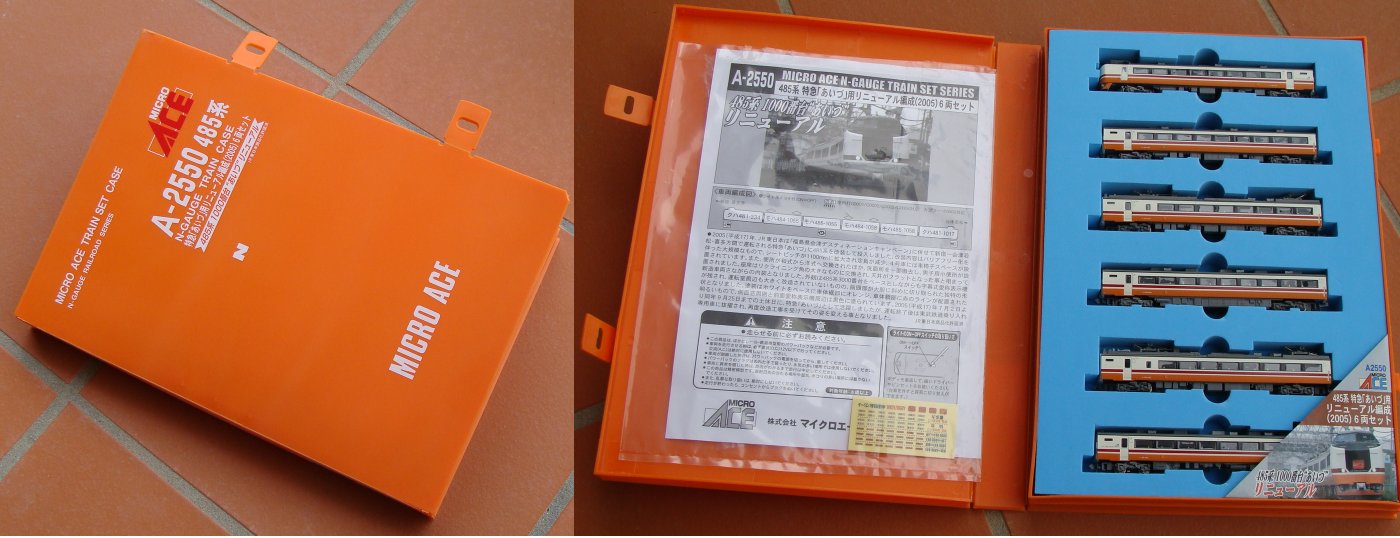
Micro Ace 6-Car "あいづ" KIHA 485系
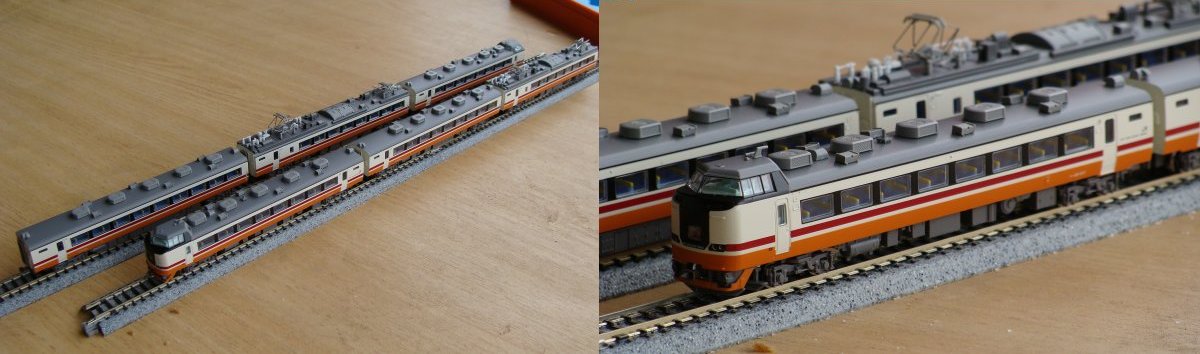
So, as you may have recently seen, I installed a decoder in my 6-Car "あいづ" KIHA 485系。 The engine car was number 3 of 6, so couldn't really get any further into the center... which is a good thing as it means it's nearly pushing as much as it has to pull.
So, I decided as I'd got it at a bargain price, that I wasn't going to fork out too much to make it DCC. I had the decoder in the engine car and wanted the lights to not 'buzz' and function correctly. I intended on having it running in one direction most of the time and could handle swapping the end cars if I wanted it to go the other way.
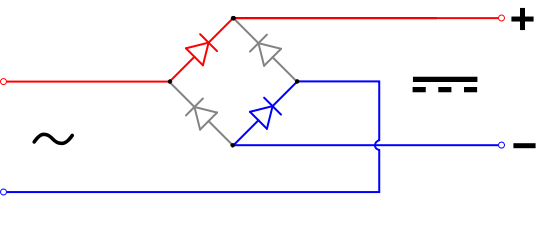
What this meant is that I would get an AC->DC Rectifier (0.84c at the local electronics store) to convert the AC voltage off the tracks to DC.
Once in DC voltage the polarity would be fixed... even if the car was swapped around on the rails.
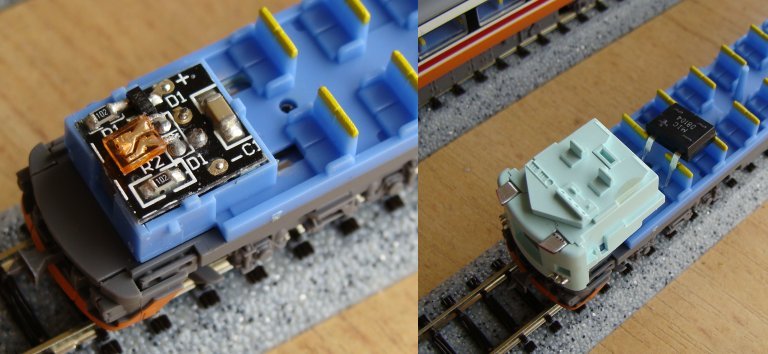
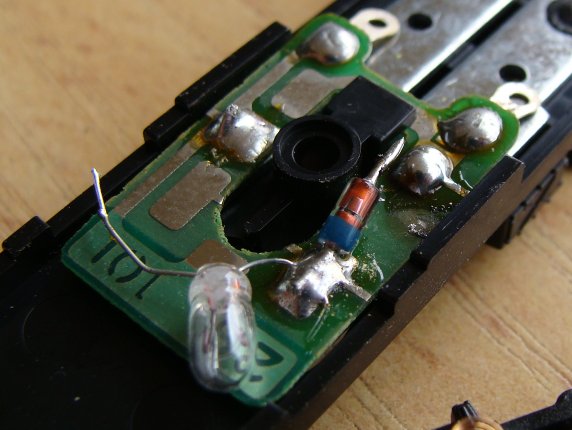
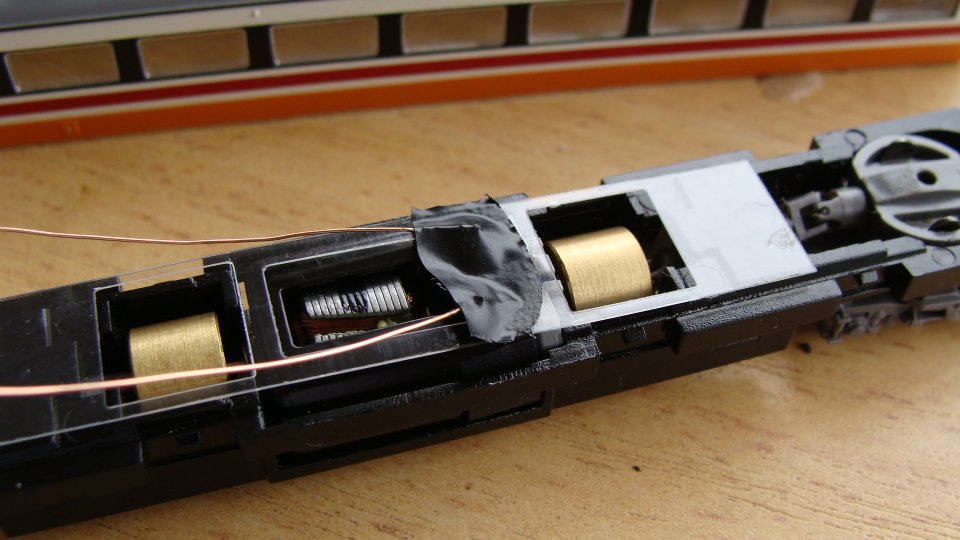
Right, so I removed the old lighting circuit board and bent the pins up that connected with the power rails... I then extended the AC side of the rectifier and pushed the pins into the area where the old contacts used to touch the power rails.
I then soldered up the DC output to the circuit board and threw it on the tracks to test.
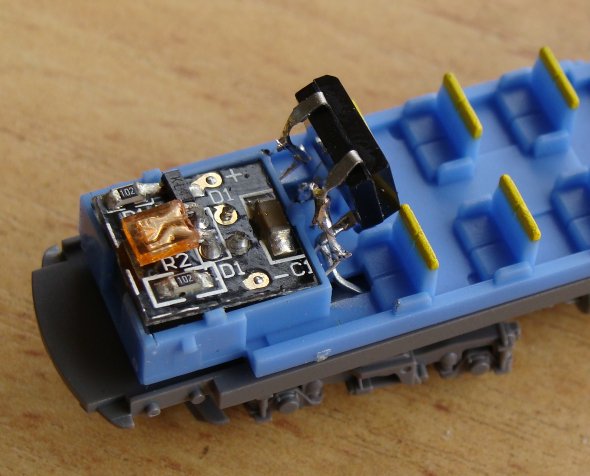
Ok, this worked well... the lights even stayed on constantly after a bit of a wheel clean. Unfortunately, you now cannot 'shutdown' the train in a siding without cutting the power. The other issue now was that the rear car would have the 'Forward Lights' on as well if wired up directly... I therefore had to reverse the wiring after the DC output. I used my 0.25mm 'winding wire' for this.
And then a test...
And that was it... the train was DCC'd and ready to roll... It worked perfectly after this as well.
Twilight Express
I then quickly slapped a Rectifier in my Twilight Express end car and disabled the lighting in the car that sits right next to the engine.
To my surprise... a 12v BULB!... This must been an older set as Martjin had previously mentioned.
...and that was a wrap... yes, it's a mighty cop-out... and those who wish to have functional/switchable head/tail lights should not do this, but it does work and I must admit, does the job for my kinda running (Full Steam Ahead!)
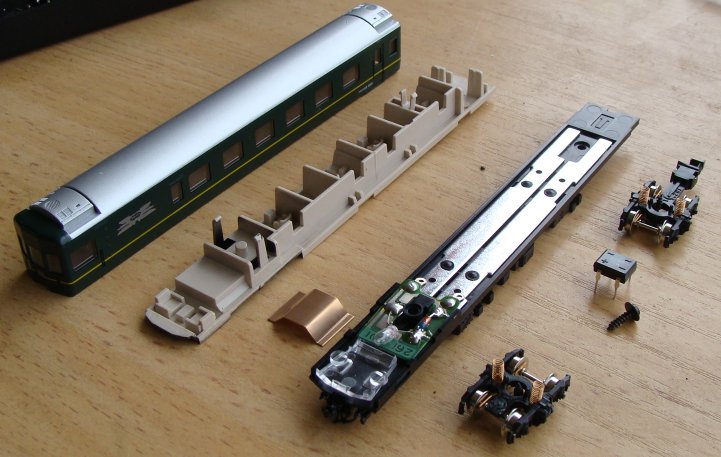
Micro Ace 485 Series “あいづ” 6-Car Decoder Install
I found this for sale on eBay and, although it's JR East, I decided I could do with another 6-Car set.
Being my first Micro Ace product, I was extremely impressed with the level of detail. I was also extremely impressed with the electronics on the inside and the way everything just snaps together... of course, this is the same with the greater majority of Japanese model railway products... but this 6-Car set seemed much easier to pull apart.
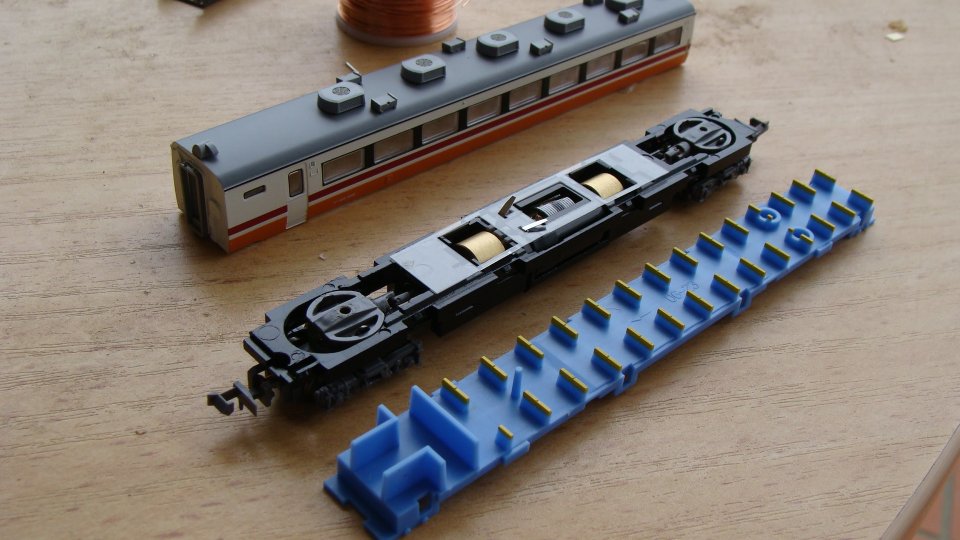
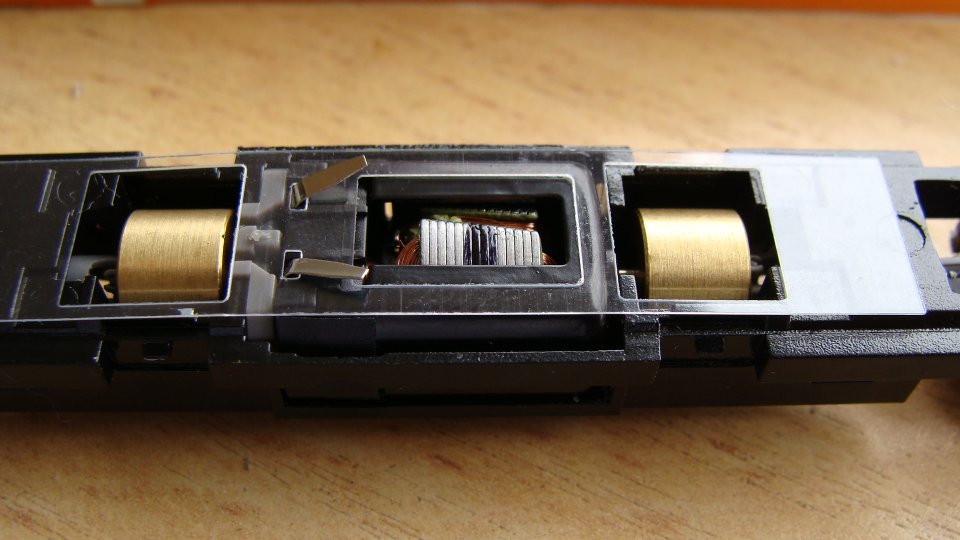
Once apart, it was obvious that the decoder install was going to be very easy... The motor contacts could easily be separated and the power rails were made of copper... solderable! After the copper wire was on.. the wire was lead back up alongside the copper rails to the decoder... wires were also soldered onto the rails to provide power. Finally, the decoder was installed.
Right... lighting... as per any large consist... there is usually a considerable length to the end cars for directional lighting... this usually means that people should install separate decoders in the end cars (high price!) or run wires throughout the cars (ugly!)... so instead, I decided to convert the AC current to DC and force the lights to be in specific directions...
But you'll see that in my next post!
Random Photos
Search
Tags
Links - Click for details
- Abandoned Rails (Japan)
- AIRLINE (Shinkansen Photography)
- Akihabara Station
- annexpressのブログ
- Australian Model Railway Magazine
- DCC普及協会ホームページ (Japanese DCC)
- Dead Section (Japanese Track Diagrams)
- Delicious Things (Japanese N Scale DCC)
- Densha Wotorou
- Digital Direct for Windows (DCC Server)
- Don's Dream World – AMAZING N Scale Japanese Layout
- Hatena::Diary
- Japanese N-Scale Modeling Forum
- JR Chiisai
- Kaz-T's blog レインボーライン (Rainbow Line)
- LED Resitance Calculator
- Masioka
- Poppondetta Blog
- RailFan Magazine, Japan
- Railmind
- Railway Travelers' Room
- Serenity Valley
- Shashinka Ichiban
- Shuzuku
- Sumida Crossing
- The next station is…
- Tomix N Gauge Track and Japanese N Gauge Trains
- TT Forums (Transport Tycoon Deluxe)
- 名鉄尾西線の貨物列車 (Nagoya: Meitetsu Freight)
- 日本型Nゲージ DCC改造例のご紹介 (Okiraku DCC)
- 泰 茅 轍 道 (Taichi Railway)
- 箱庭登山鉄道製作記 (Hakone-Tozan Layout Blog)
Archive
- July 2026
- May 2026
- April 2026
- March 2026
- February 2026
- January 2026
- November 2025
- October 2025
- September 2025
- August 2025
- July 2025
- June 2025
- February 2025
- January 2025
- November 2024
- September 2024
- August 2024
- July 2024
- June 2024
- May 2024
- April 2024
- March 2024
- February 2024
- December 2023
- October 2023
- September 2023
- August 2023
- July 2023
- June 2023
- May 2023
- April 2023
- March 2023
- December 2022
- November 2022
- October 2022
- April 2022
- March 2022
- February 2022
- January 2022
- December 2021
- November 2021
- September 2021
- August 2021
- July 2021
- May 2021
- March 2021
- February 2021
- January 2021
- October 2020
- September 2020
- August 2020
- July 2020
- June 2020
- May 2020
- April 2020
- March 2020
- January 2020
- December 2019
- November 2019
- October 2019
- September 2019
- August 2019
- July 2019
- June 2019
- April 2019
- March 2019
- February 2019
- January 2019
- December 2018
- November 2018
- October 2018
- September 2018
- August 2018
- July 2018
- June 2018
- May 2018
- April 2018
- March 2018
- January 2018
- December 2017
- November 2017
- October 2017
- September 2017
- August 2017
- July 2017
- June 2017
- May 2017
- March 2017
- February 2017
- January 2017
- December 2016
- November 2016
- October 2016
- September 2016
- August 2016
- July 2016
- June 2016
- May 2016
- February 2016
- November 2015
- October 2015
- September 2015
- August 2015
- July 2015
- June 2015
- May 2015
- April 2015
- March 2015
- February 2015
- January 2015
- December 2014
- November 2014
- August 2014
- July 2014
- May 2014
- April 2014
- March 2014
- December 2013
- November 2013
- October 2013
- June 2013
- August 2012
- April 2012
- March 2012
- February 2012
- November 2011
- October 2011
- September 2011
- July 2011
- June 2011
- May 2011
- April 2011
- March 2011
- February 2011
- January 2011
- December 2010
- November 2010
- October 2010
- September 2010
- August 2010
- June 2010
- May 2010
- April 2010
- March 2010
- February 2010
- January 2010
- December 2009
- November 2009
- October 2009
- August 2009
- January 2009
- December 2008
- November 2008
- October 2008
- September 2008
- July 2008