


 Melbourne BG SCS Train Timetable


Creating a Shrine Torii Entrance
After checking out more of the work by tanaka_ace on the Tounosawa Blog, I've decided to add a Japanese Shrine to my layout. I've extended the upper level to allow room for a kit I bought in Japan last September and have created a path back to the main town area.
As with any Shrine in Japan, the grounds are seen as sacred and insulated from the surrounding area; usually by either high walls or thick vegetation with a Torii gate for the entrance. I'll be adding the walls in soon enough, but prior to doing so I wanted to make sure I had all of the buildings and scenery effects in place.
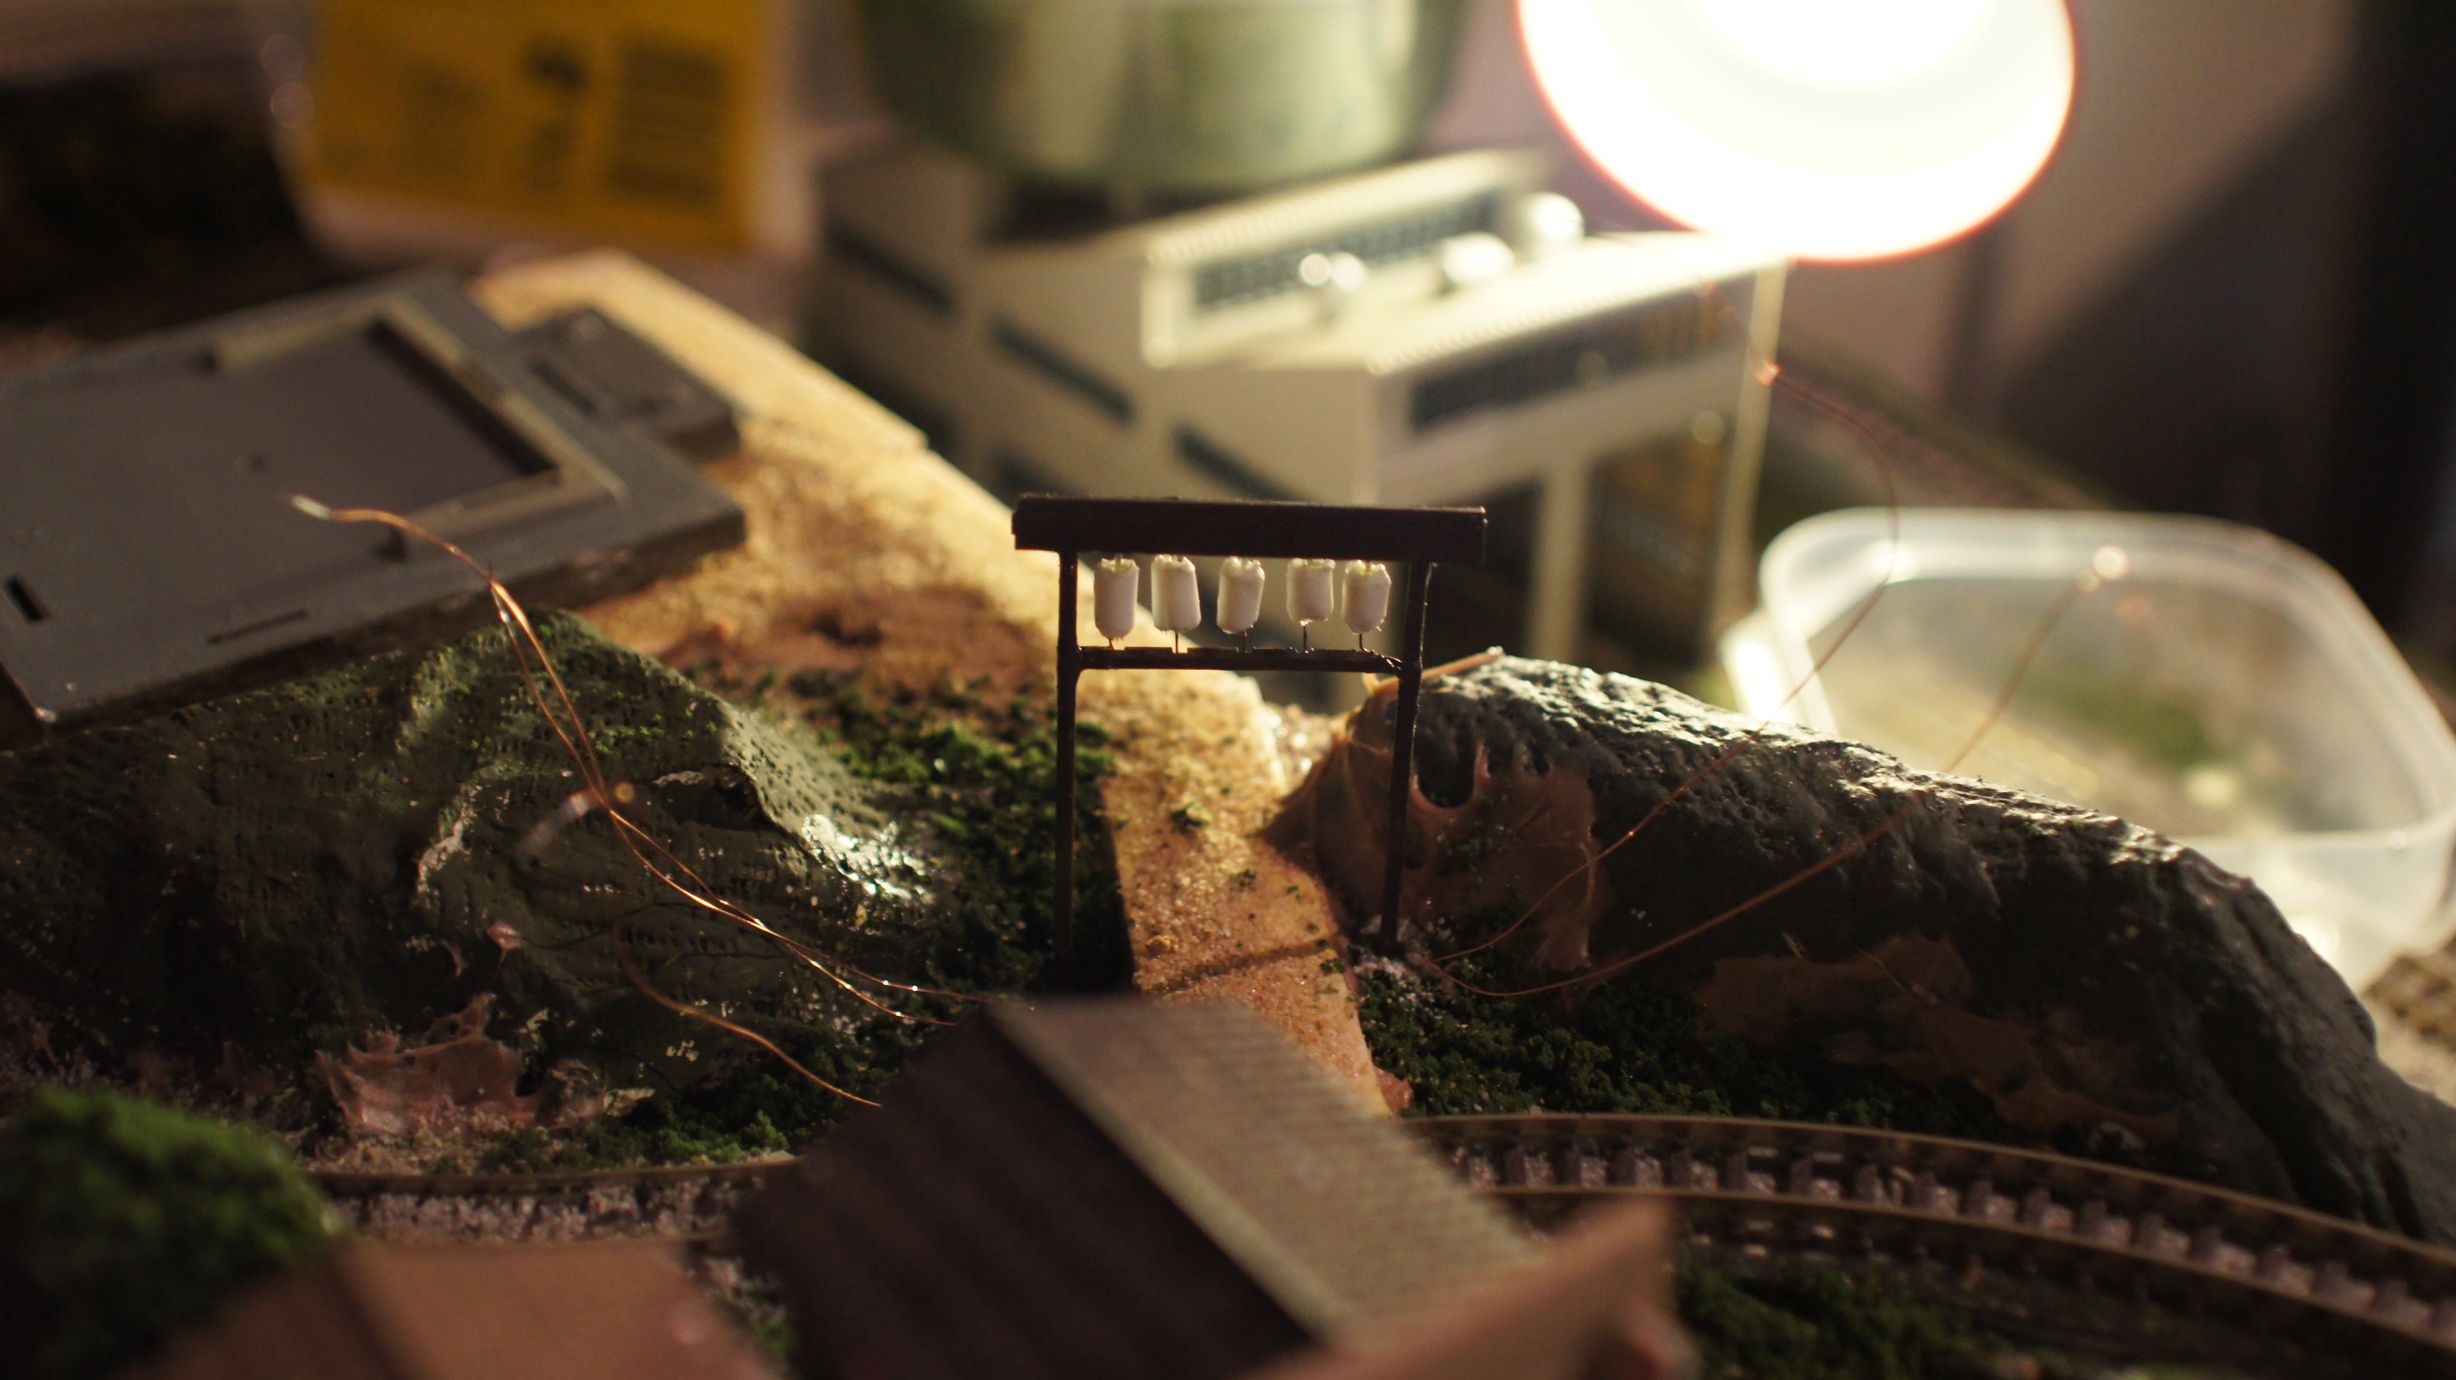
The first thing to create was the Torii gate entrance. Tanaka_ace on his Tounosawa Blog had created a very nice gate with LED lanterns added. This is all based off a real-life location at the Tounosawa Station on the Hakone Tozan Railway. He had also created a blog post showing what he based the model off.
My version
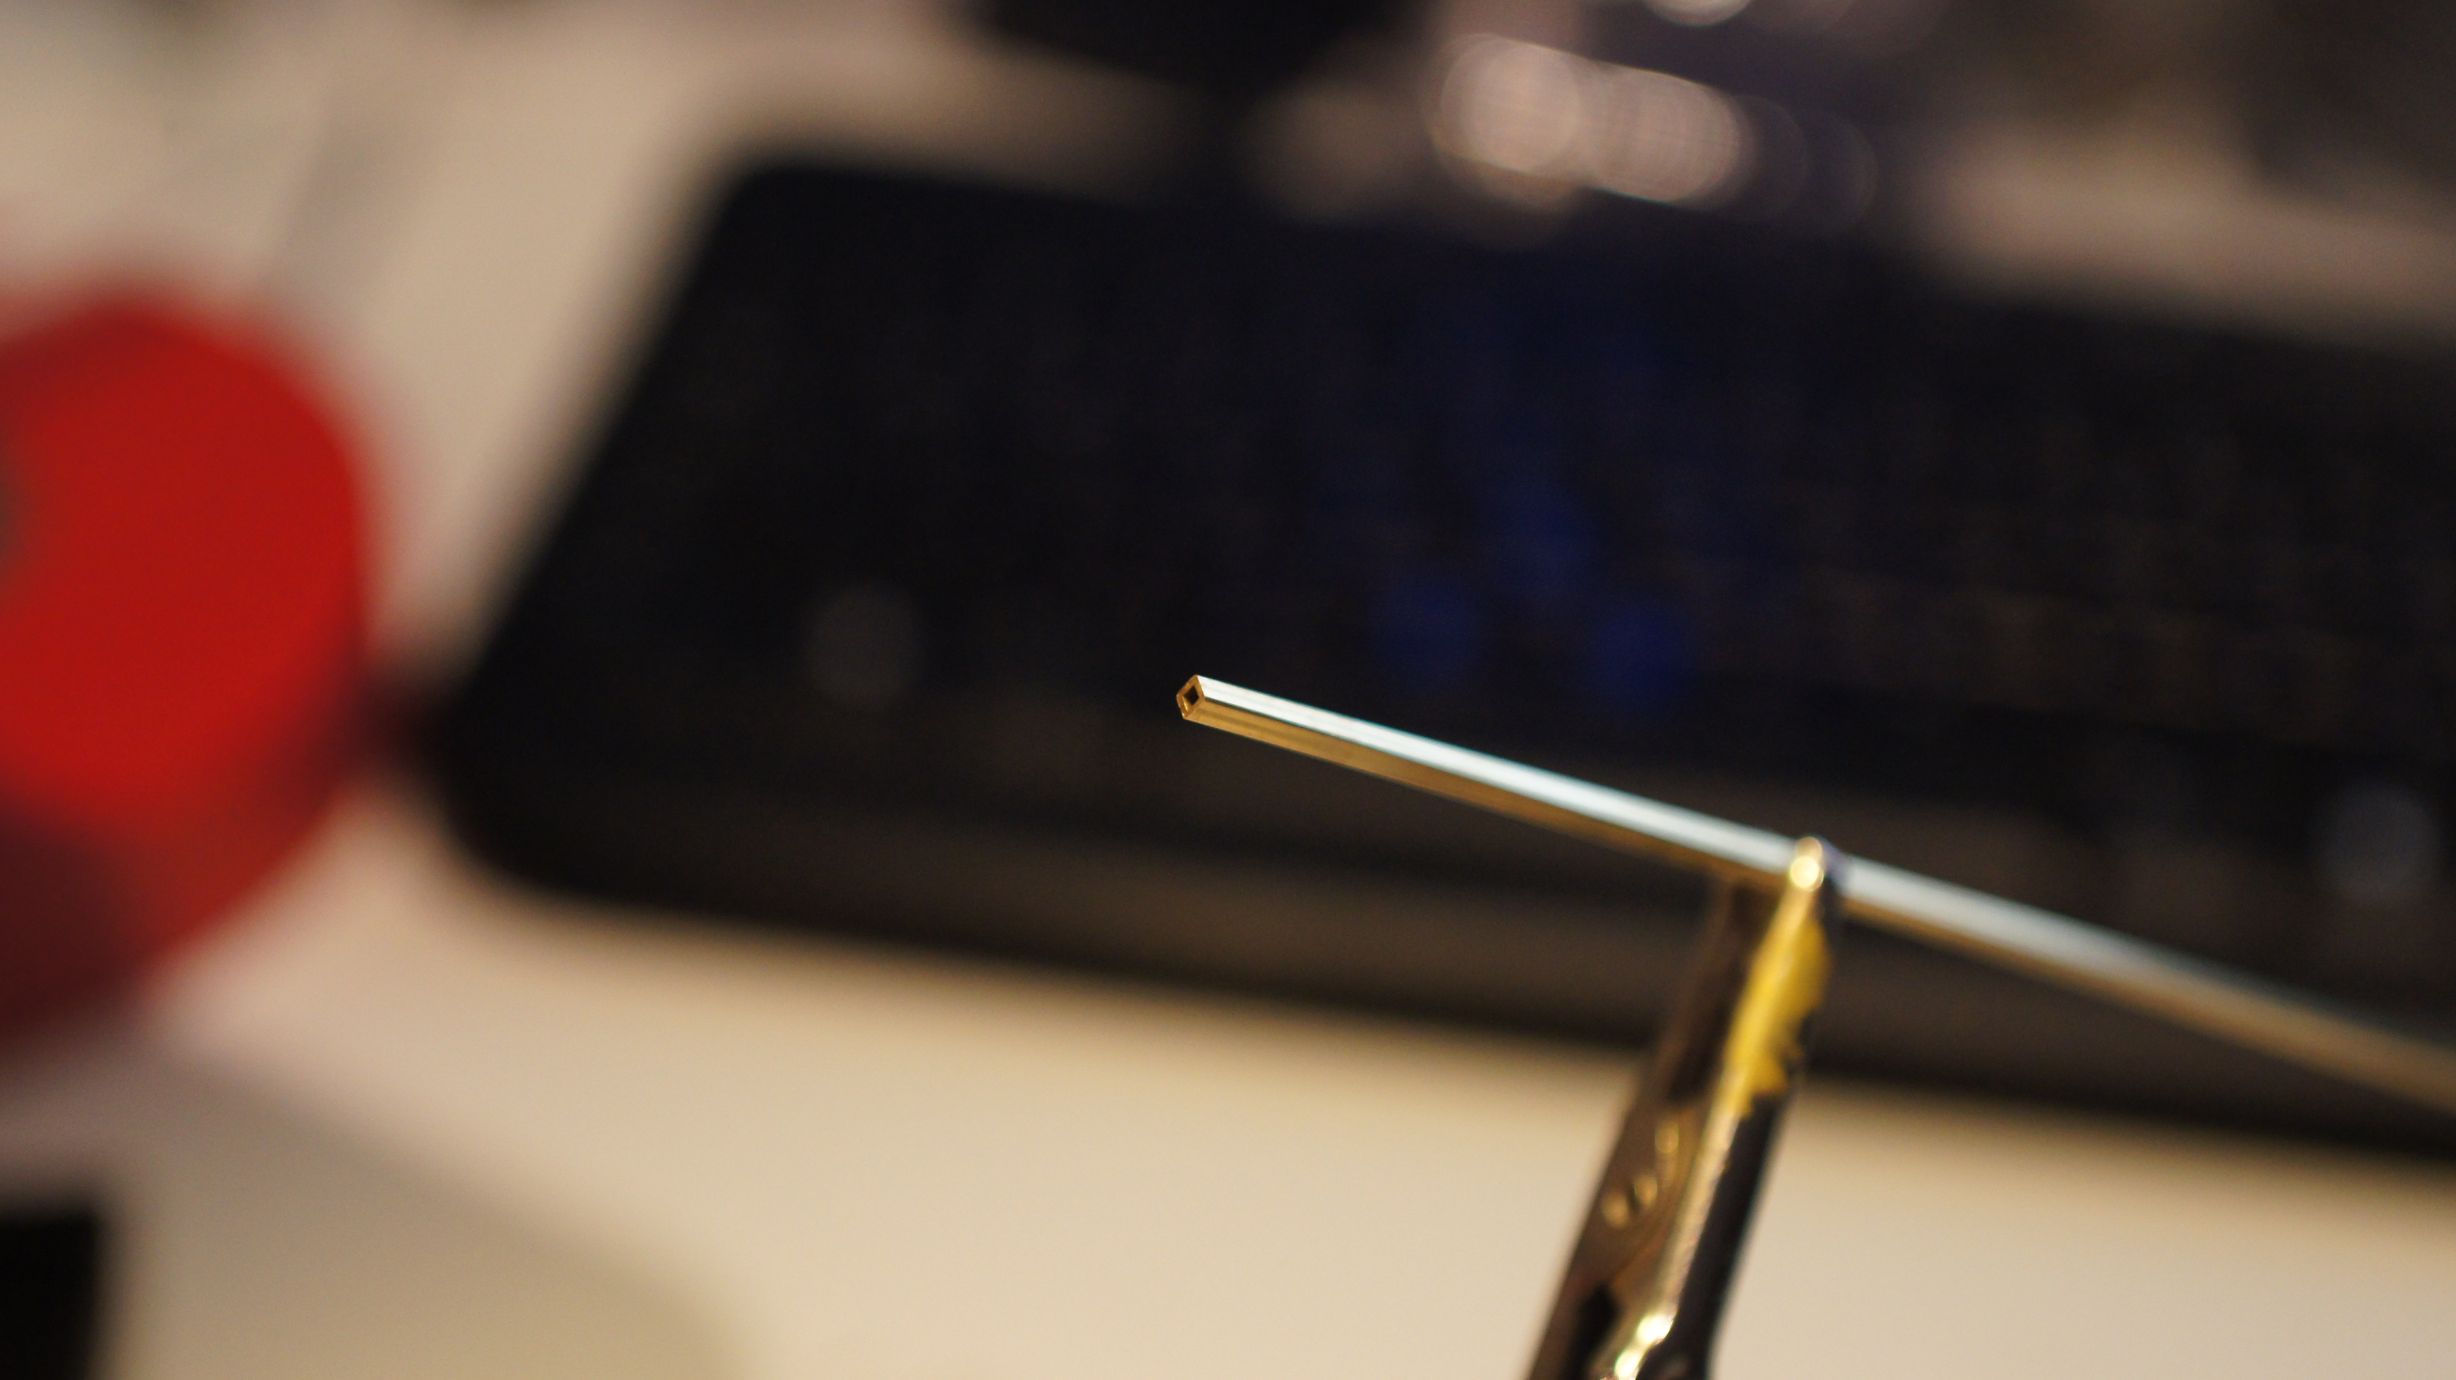
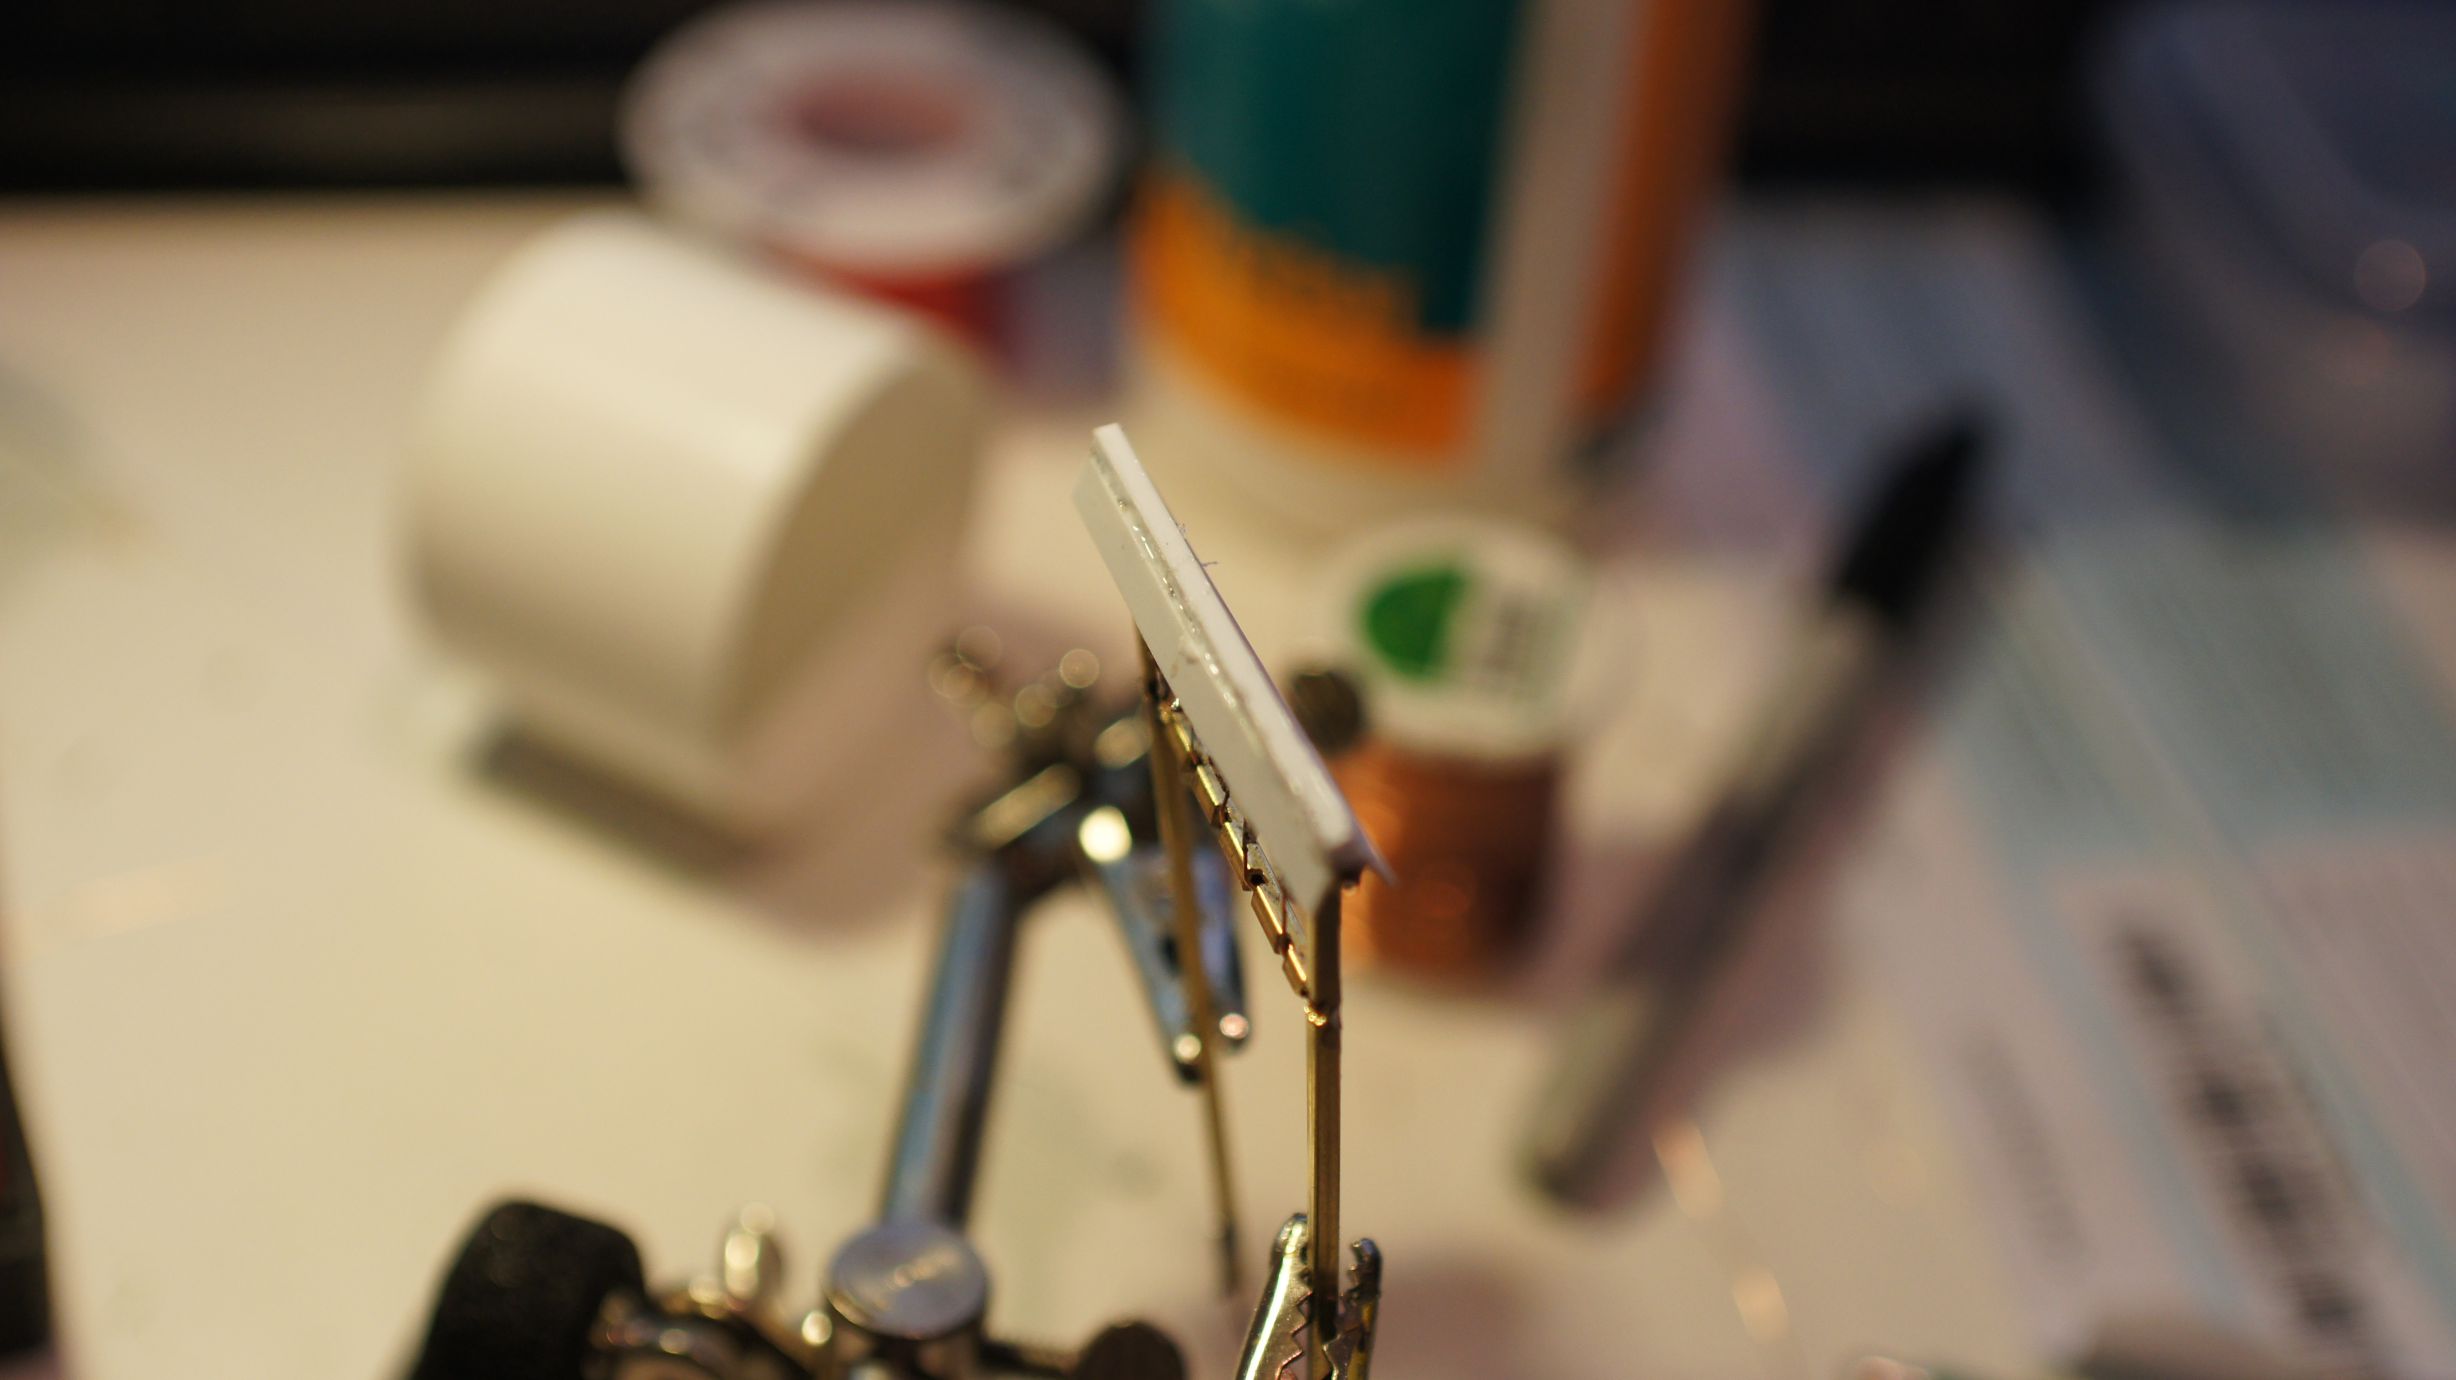
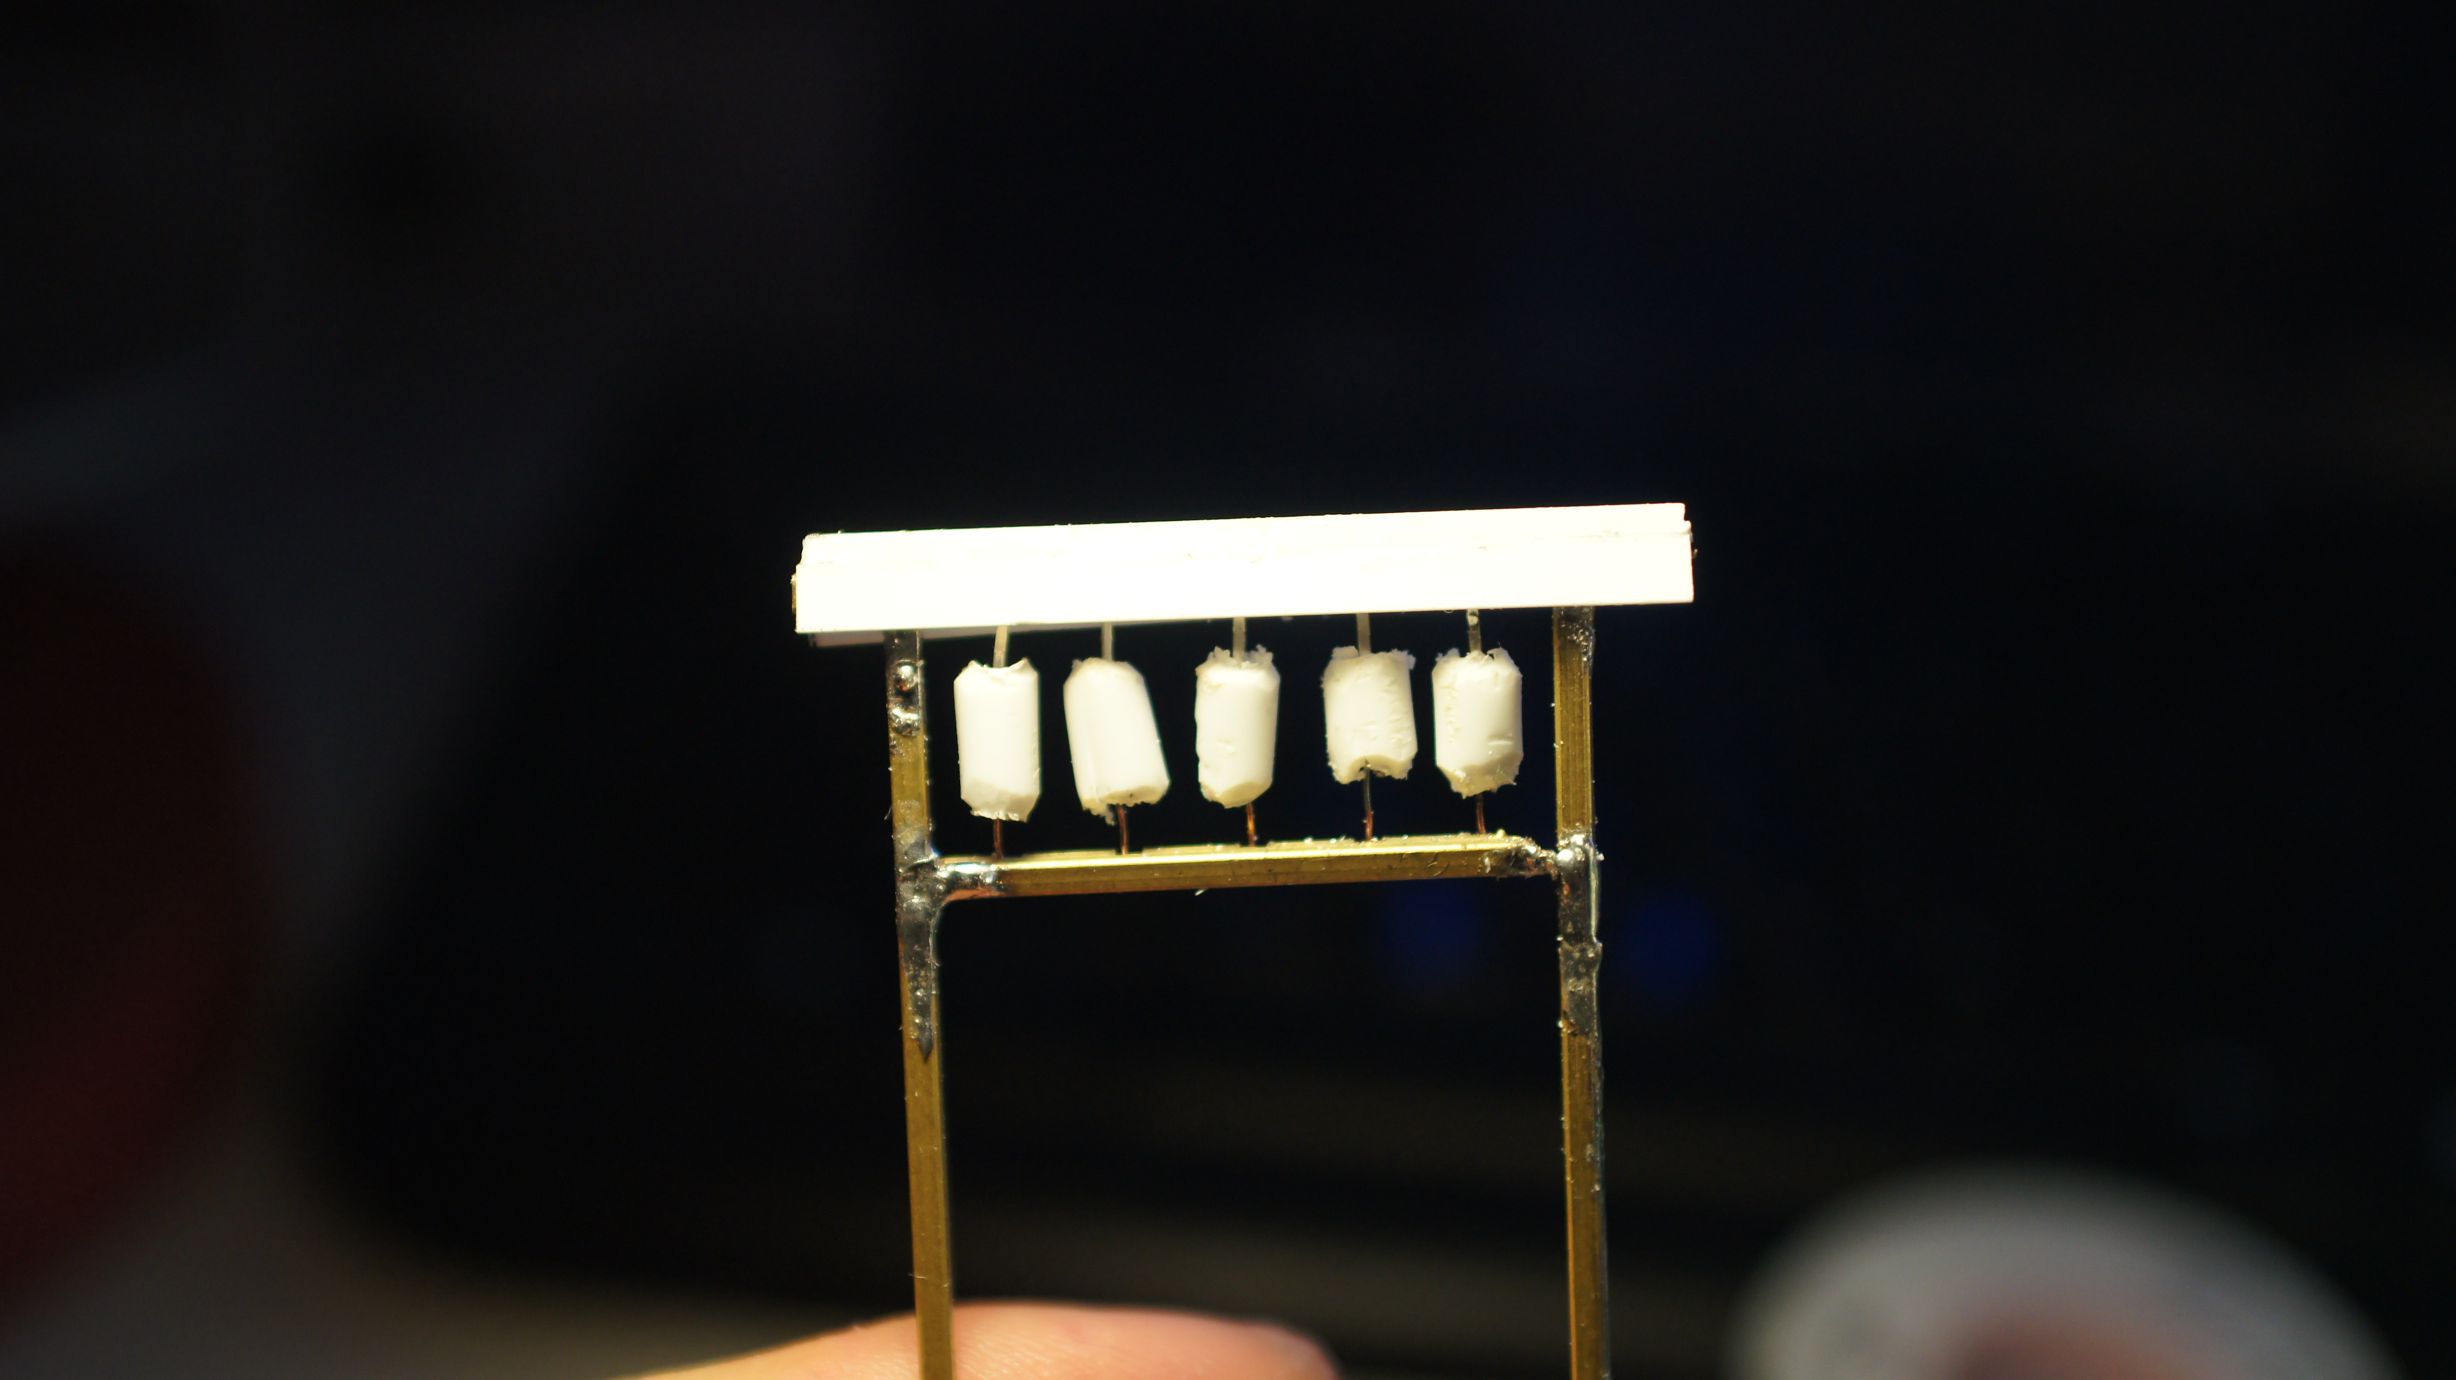
I've used the same gauge winding wire I'd used for my level crossing lights, streetlights and building lighting. With this I've also used 1/16" brass pole for the main frame of the gate because I wanted to emulate wood rather than a cylindrical concrete post this time. This also provided a little more room to squeeze the wires through. Each length needed to be cut down to size and then filed back. I used standard snips to cut the brass, a smaller saw would've been a better idea.

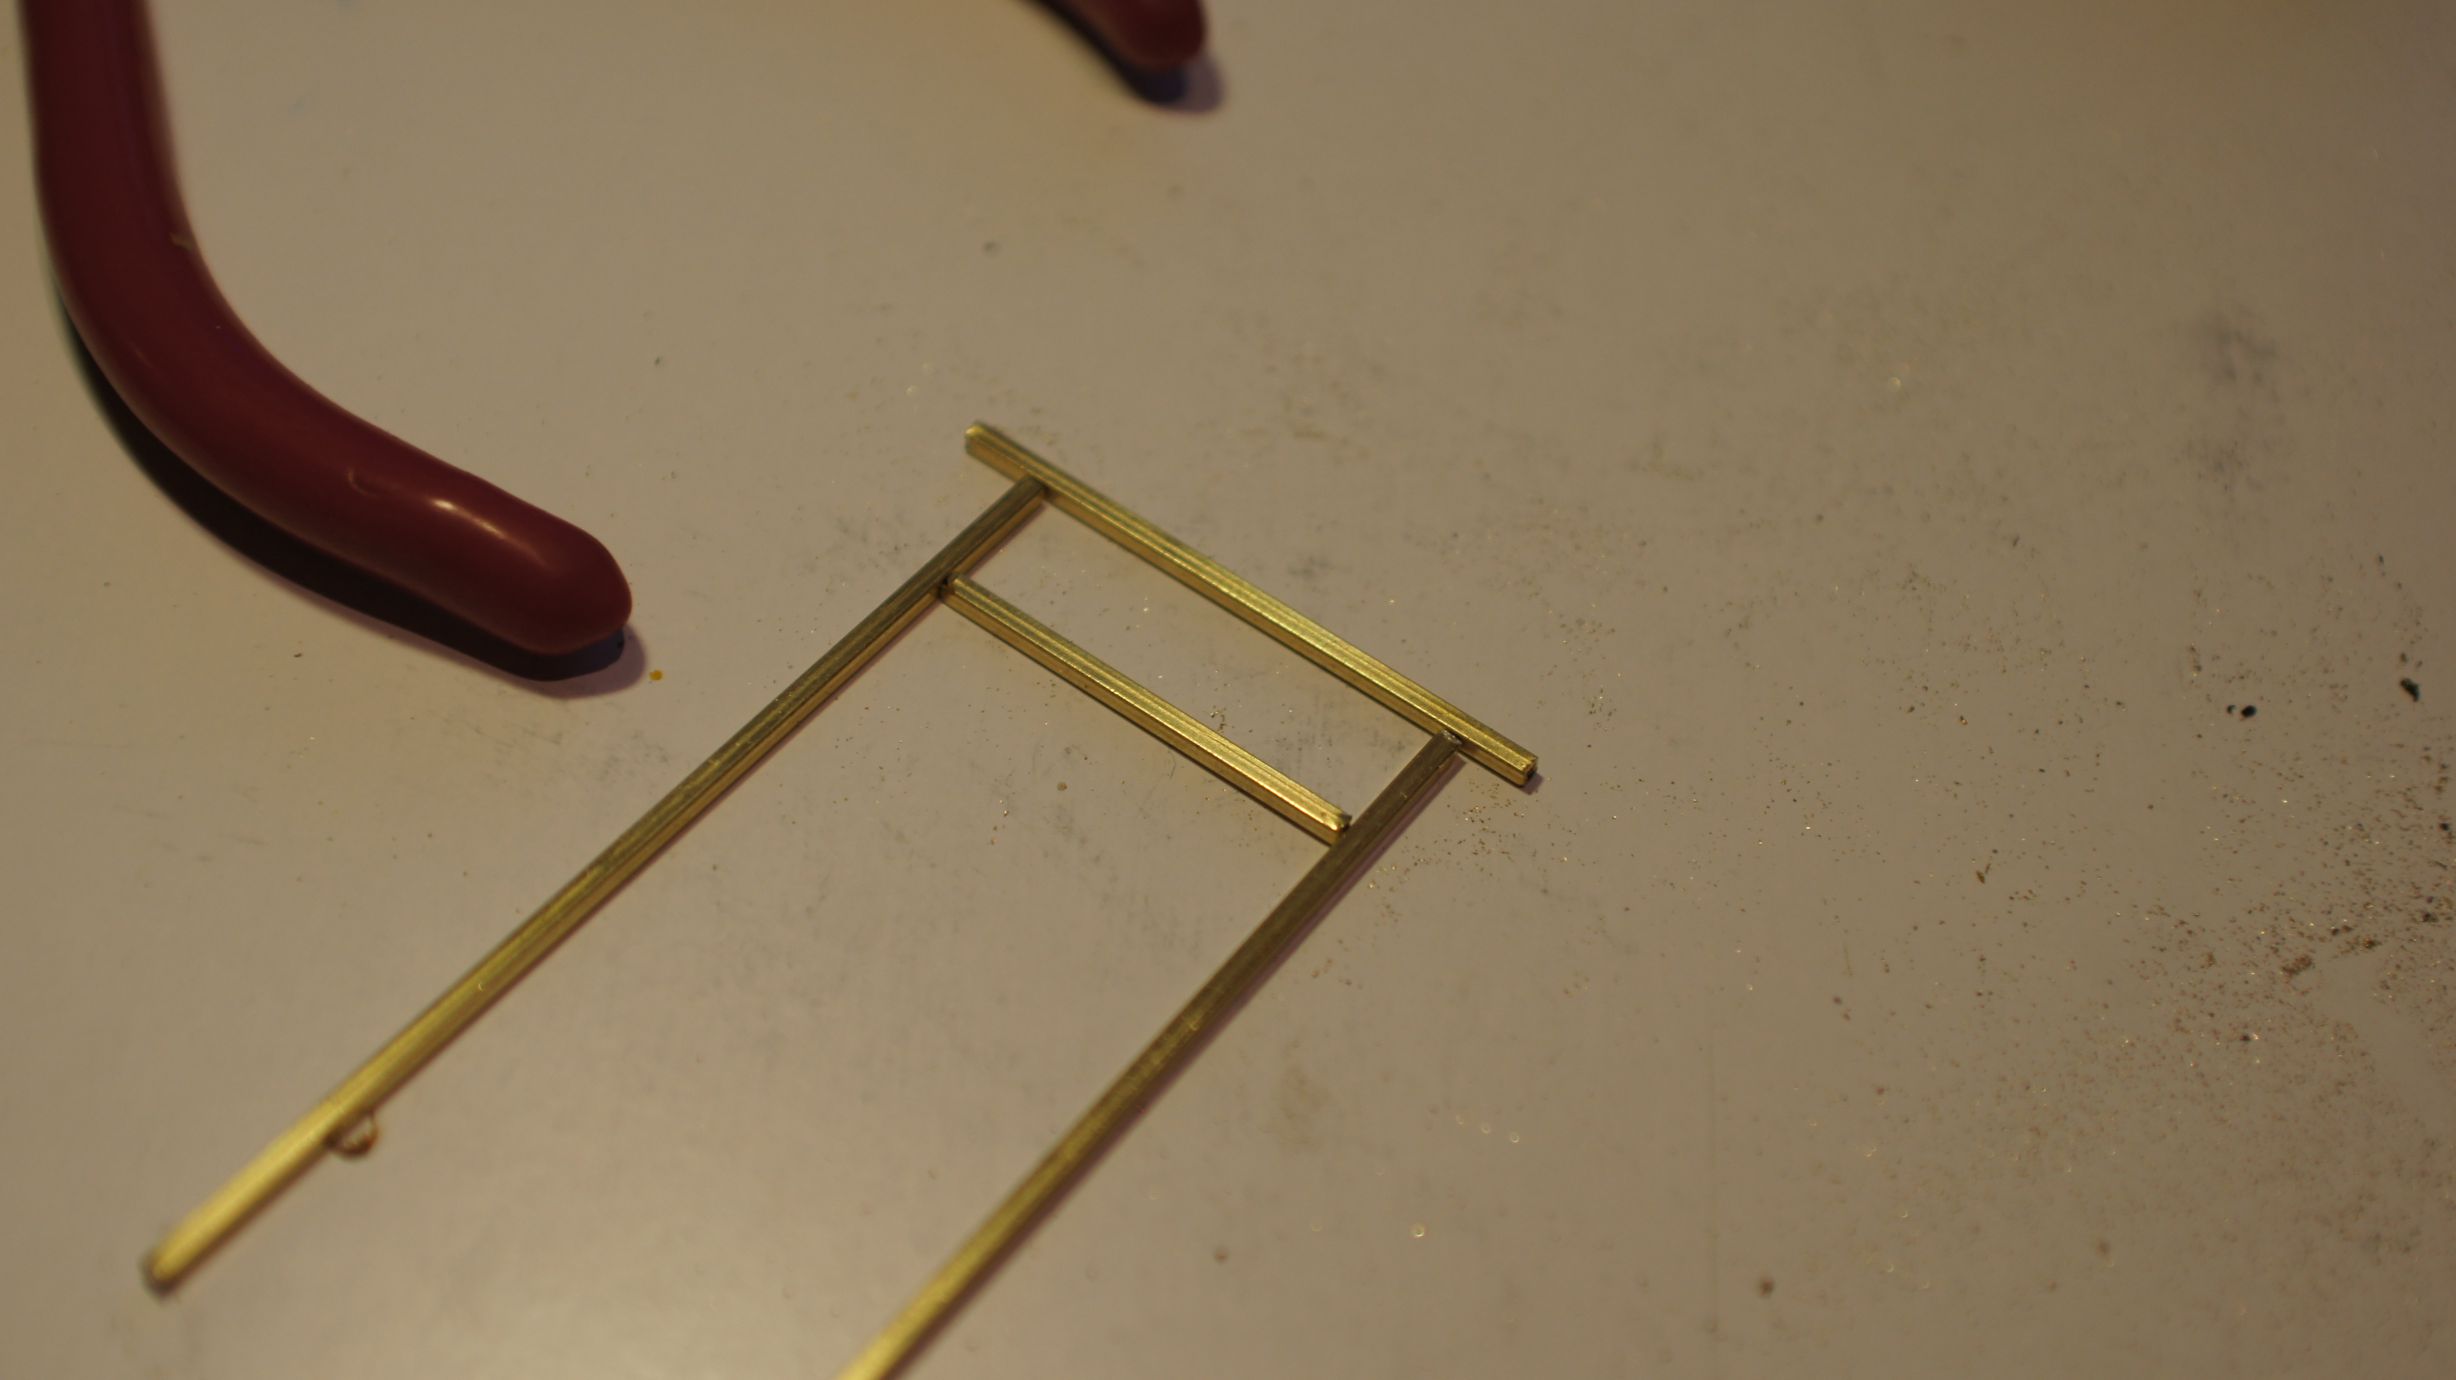
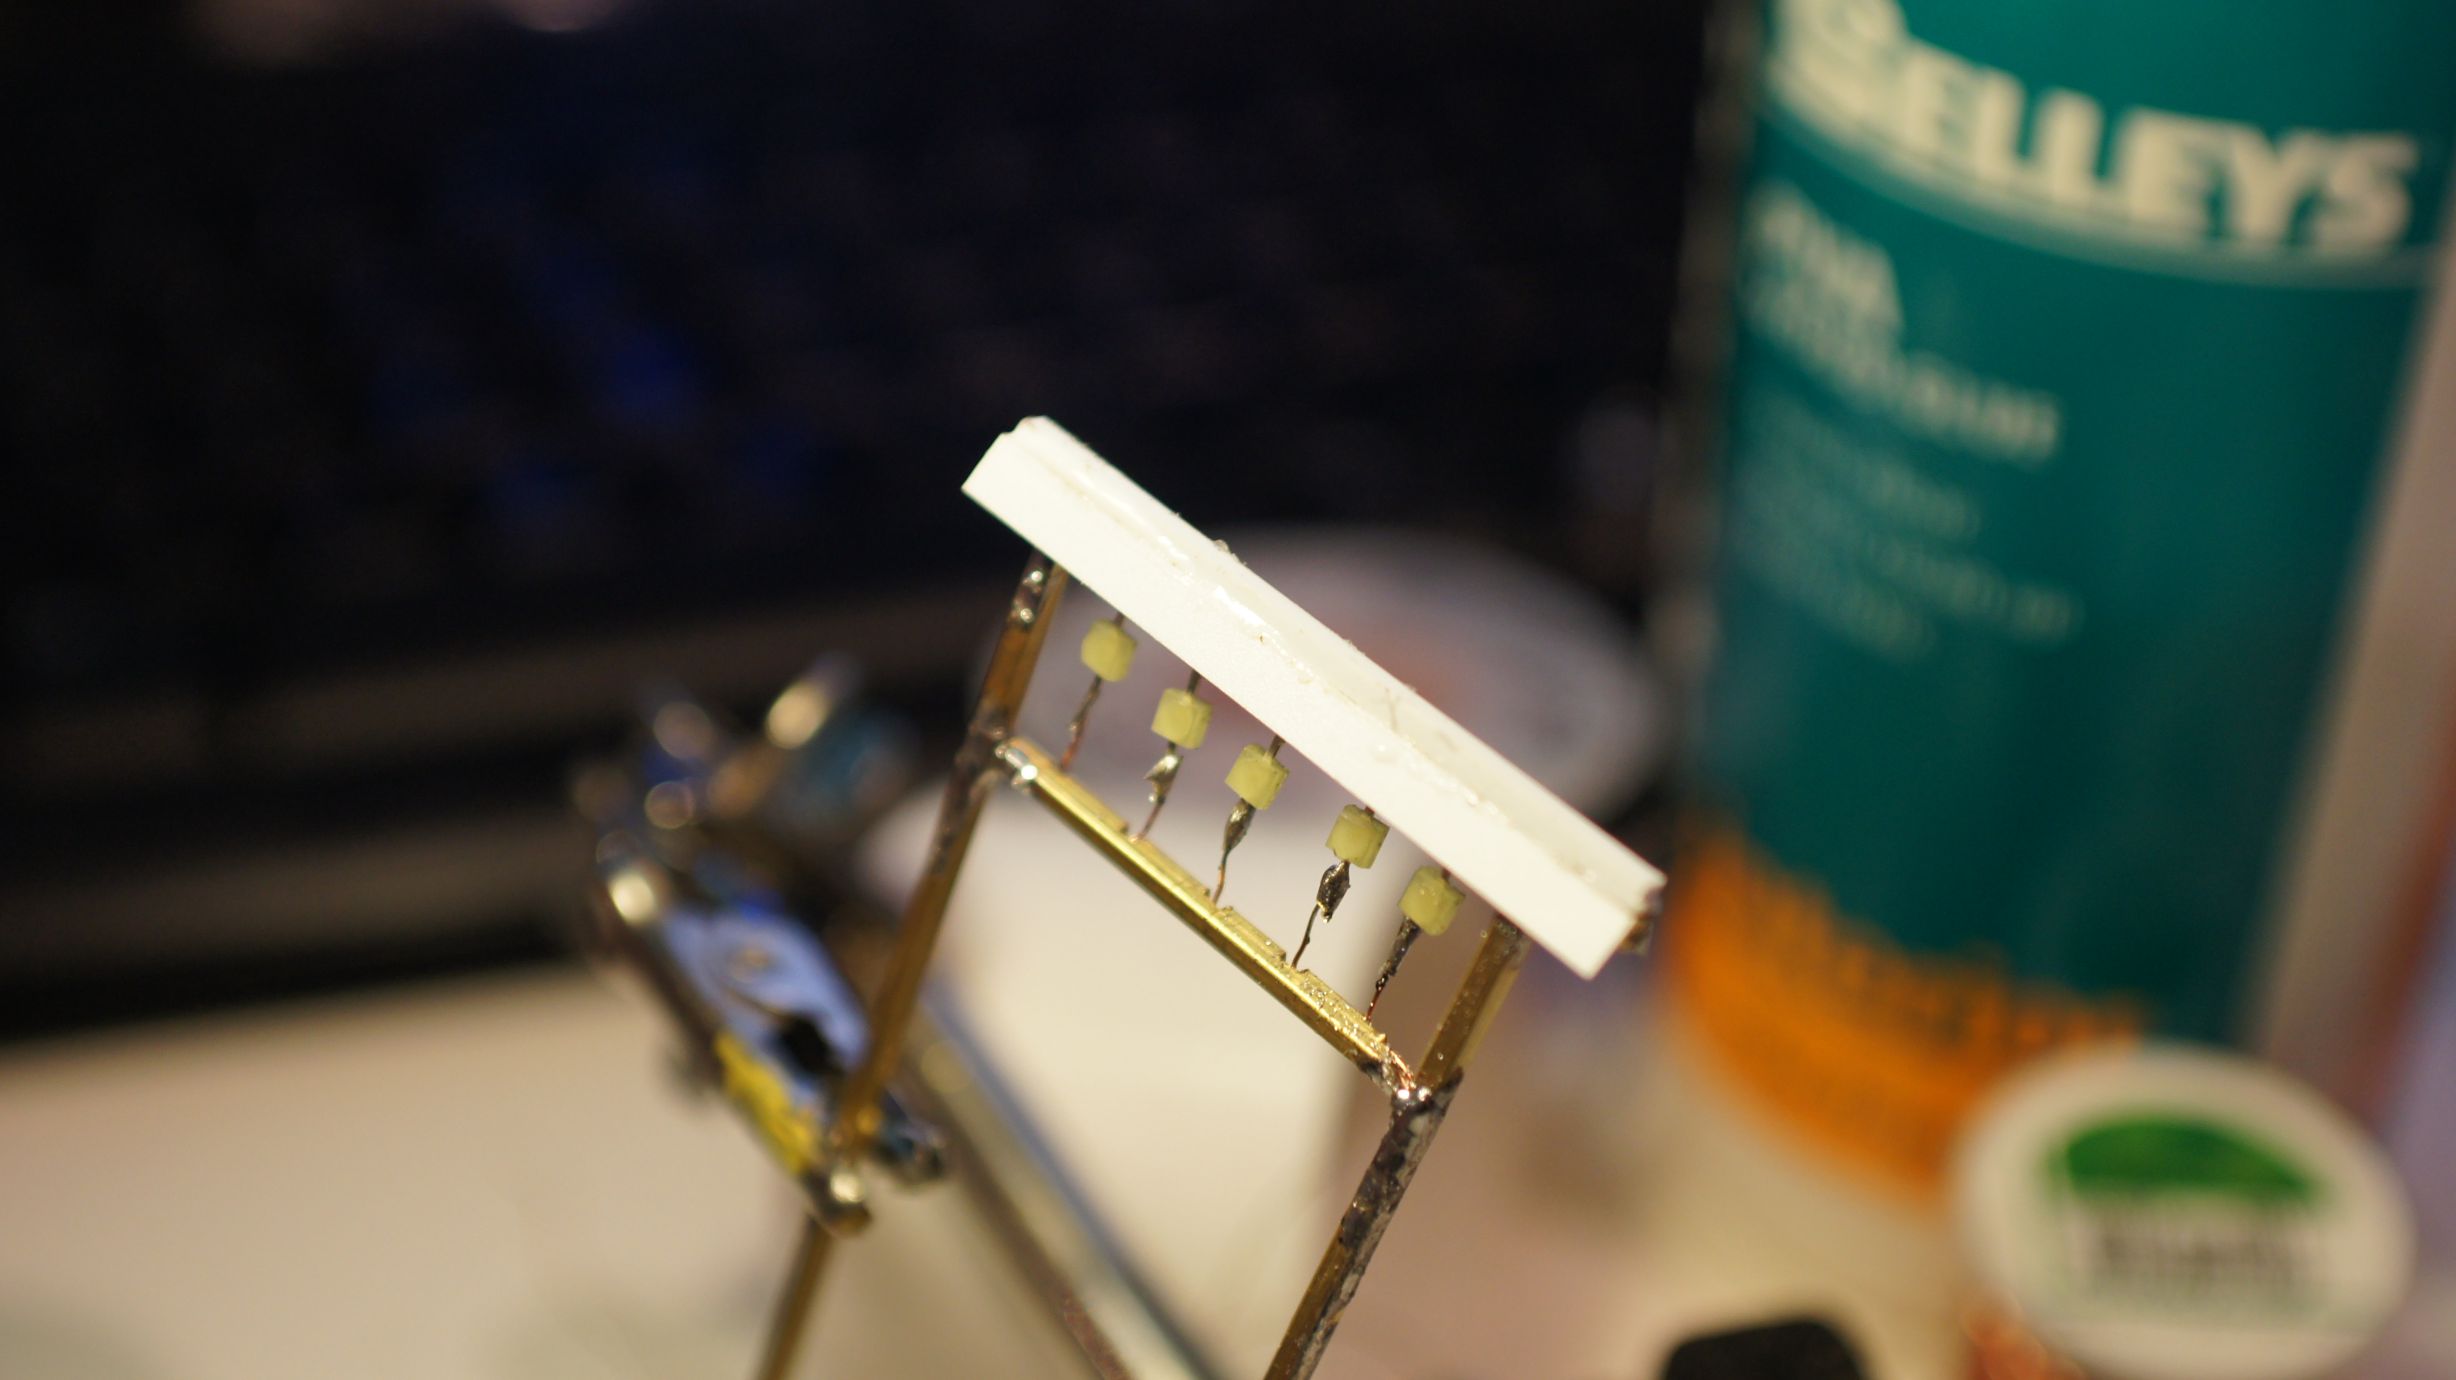
I based the size on the path that I had already created on the layout. I didn't really have a real-life prototype to work off and made a lot of it up as I went. The final size was around 50mm wide and I could fit 5 lanterns in. Below you can see the framing taking place.
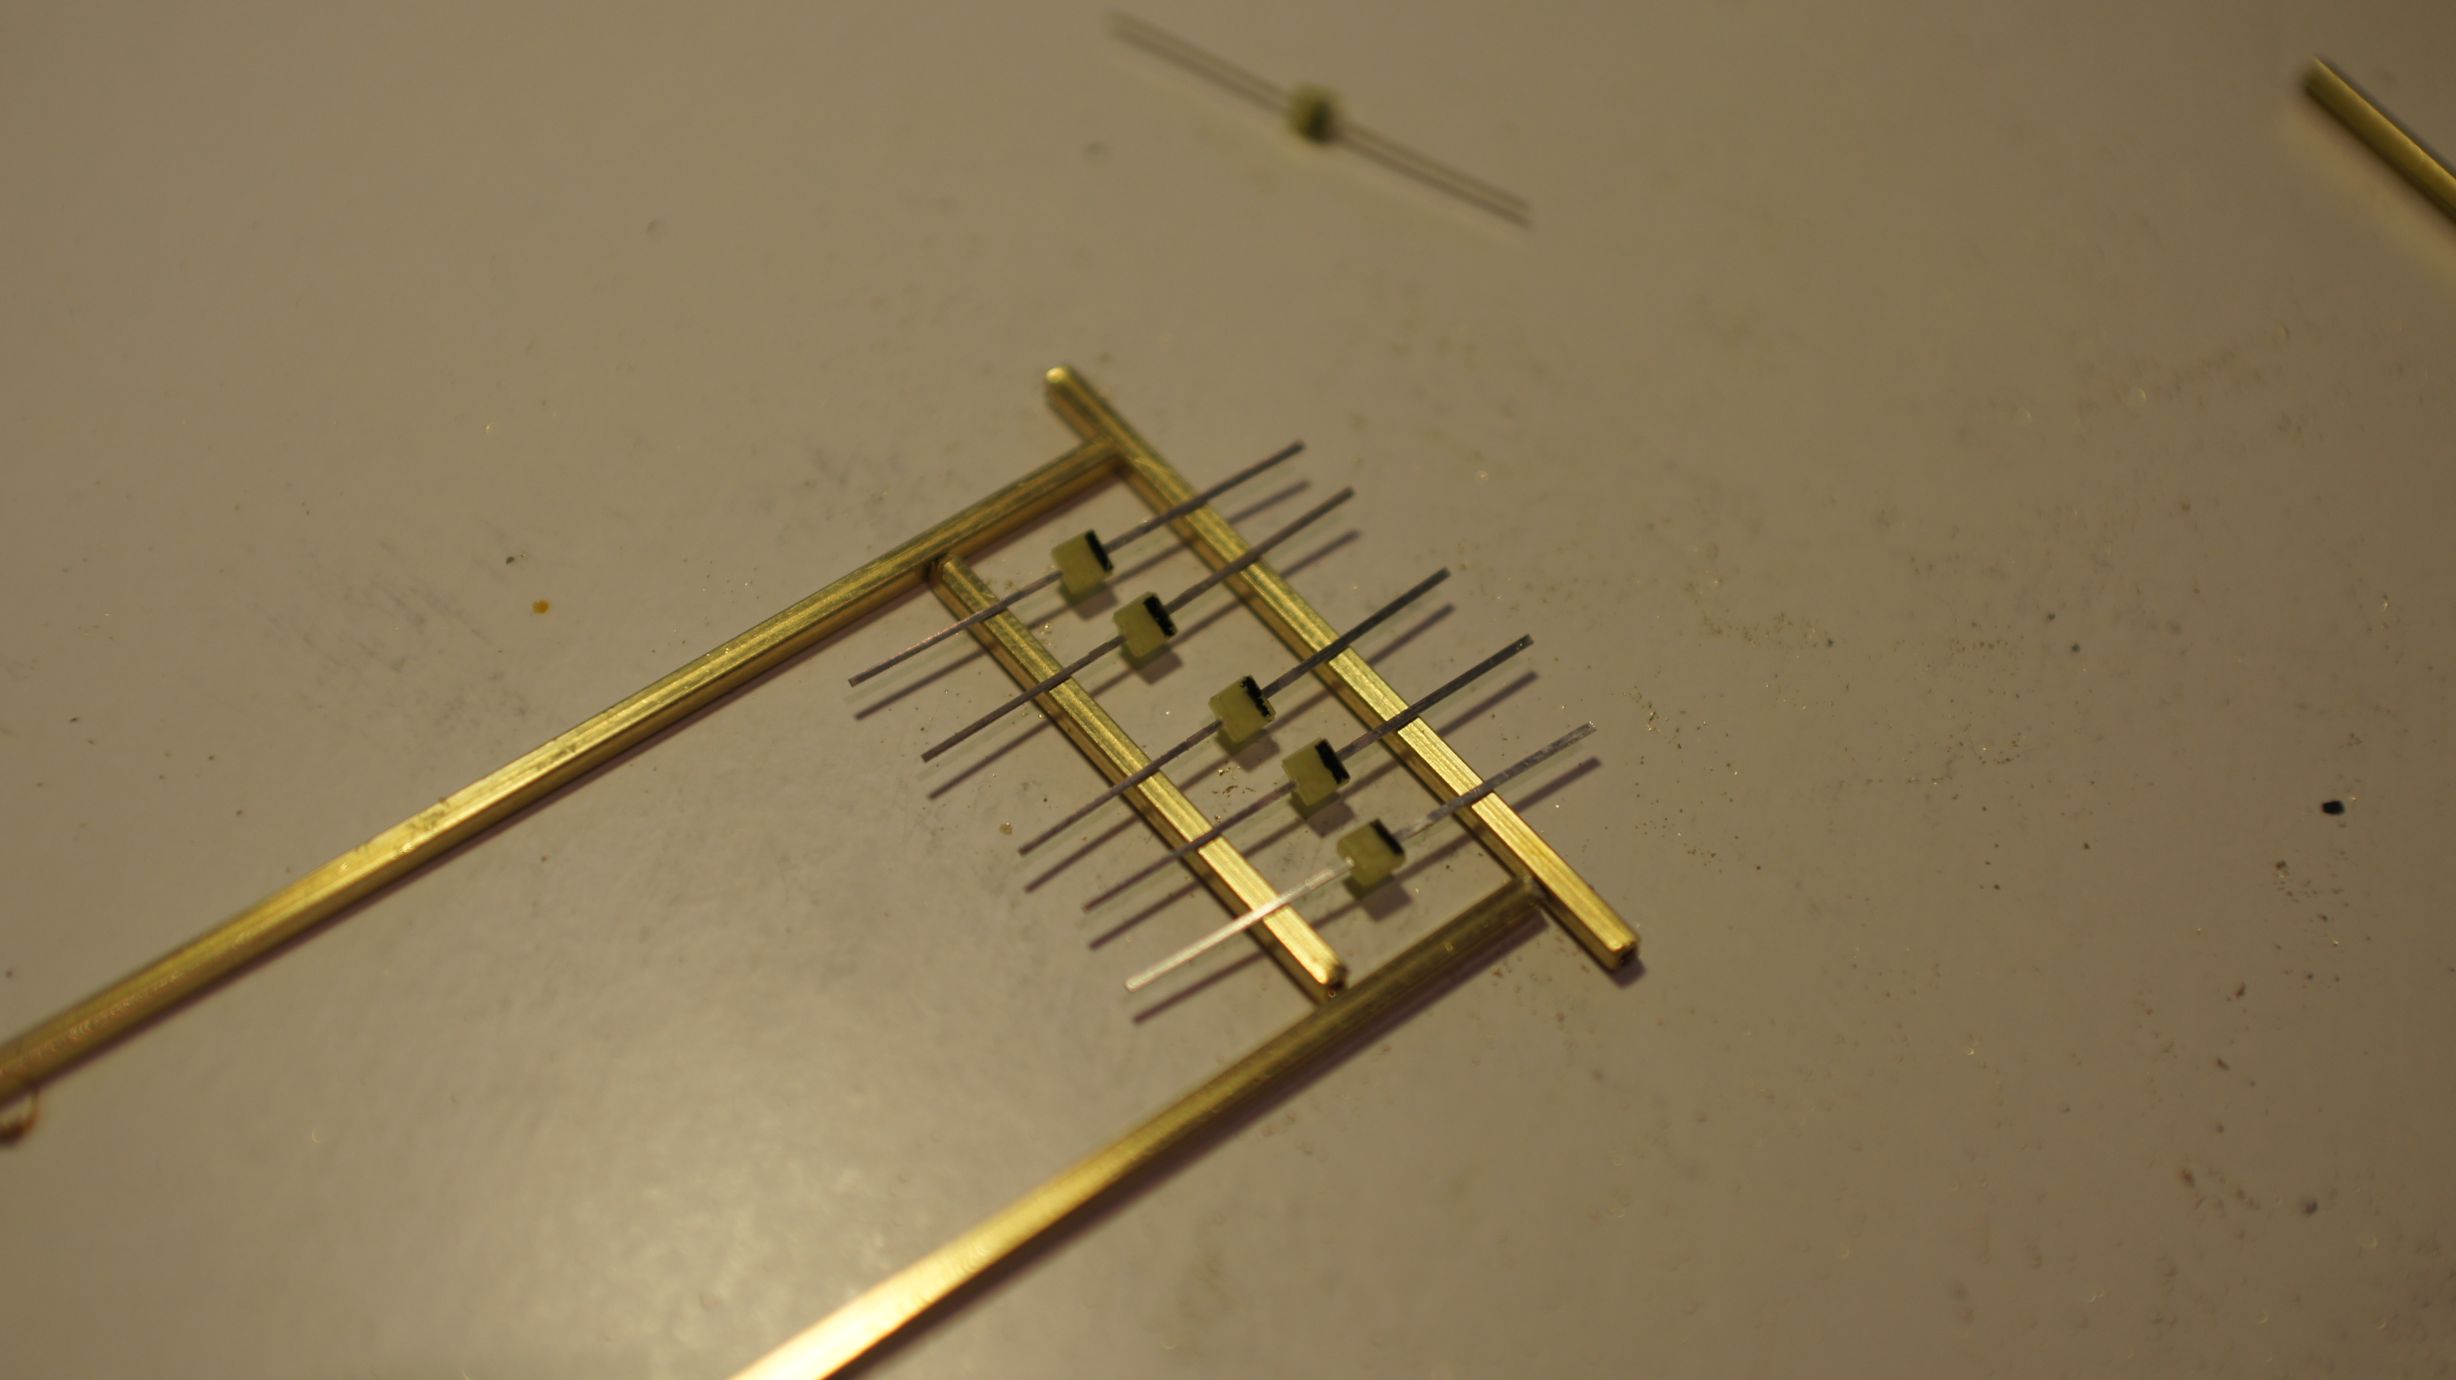

I then started cutting out the holes to feed the wire through. I used my trusty pocket-knife as the brass was quite soft. I also used a wire cut off a resistor to clean out the tubes of any metal shavings. The entrances created for the wires would have sharp edges and could scrape off the insulation on the wires, so I made the holes as big as possible.
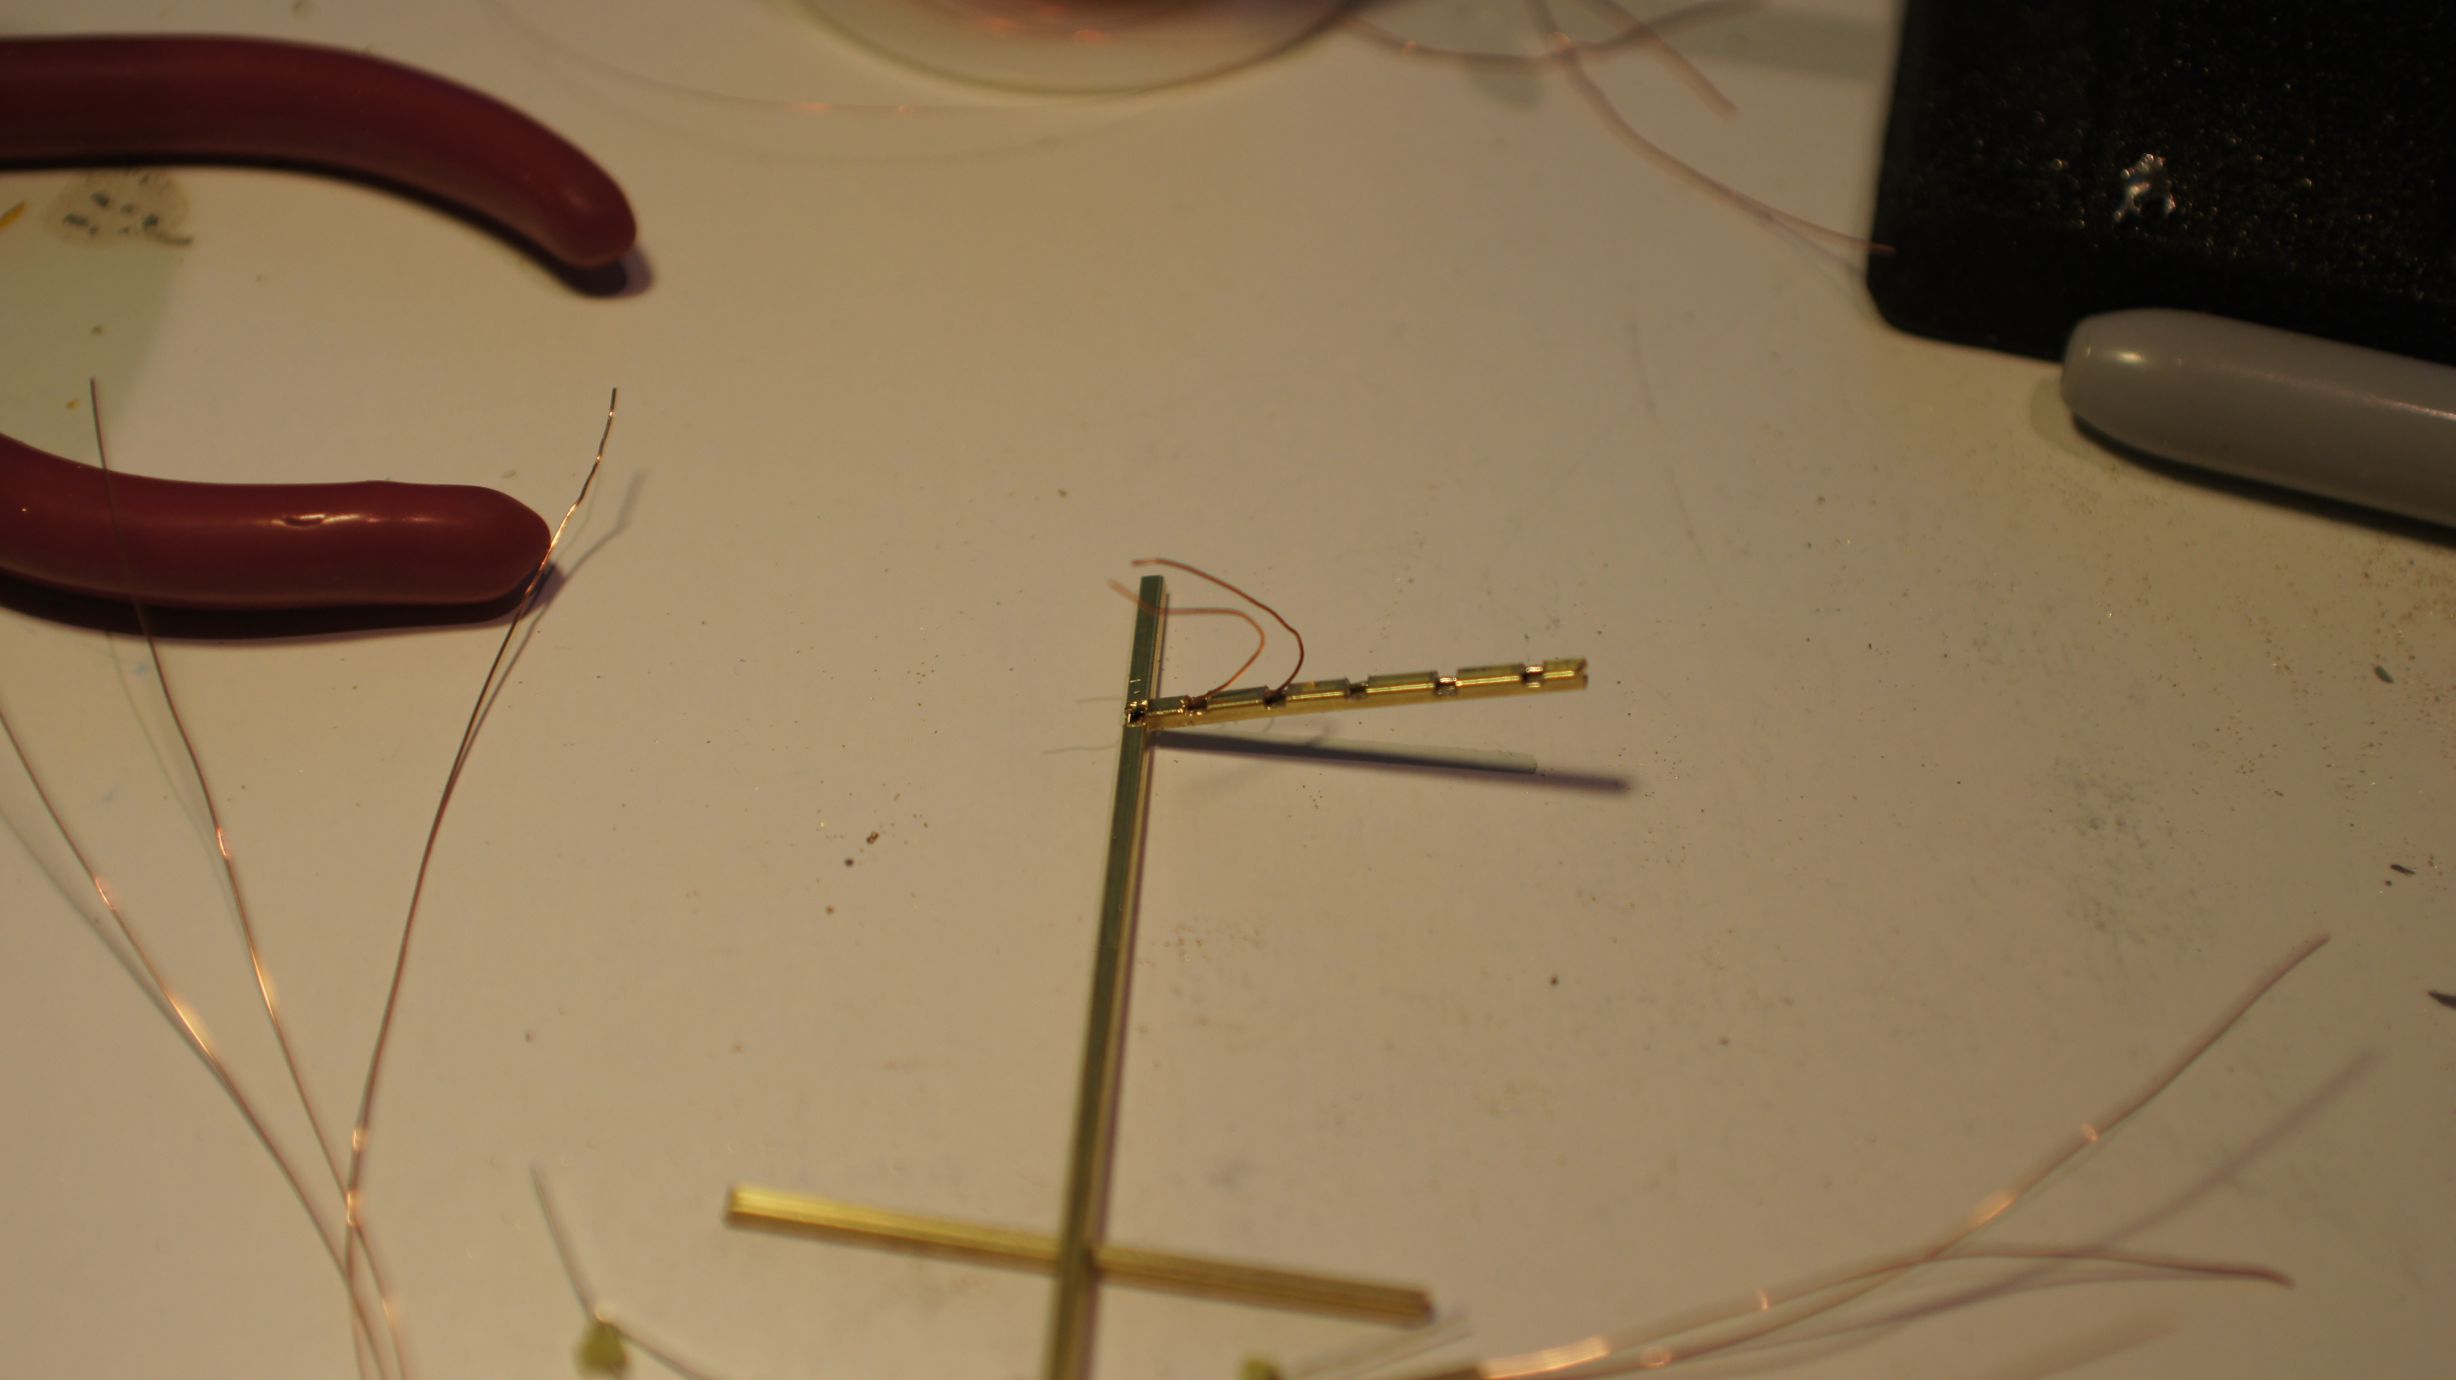
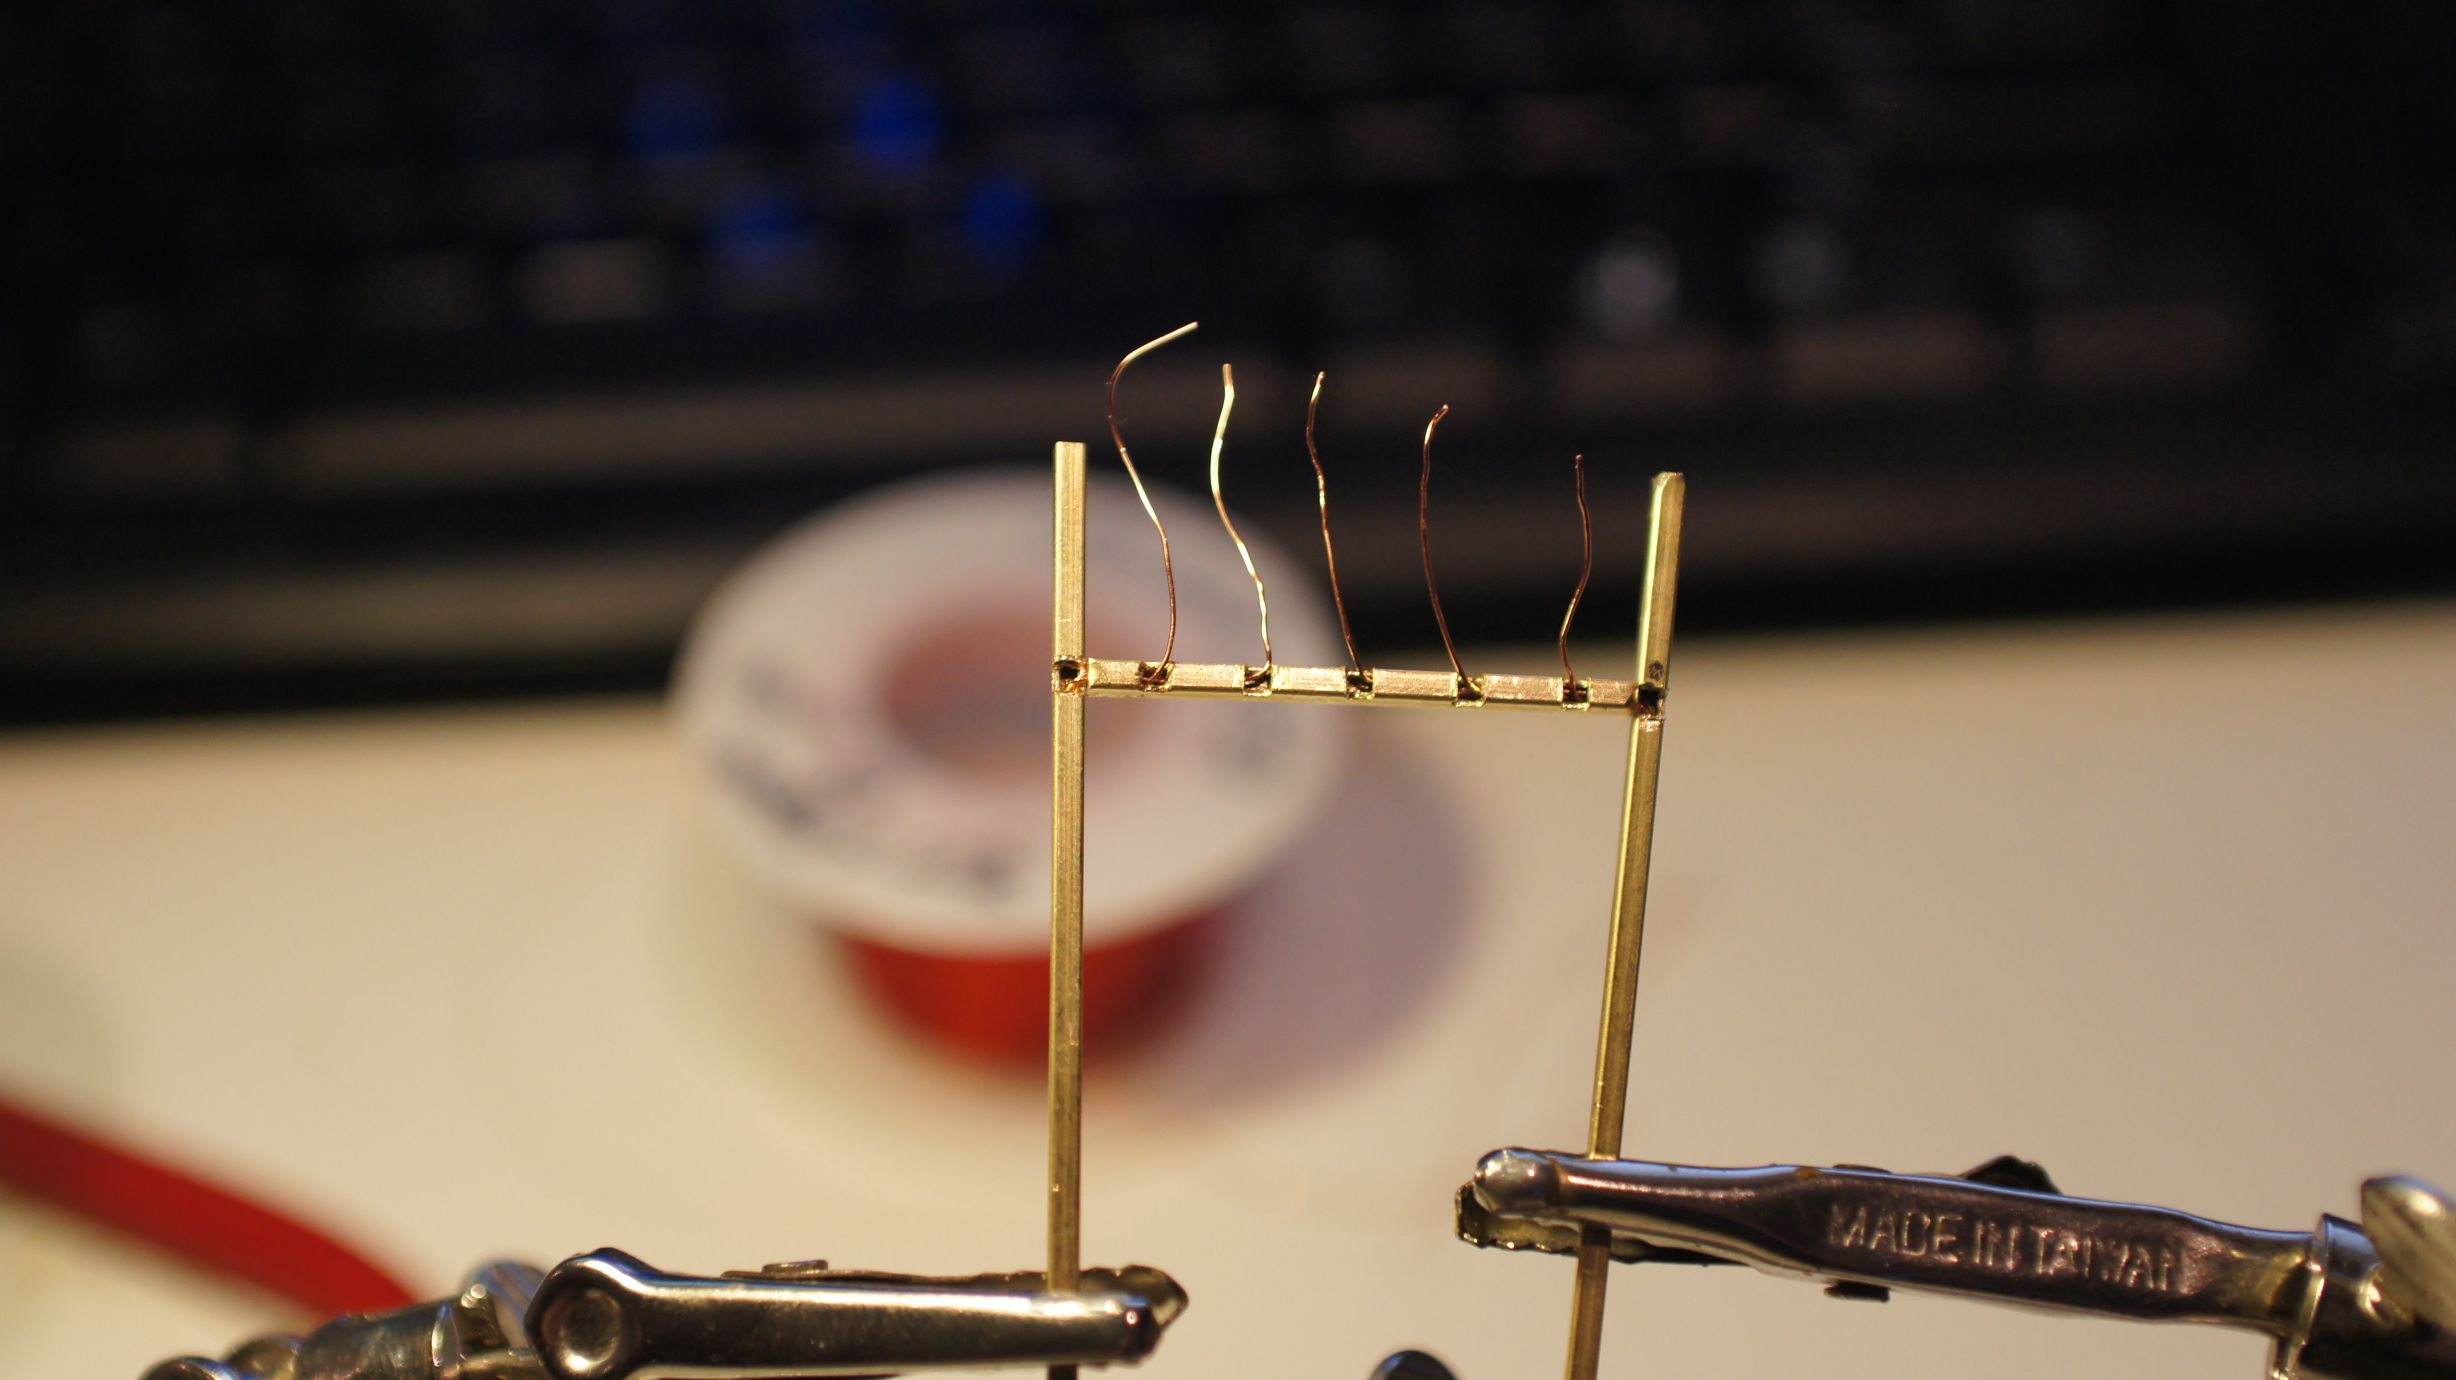
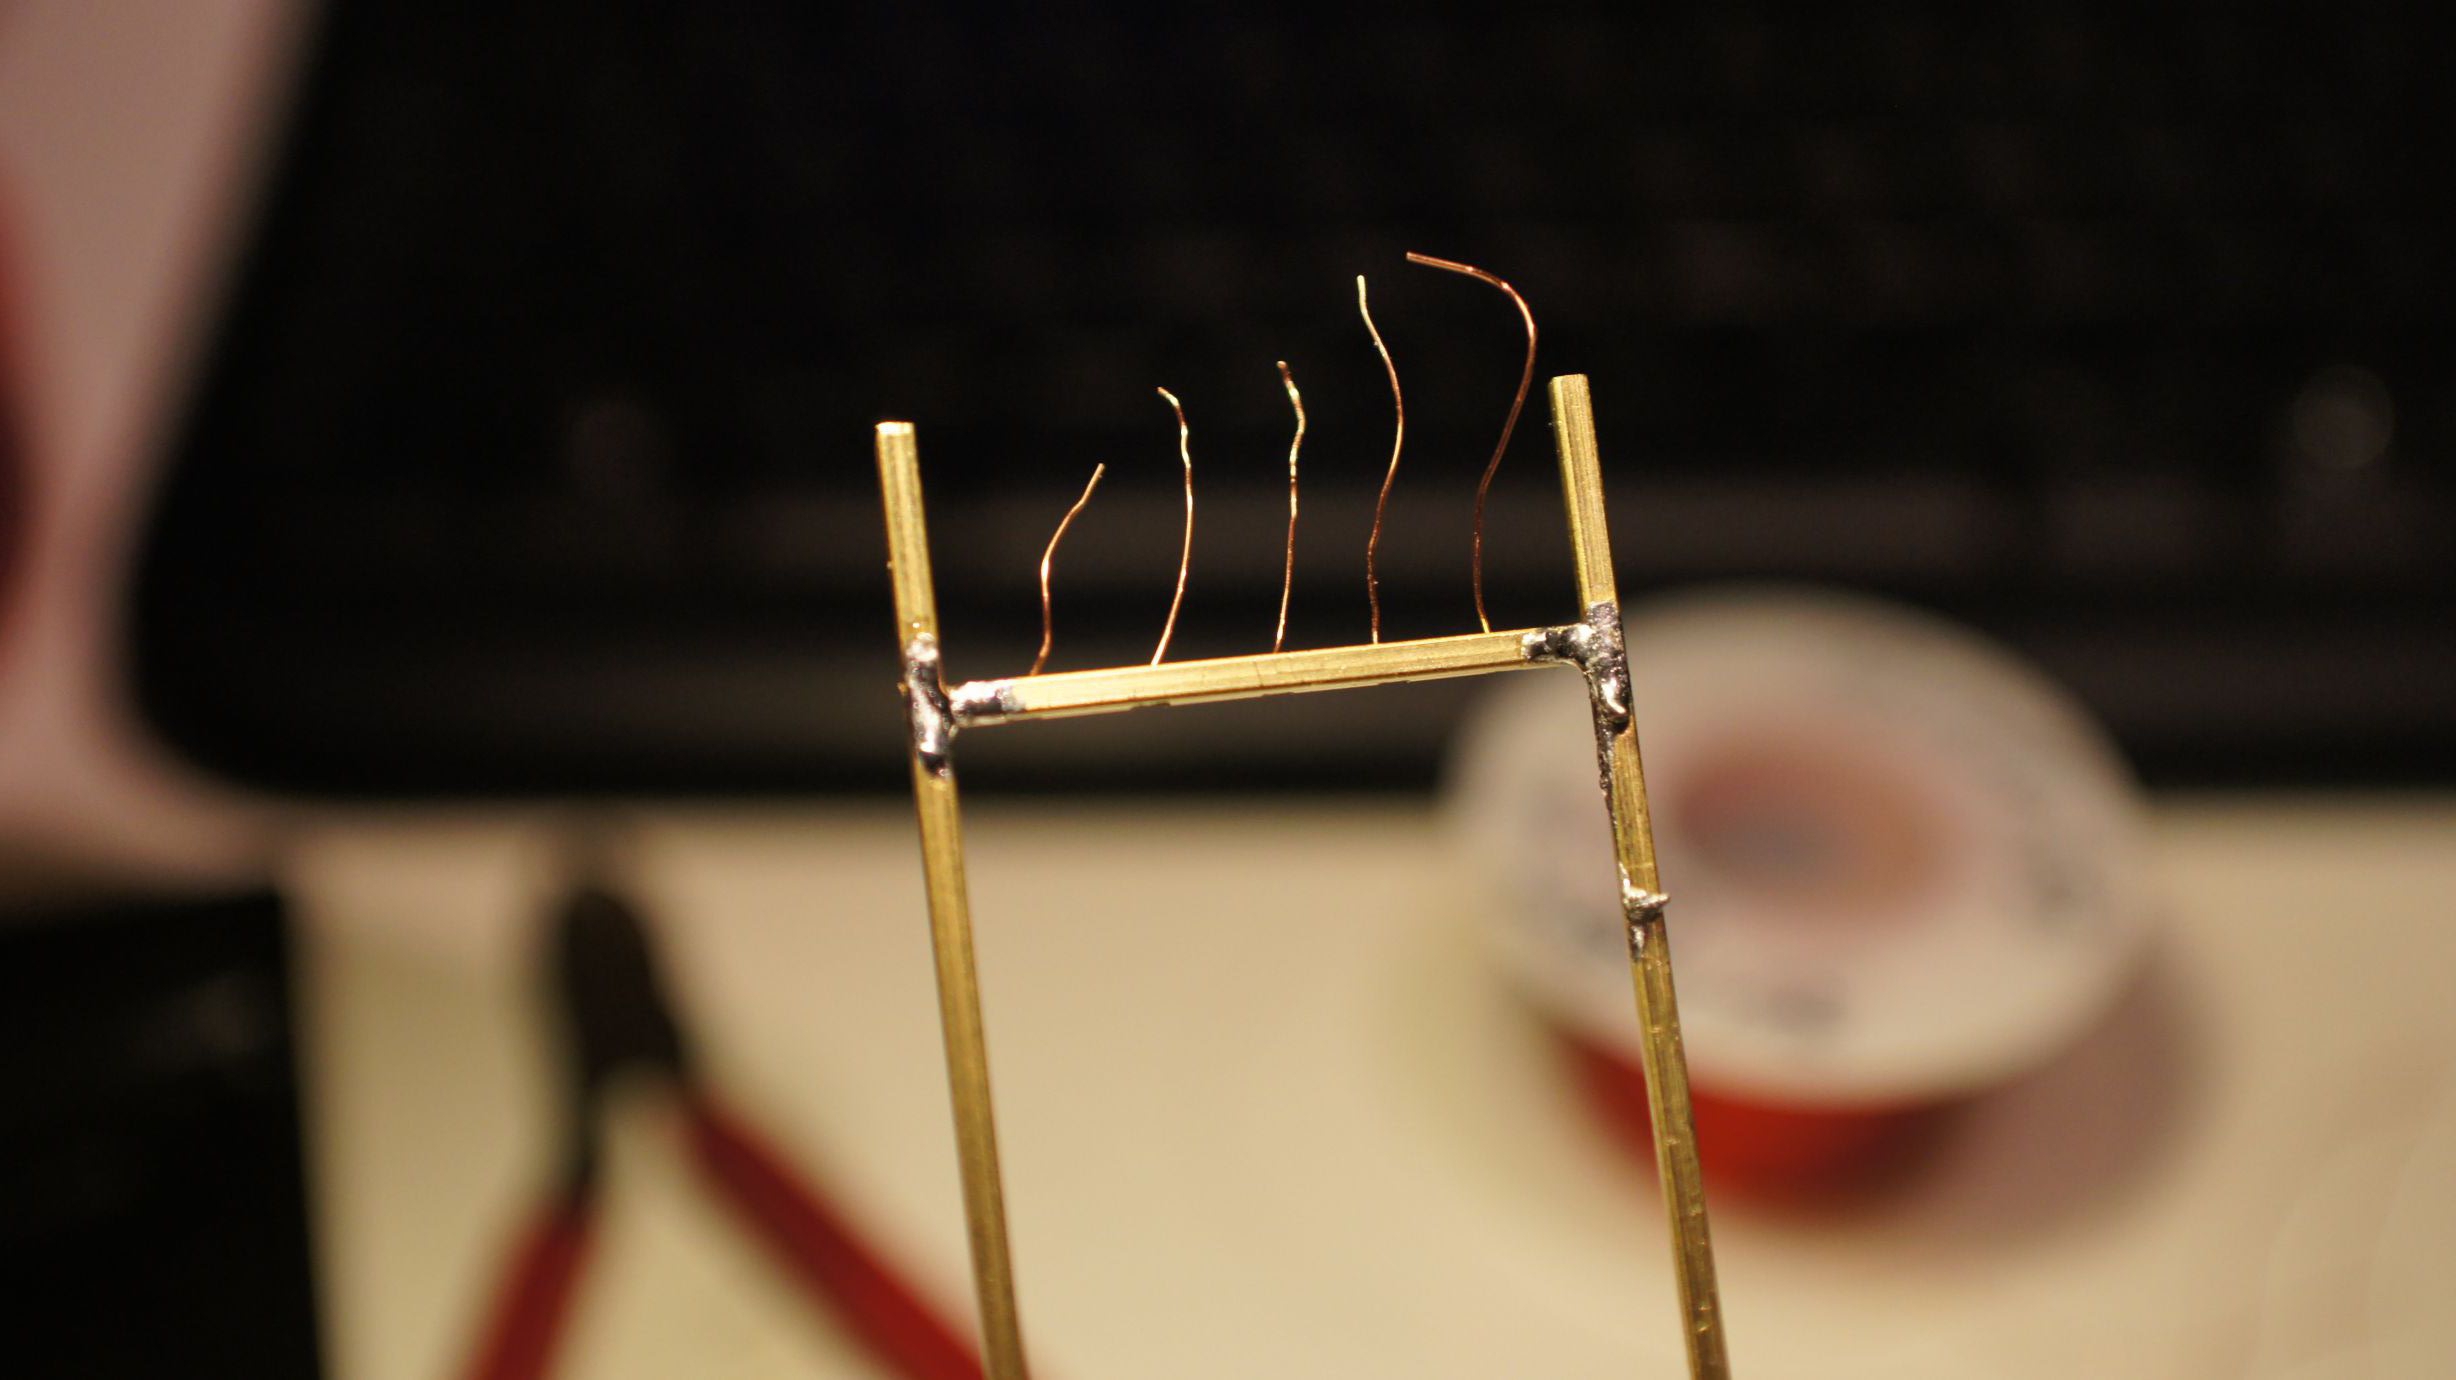
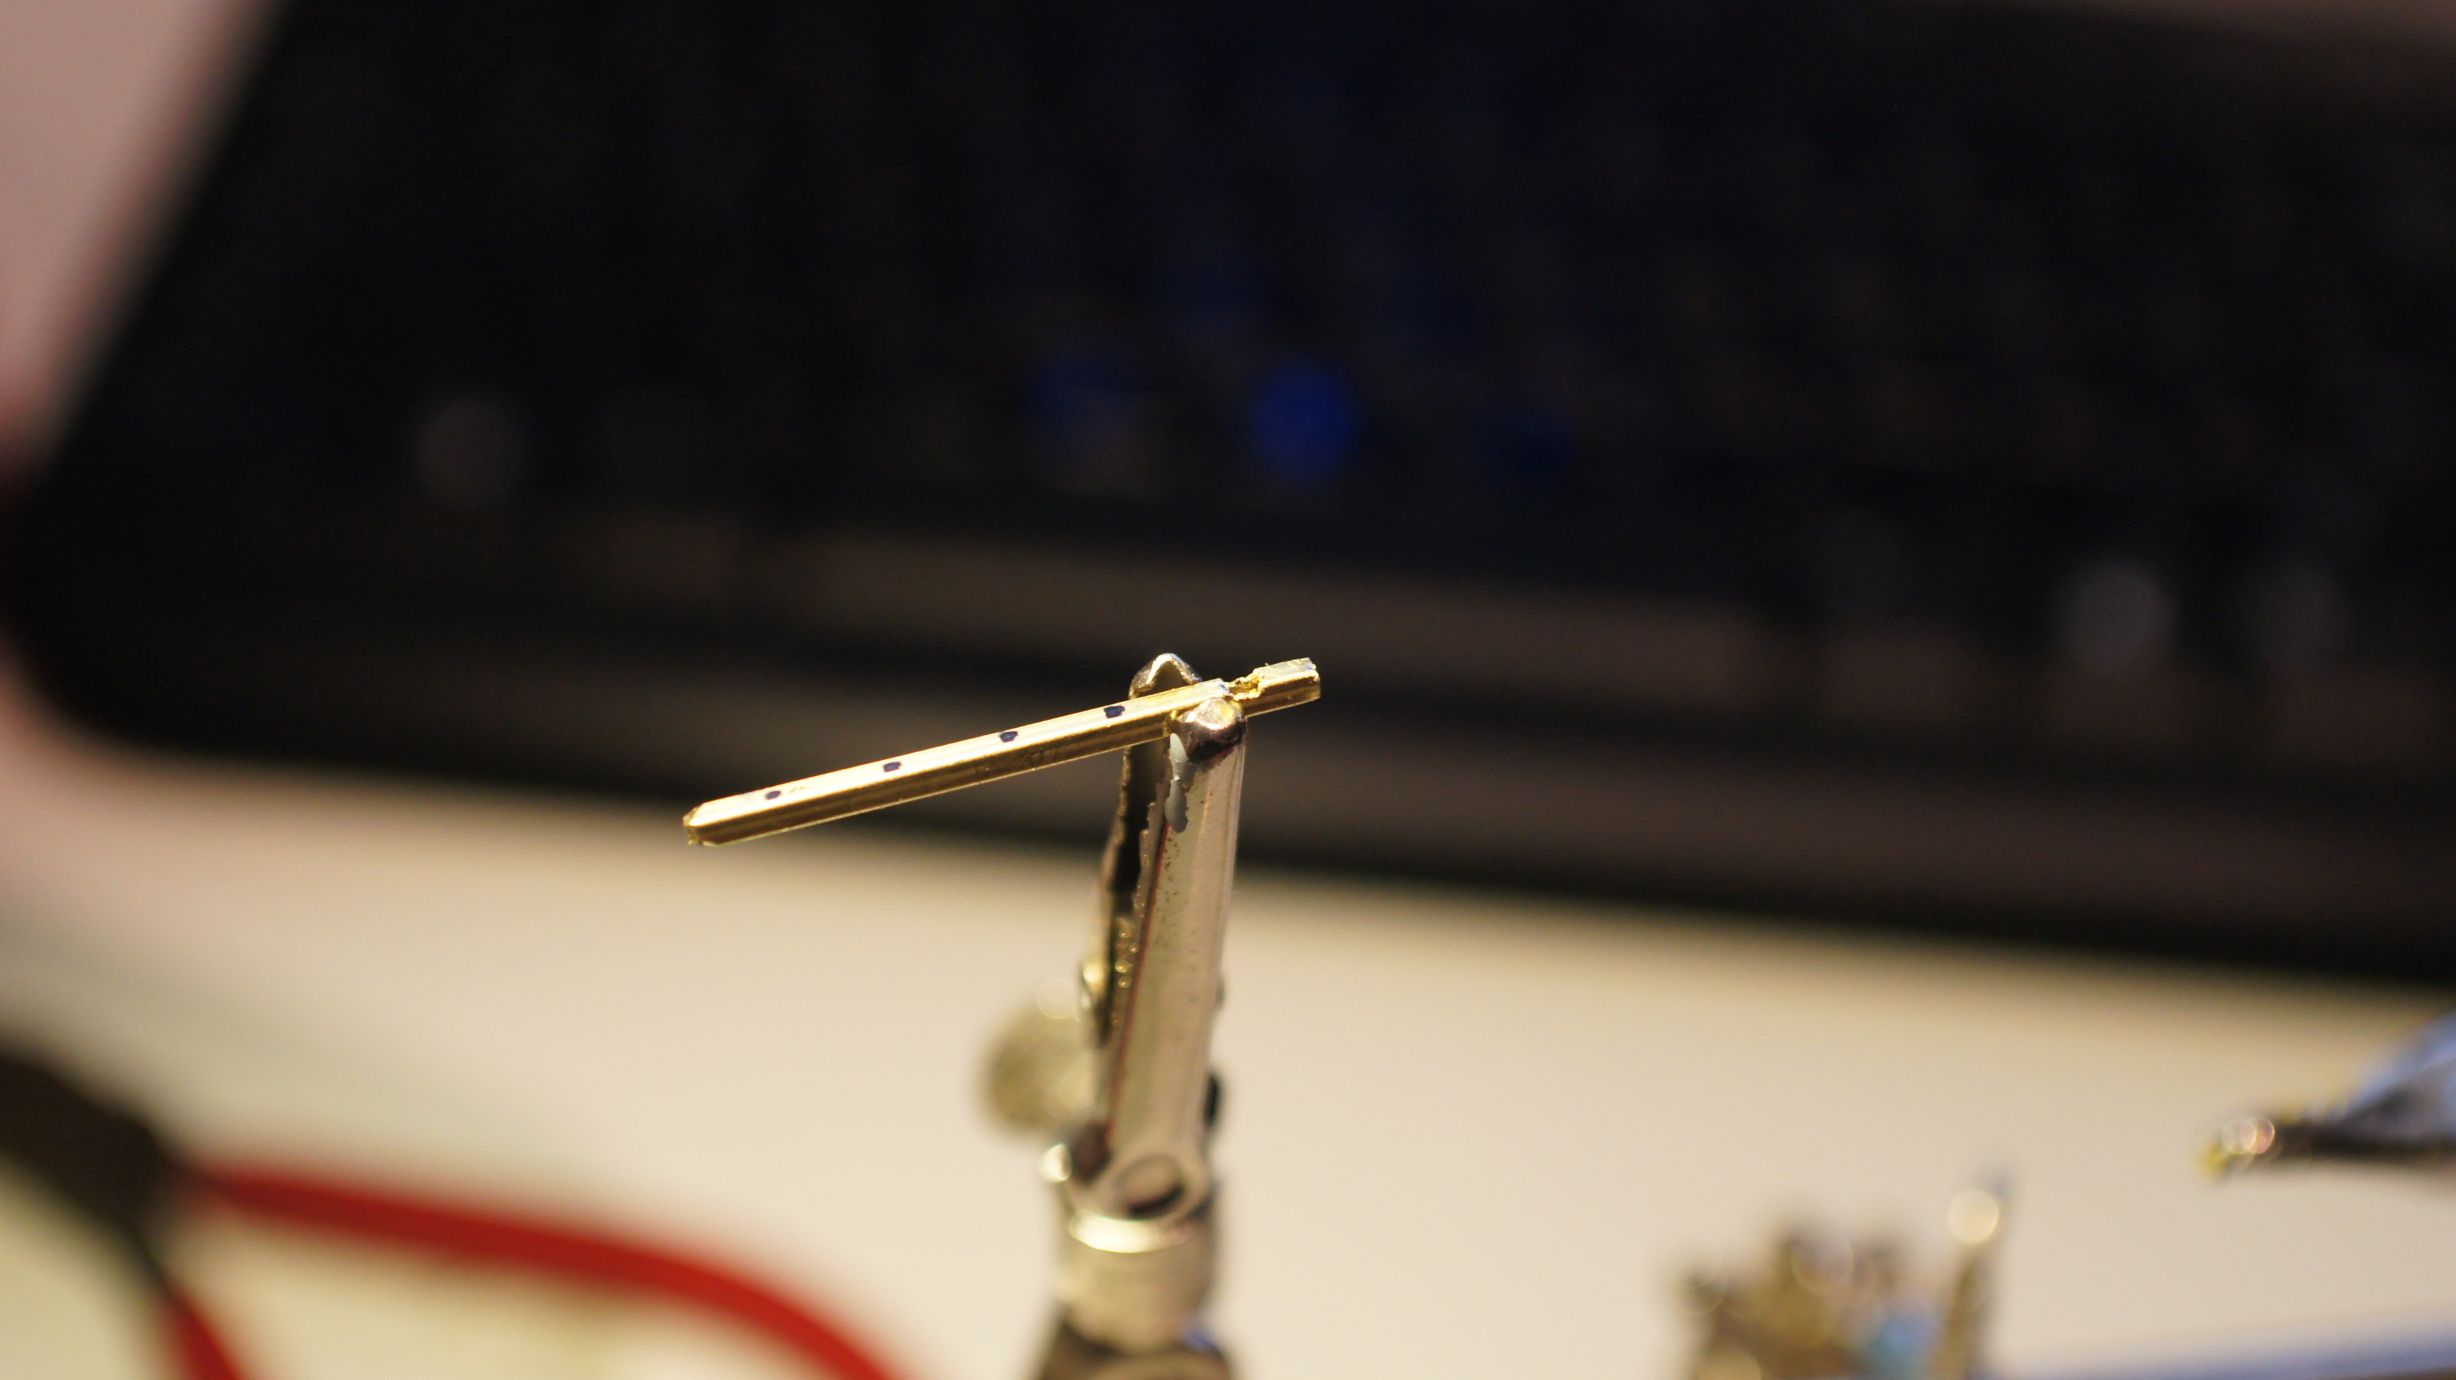
Once the holes were cut, I fed the wires through as a test. I then constructed the frame with solder. At this point I accidently overheated the wires on the left side. This caused one to ground and I then couldn't successfully light 1 of the 5 LEDs. I took more care the second time around when soldering the frame back together.

I added a quick roof to the frame as tanaka_ace had done with his second version.
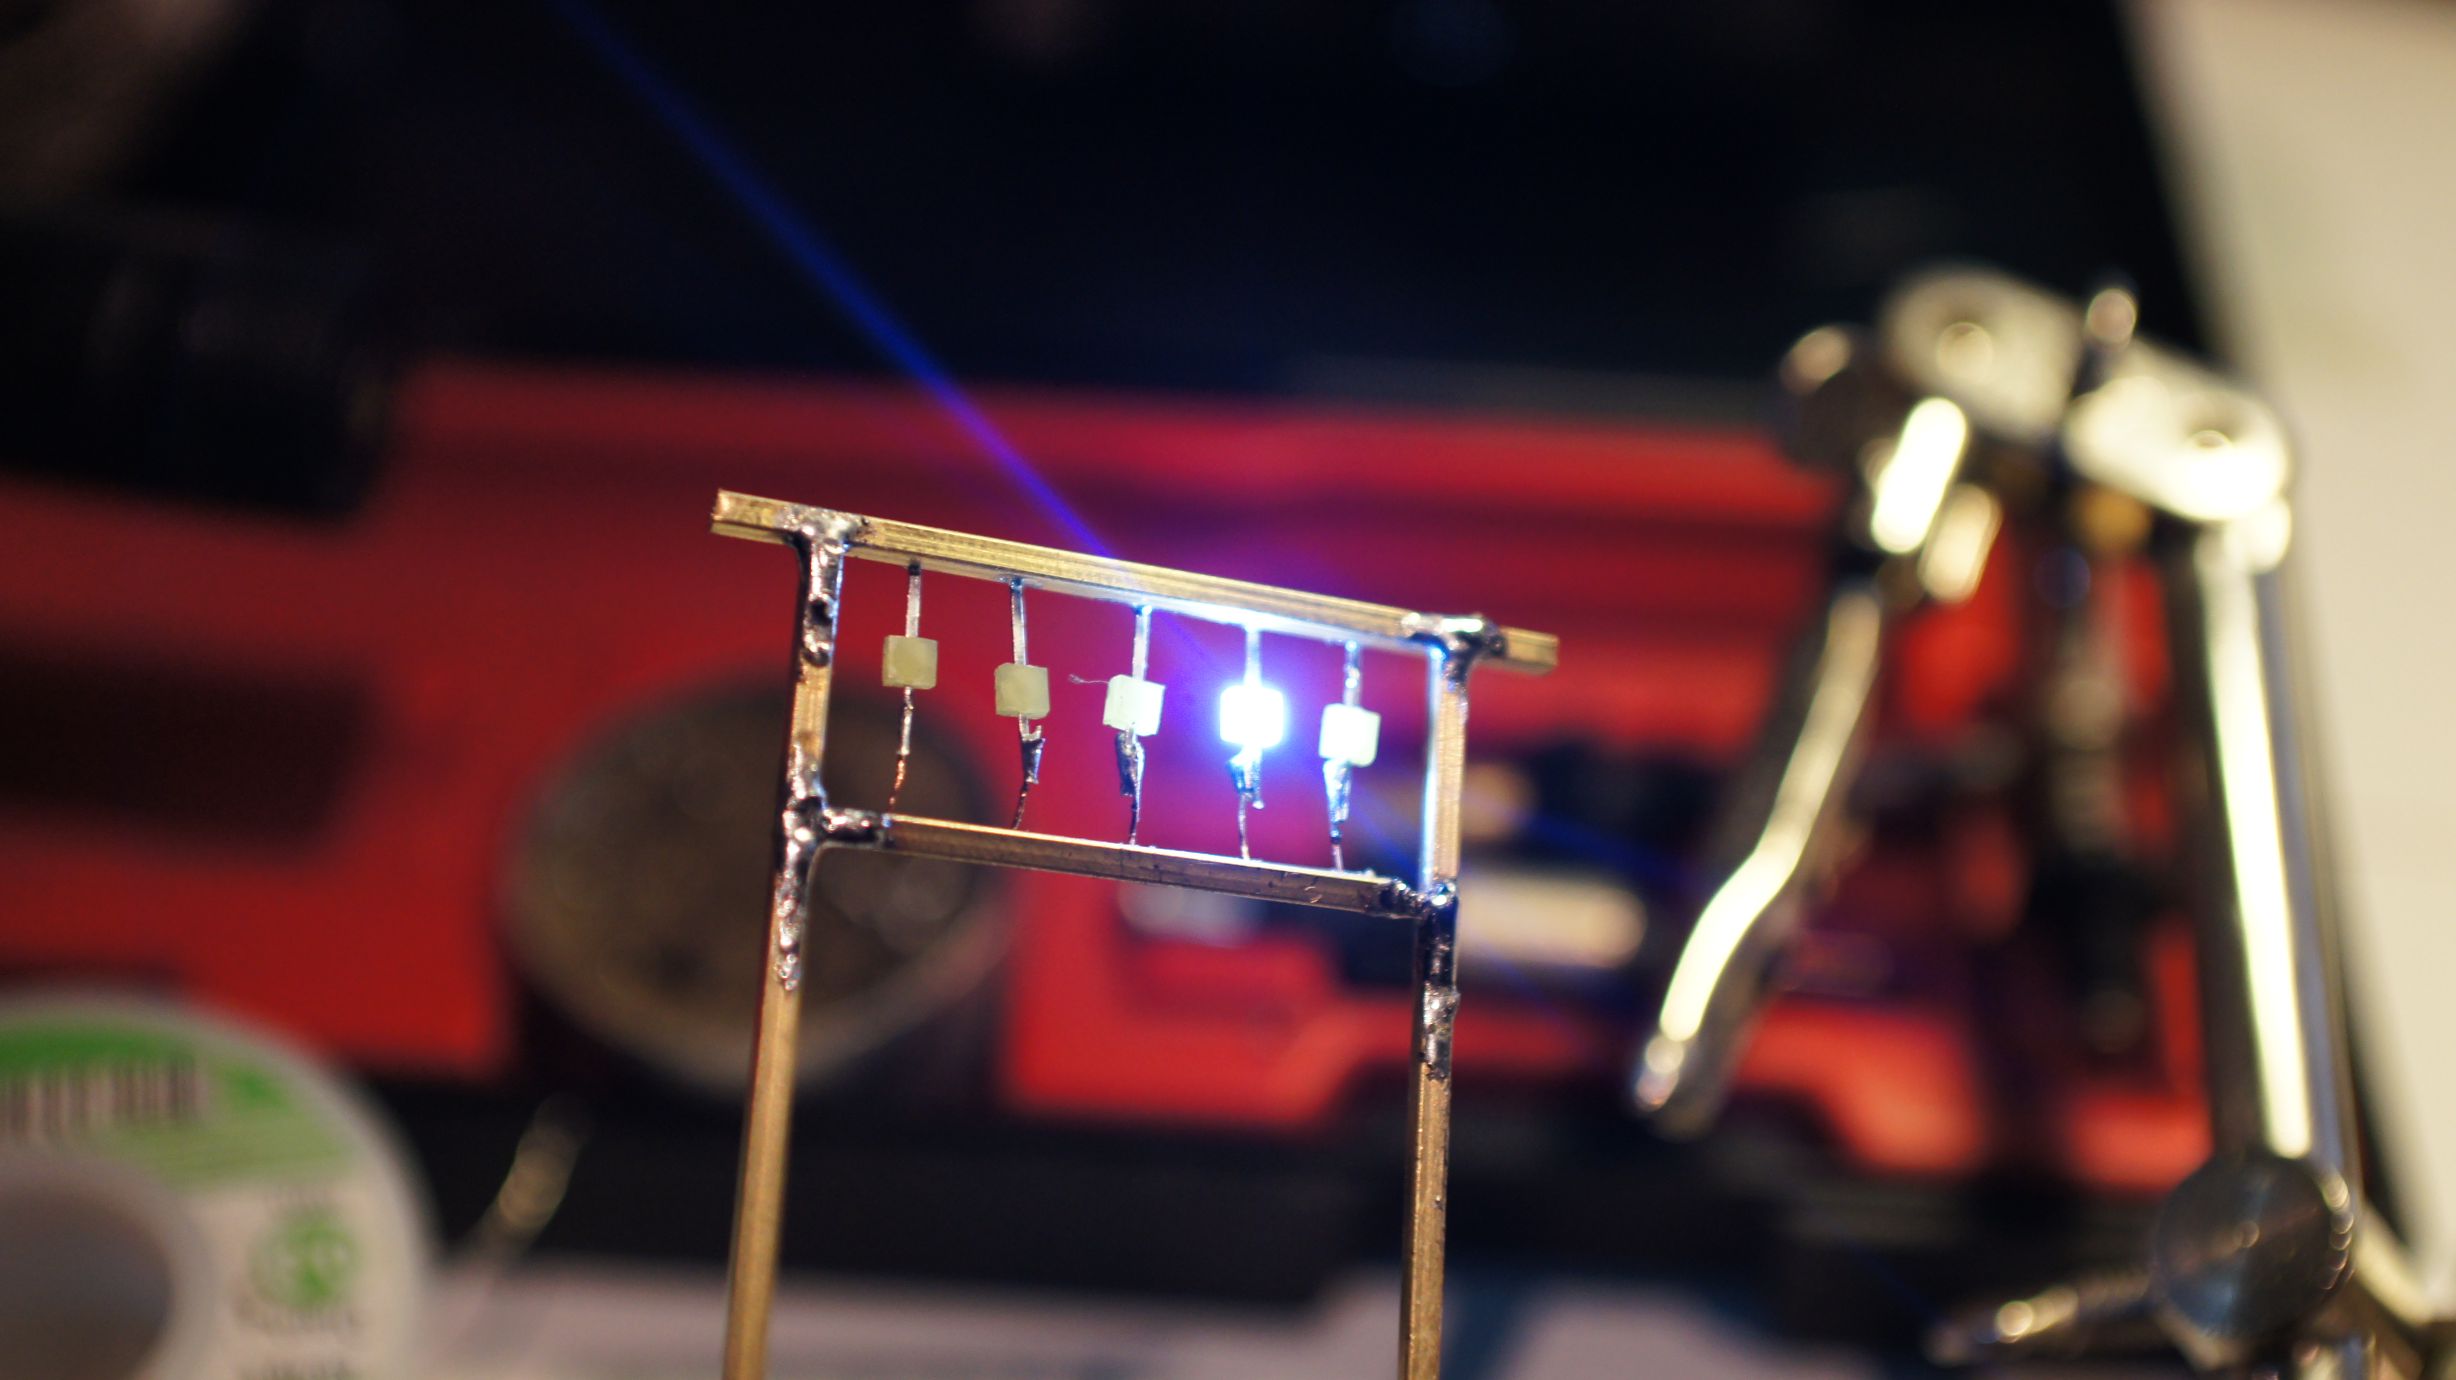
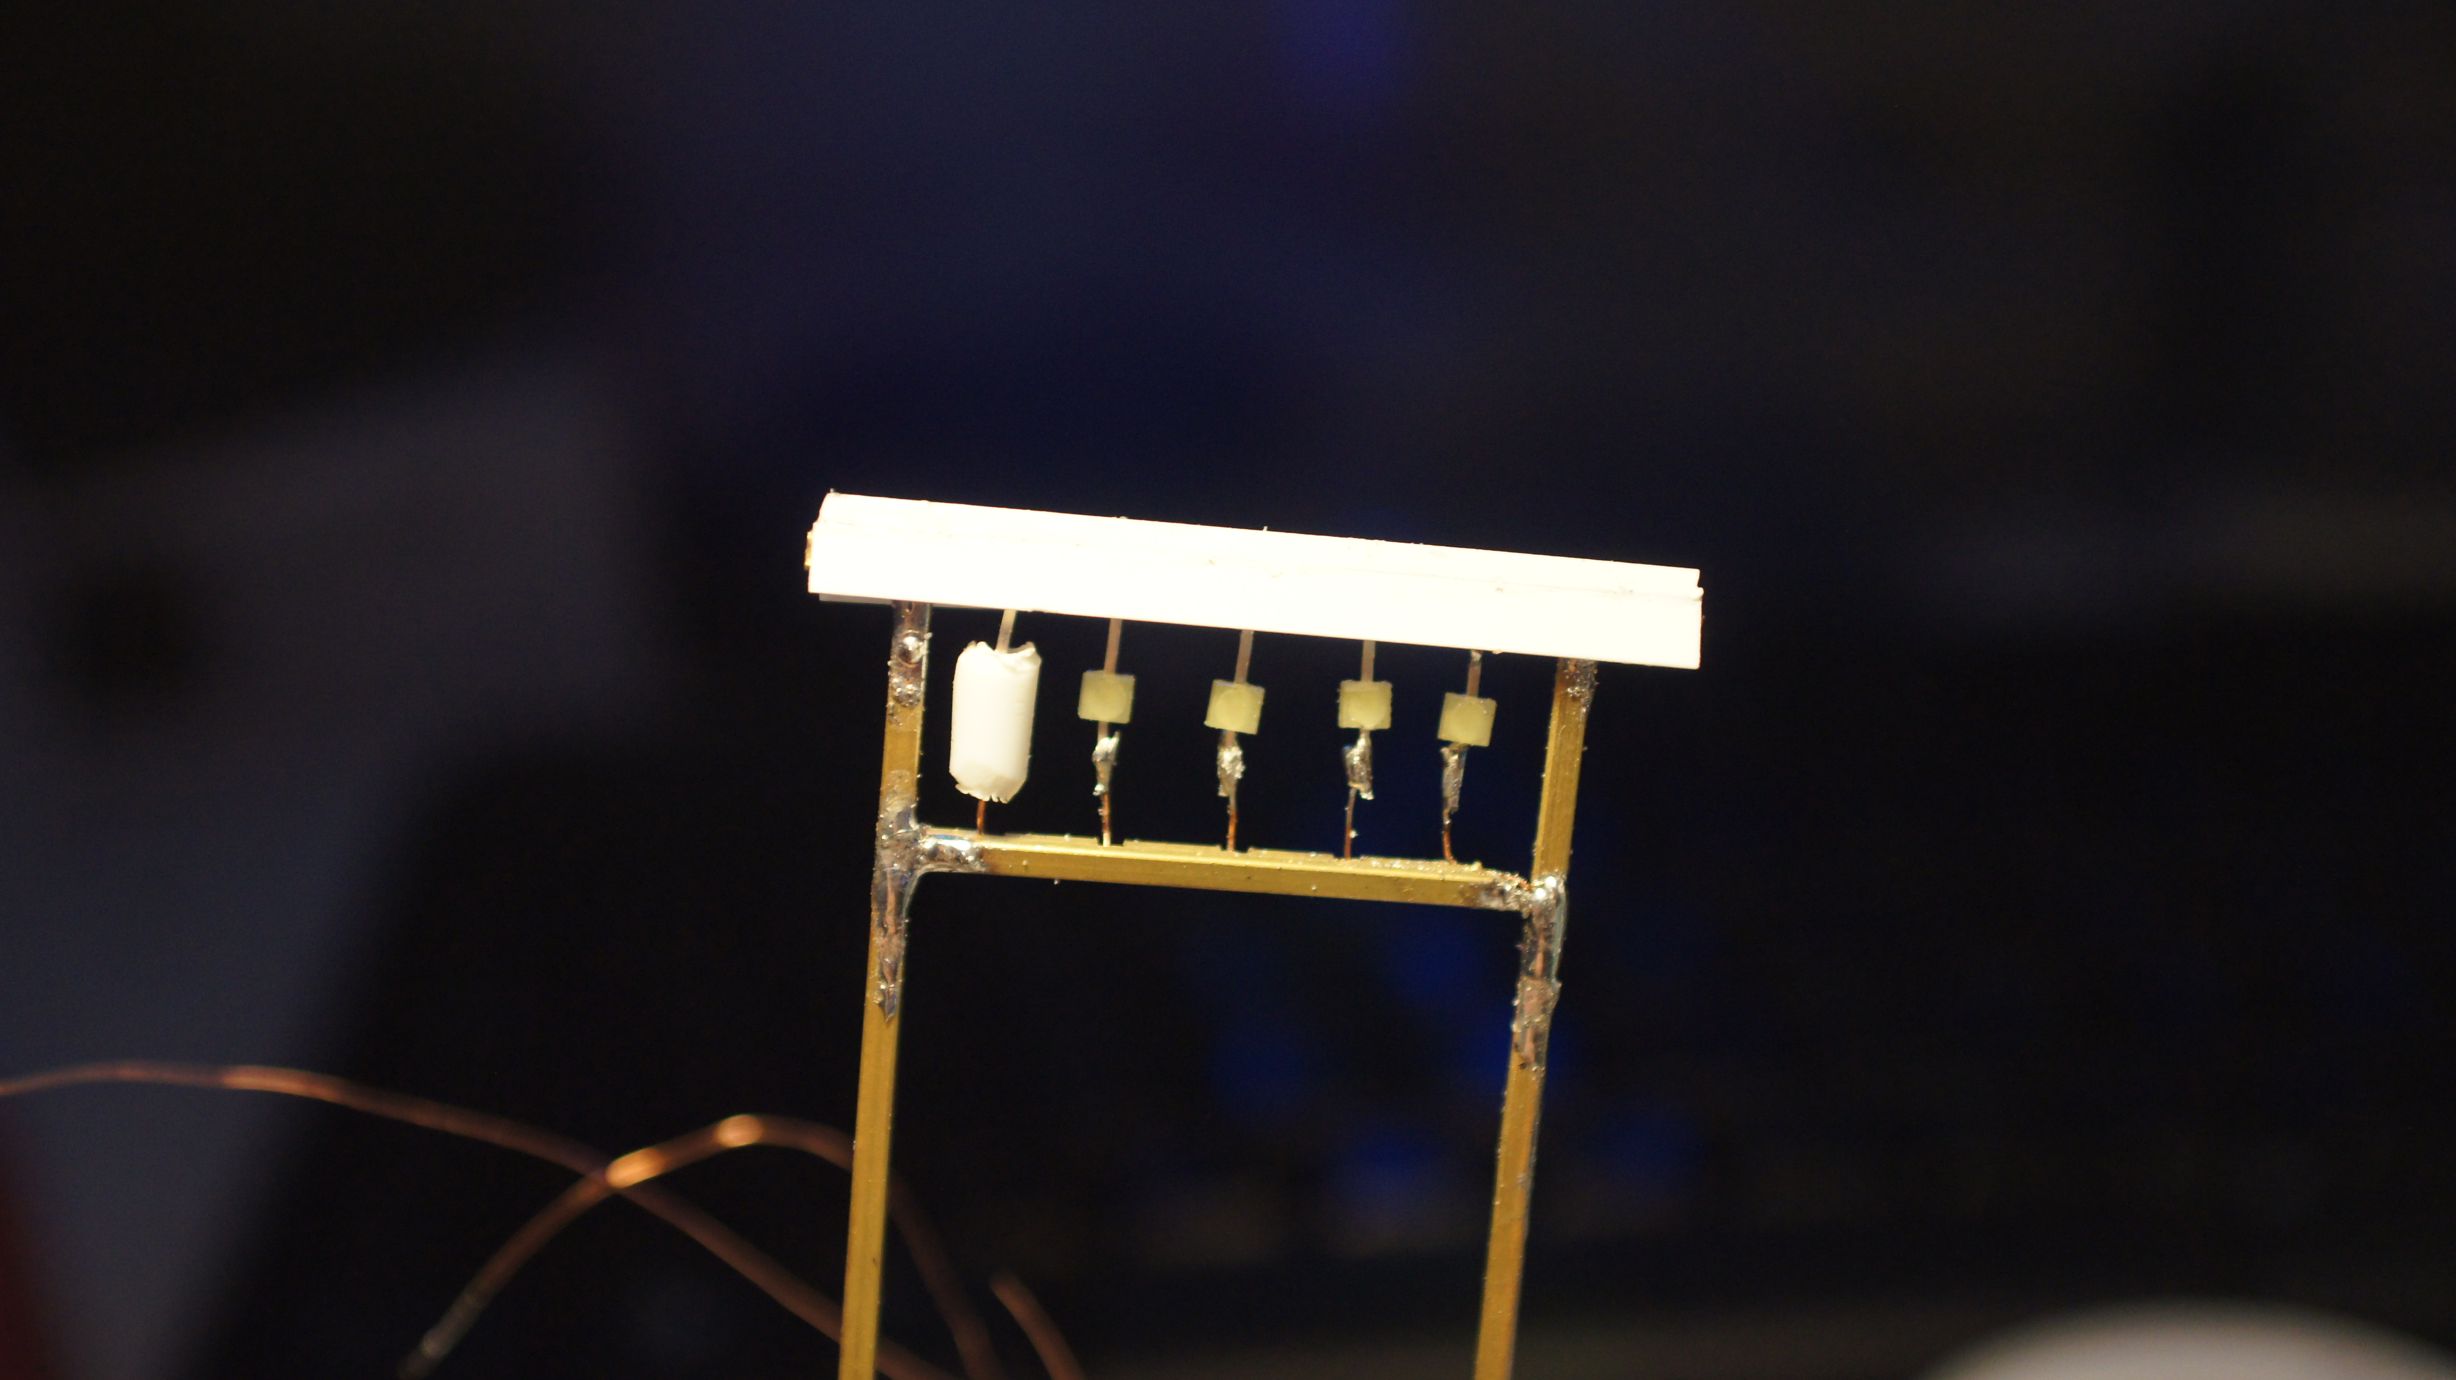
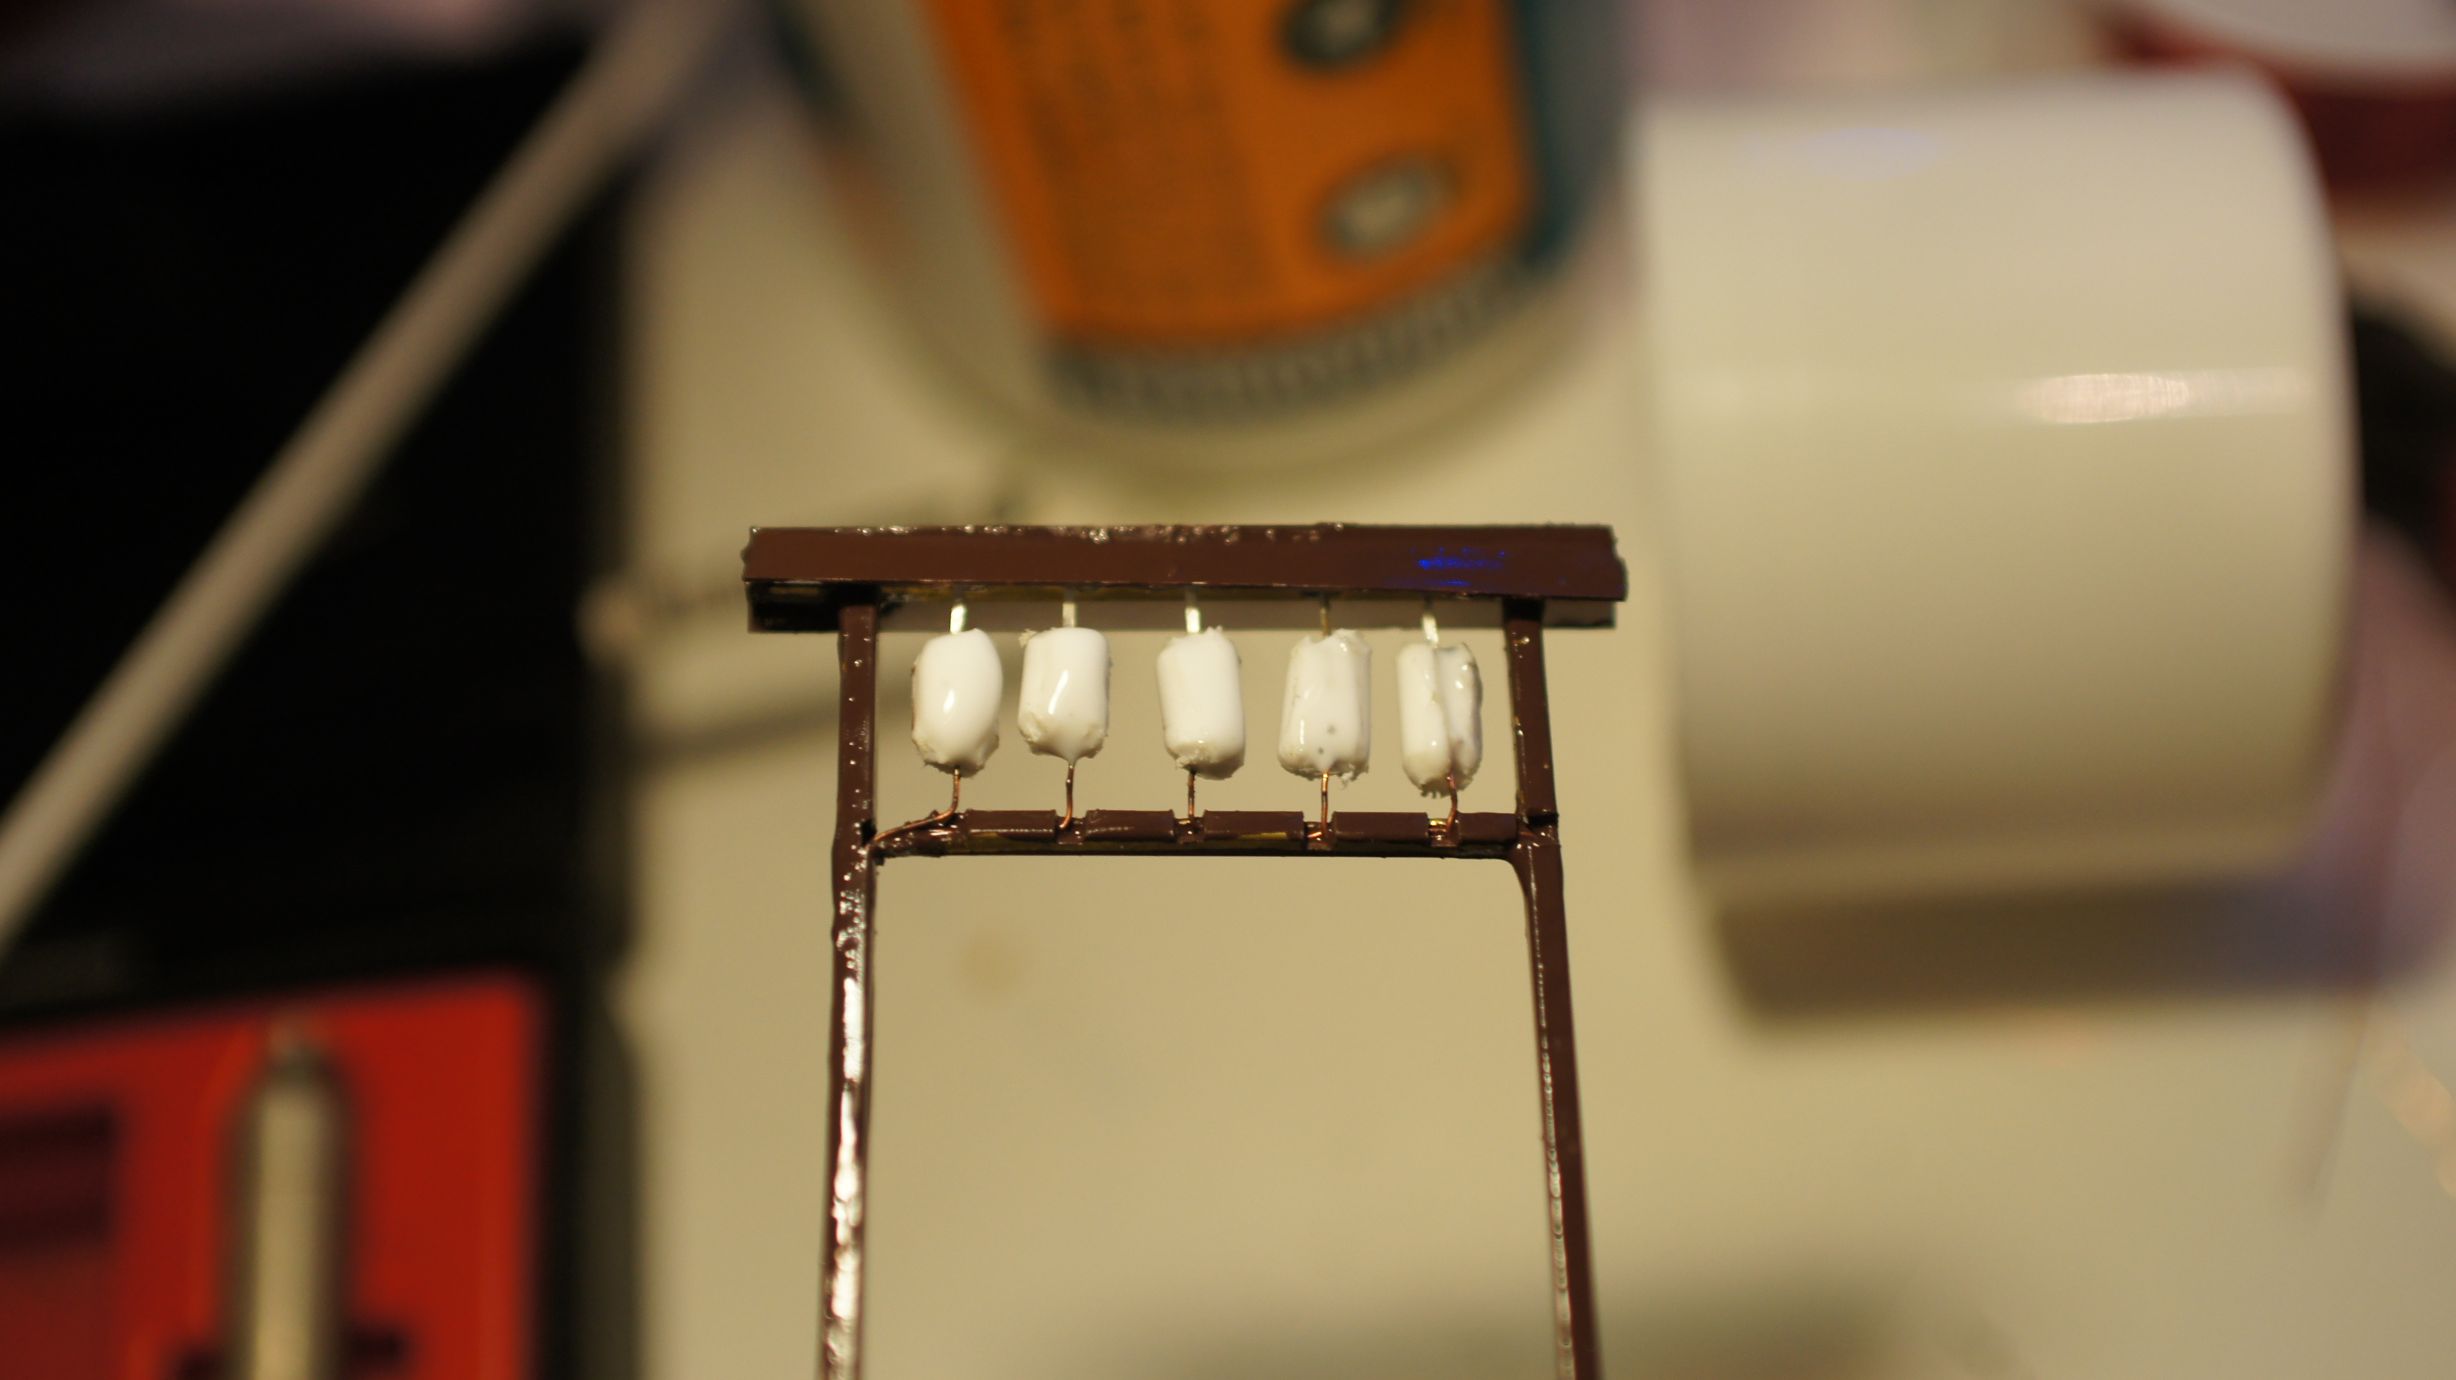
Now that the frame and LEDs were in place, I could go about turning them into lanterns. This would be done by putting plastic piping around them. I had already done this with a fixed lantern on a TomyTec Japanese Shop, but this time I had no existing lanterns to work with. I therefore used the same concept as tanaka_ace.
Thanks to globalisation, I was able to acquire the exact same "Evergreen Scale Models" poly-piping that he used. I happened to purchase 3.2mm pipe instead of the 2.4mm; but this worked out well as the LEDs that I was using were a little bigger. The pipe was cut into appropriate lengths and then the edges rounded down to create the lantern shape. The individual lanterns were then sliced at the back so that I could slide them over the LEDs. I then used stock-standard Shelleys Aquadhere to fill in the ends.
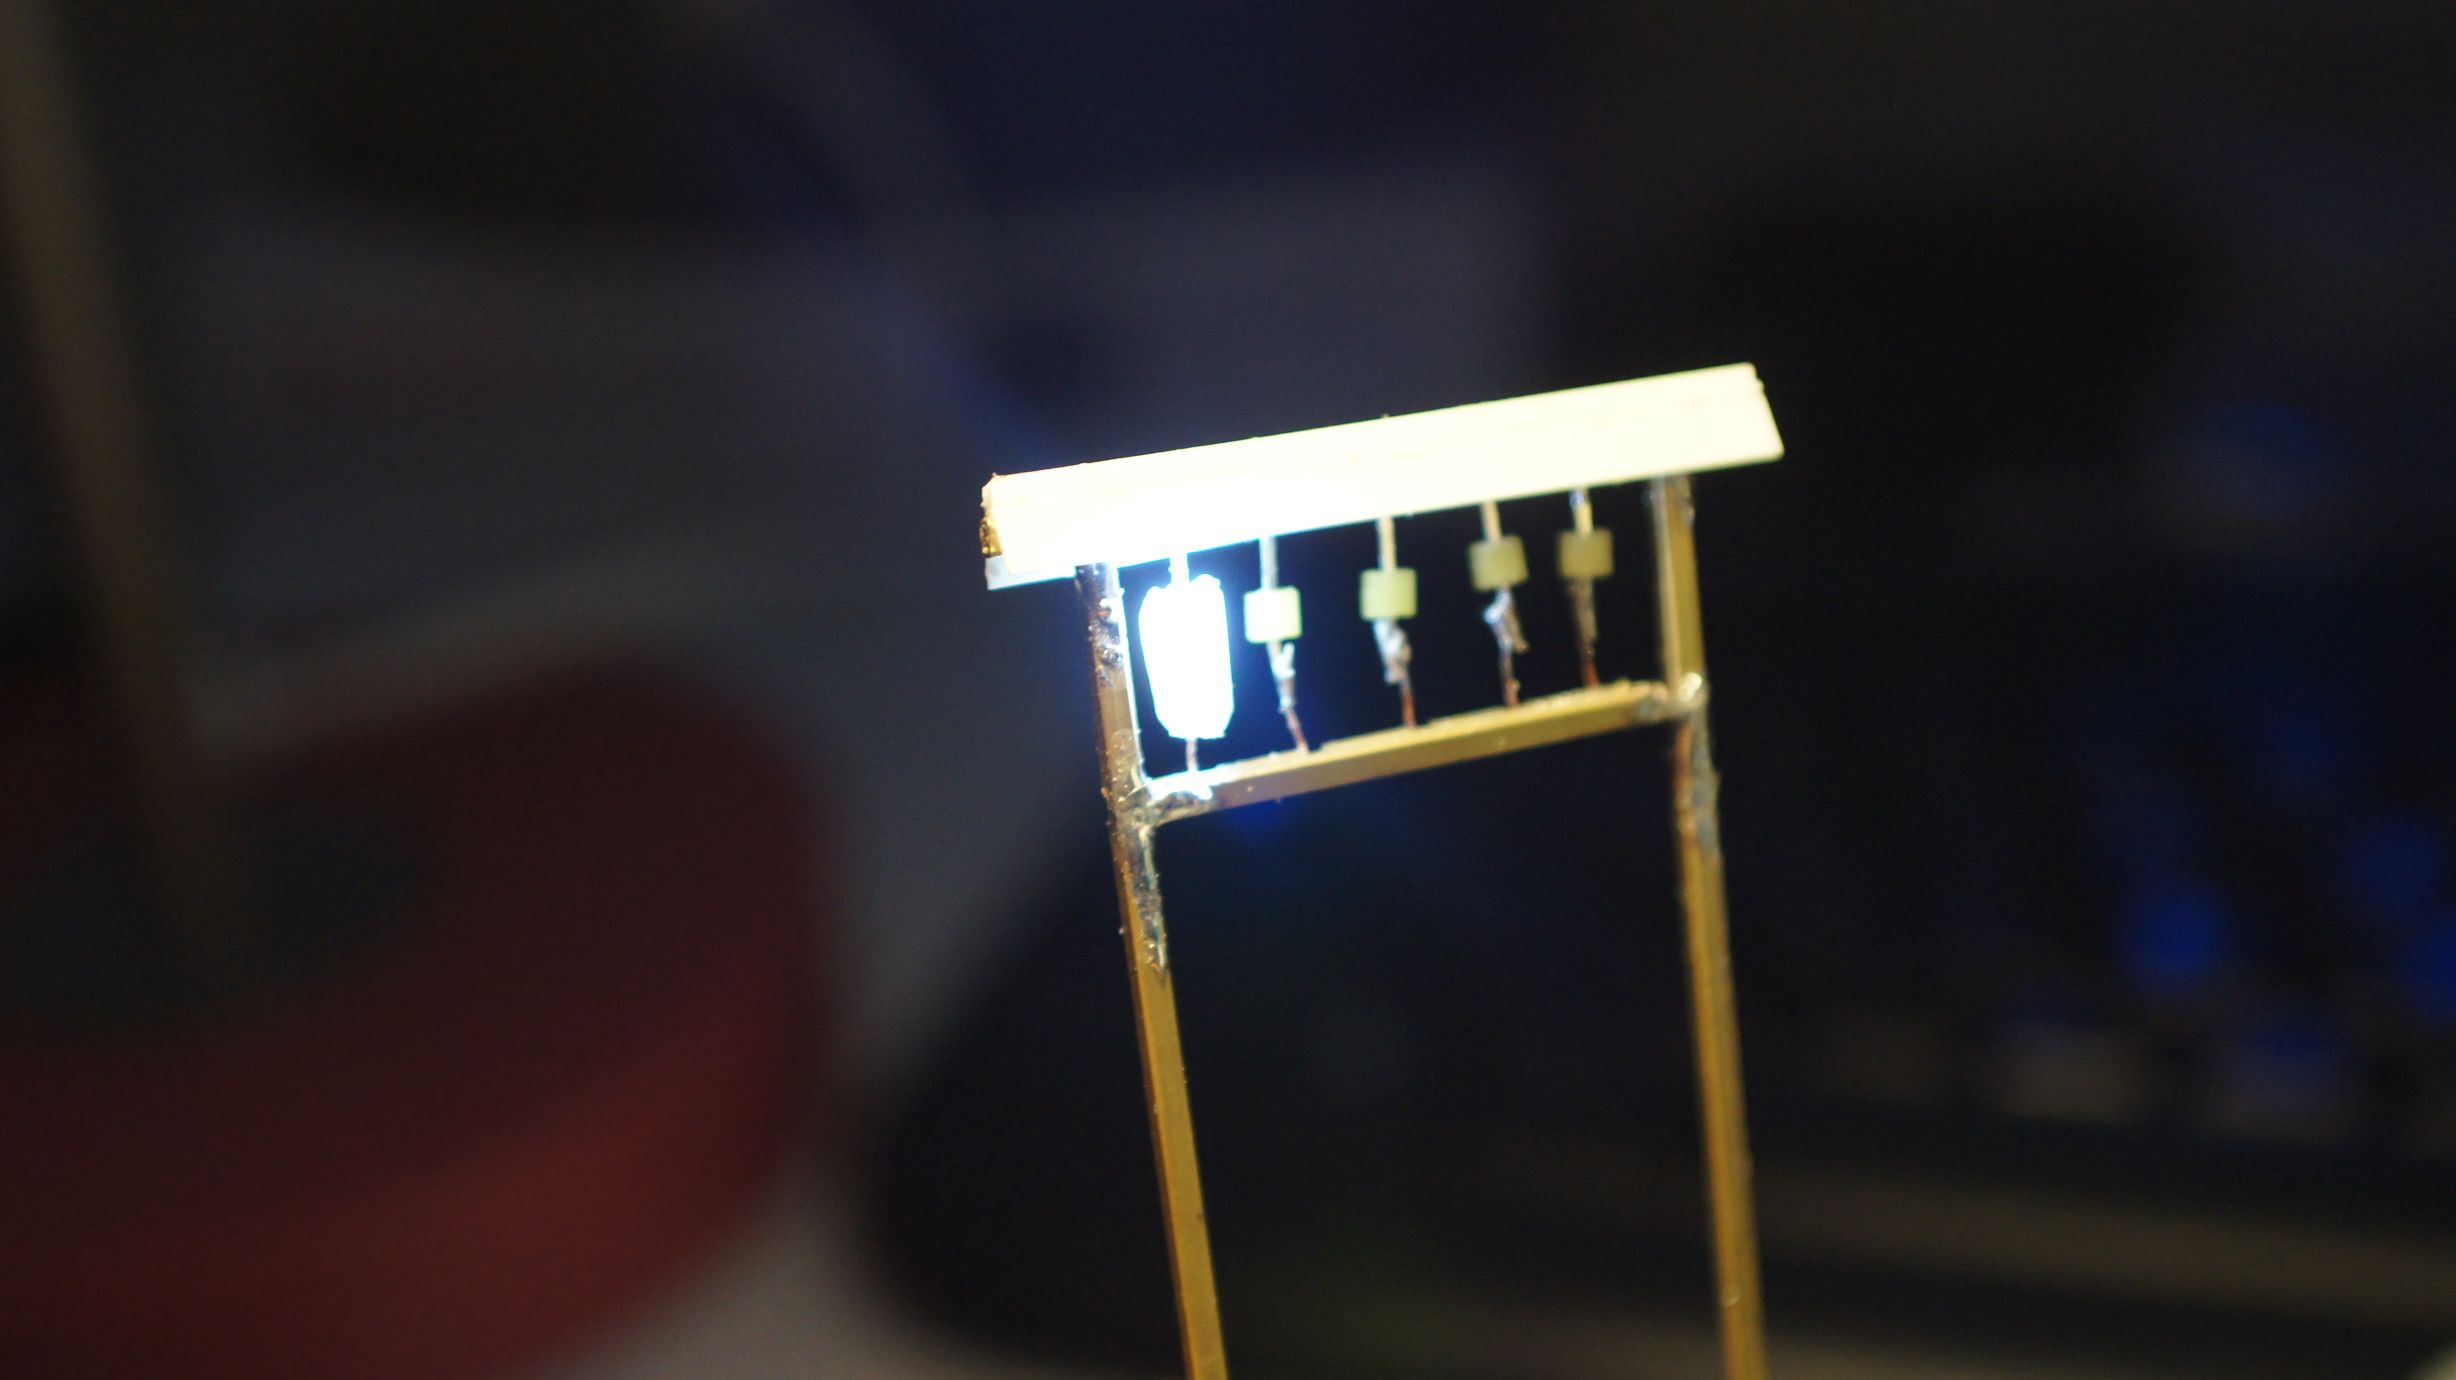
Once these were holding in place, I painted the frame a nice wood-brown. Torii gates can be made of wood or stone and painted a multitude of colours. You more often than not will see them in brown wood, but bright red, and even out in the ocean, is not uncommon.
And that was it... I still think I need to place some characters on the lanterns, but I need to work out what to write on them. I also should've taken more care to get the lanterns even, but I was happy enough with the outcome and, once in place on the layout, knew it would be good enough.
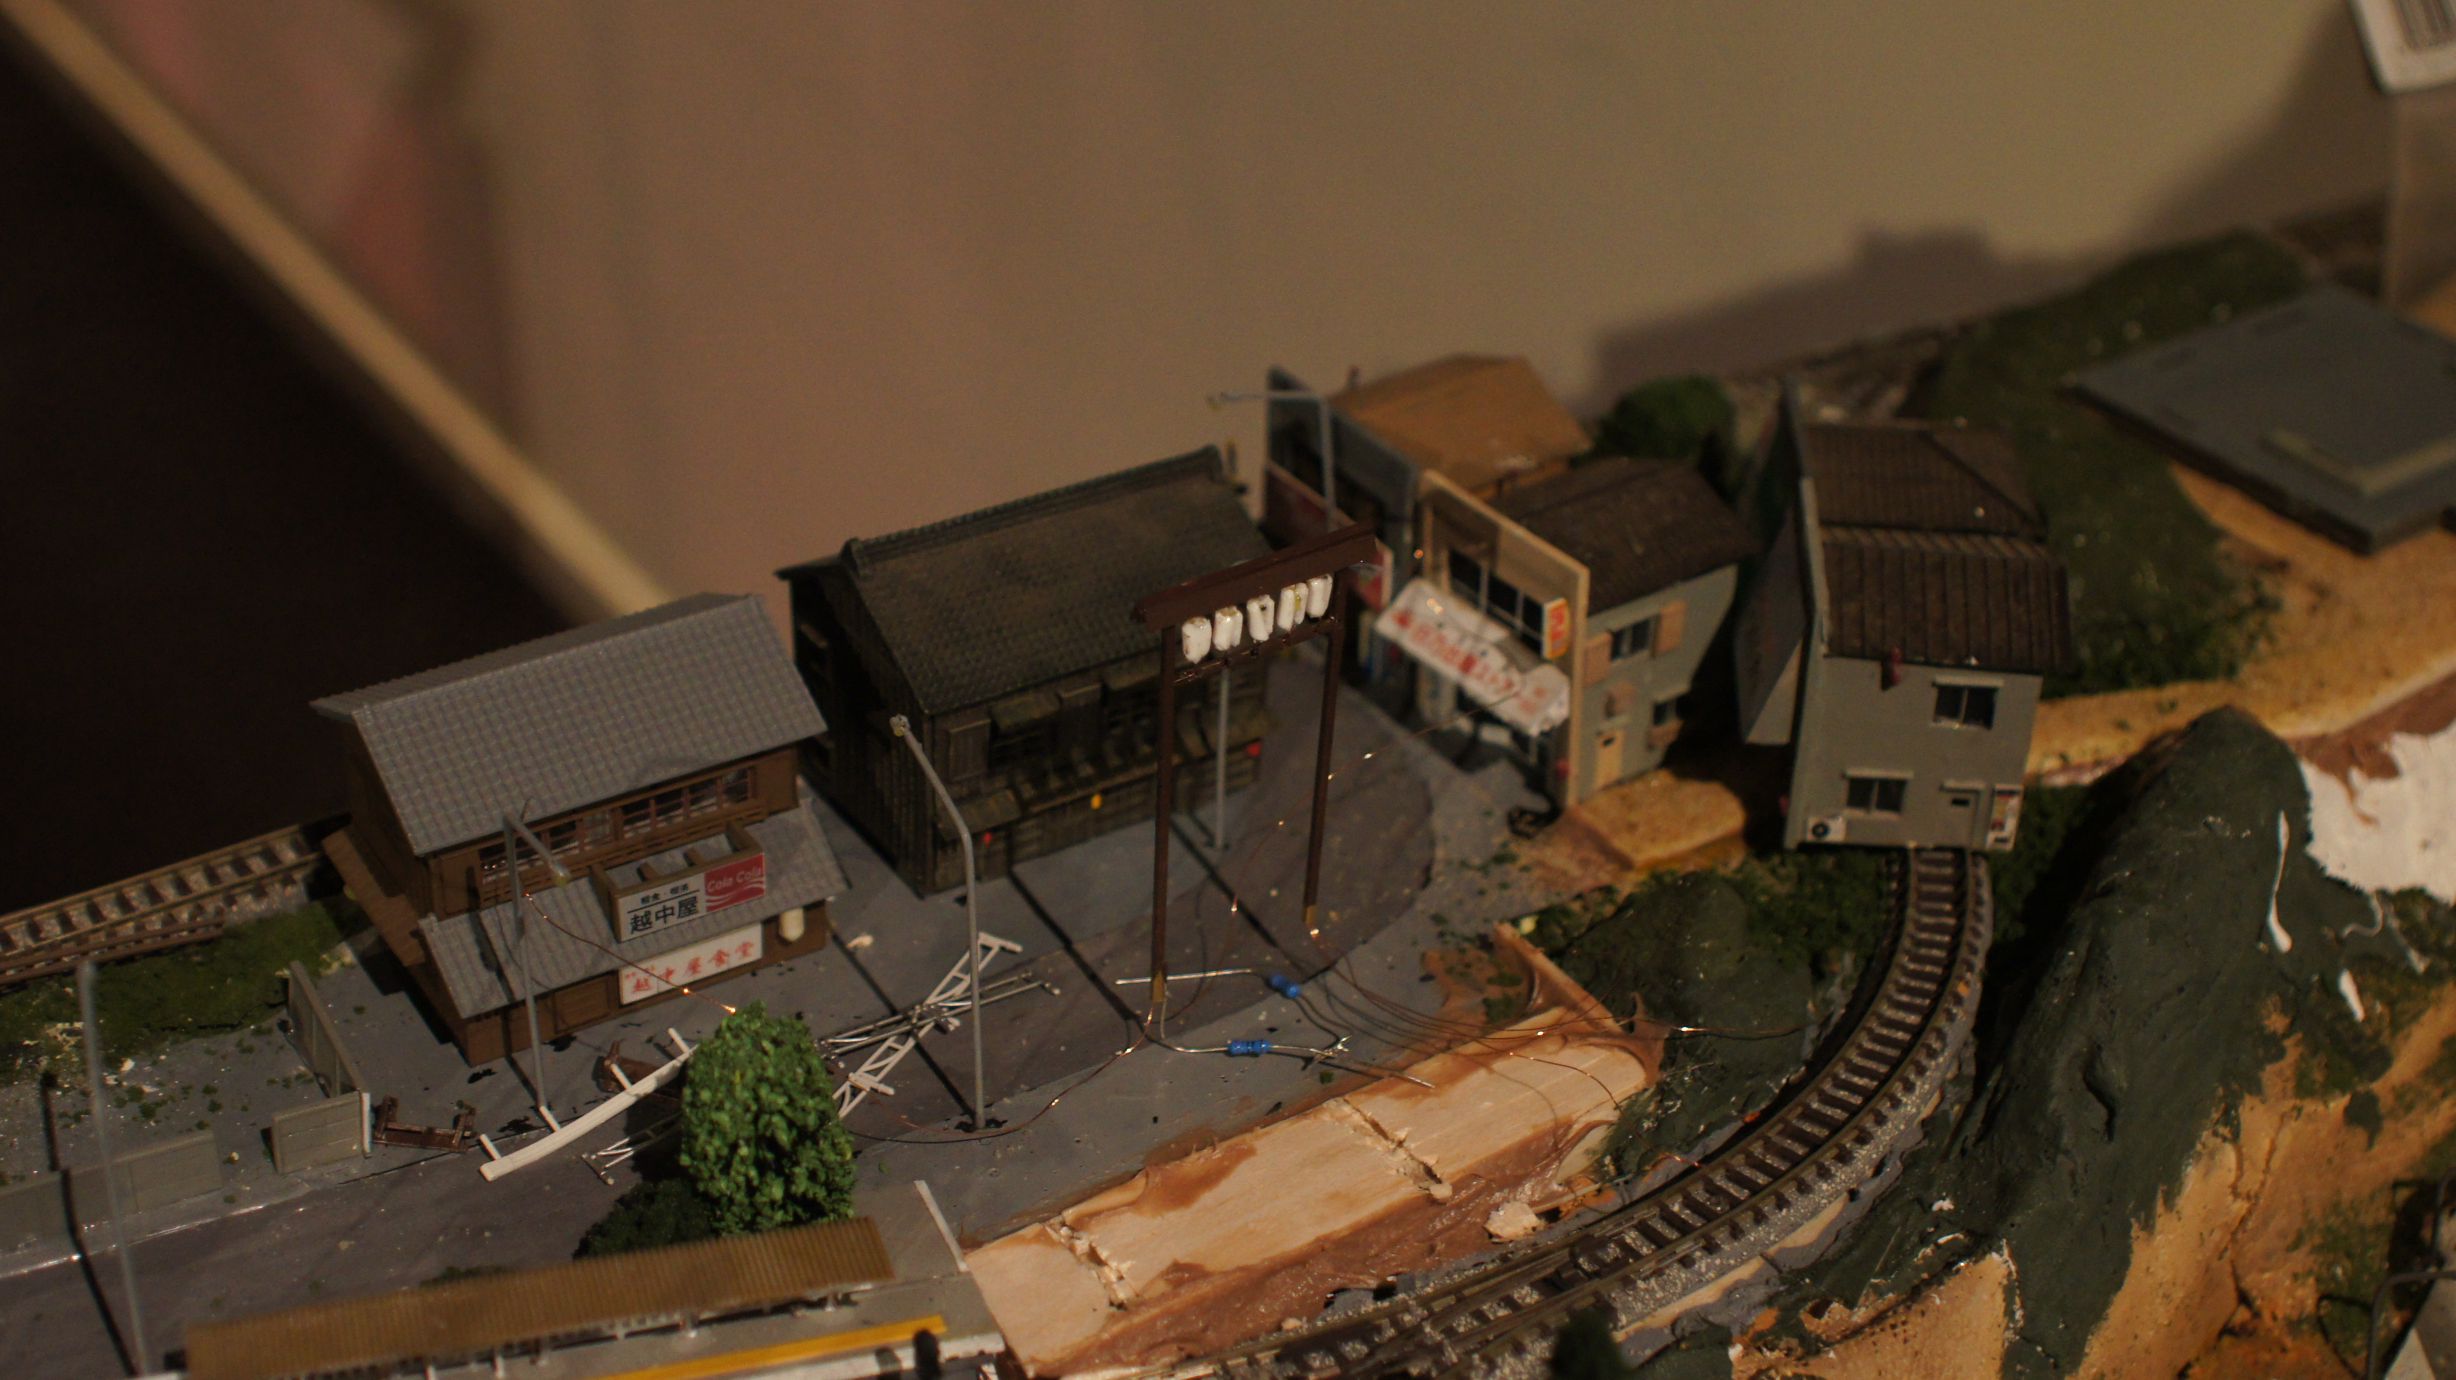
Now that the entrance is in place, it's time to get the fences and shrine in. As you can see, the foundations are there already and I'm currently working on adding lanterns and lights to the shrine.
Random Photos
Search
Tags
Links - Click for details
- Abandoned Rails (Japan)
- AIRLINE (Shinkansen Photography)
- Akihabara Station
- annexpressのブログ
- Australian Model Railway Magazine
- DCC普及協会ホームページ (Japanese DCC)
- Dead Section (Japanese Track Diagrams)
- Delicious Things (Japanese N Scale DCC)
- Densha Wotorou
- Digital Direct for Windows (DCC Server)
- Don's Dream World – AMAZING N Scale Japanese Layout
- Hatena::Diary
- Japanese N-Scale Modeling Forum
- JR Chiisai
- Kaz-T's blog レインボーライン (Rainbow Line)
- LED Resitance Calculator
- Masioka
- Poppondetta Blog
- RailFan Magazine, Japan
- Railmind
- Railway Travelers' Room
- Serenity Valley
- Shashinka Ichiban
- Shuzuku
- Sumida Crossing
- The next station is…
- Tomix N Gauge Track and Japanese N Gauge Trains
- TT Forums (Transport Tycoon Deluxe)
- 名鉄尾西線の貨物列車 (Nagoya: Meitetsu Freight)
- 日本型Nゲージ DCC改造例のご紹介 (Okiraku DCC)
- 泰 茅 轍 道 (Taichi Railway)
- 箱庭登山鉄道製作記 (Hakone-Tozan Layout Blog)
Archive
- July 2026
- May 2026
- April 2026
- March 2026
- February 2026
- January 2026
- November 2025
- October 2025
- September 2025
- August 2025
- July 2025
- June 2025
- February 2025
- January 2025
- November 2024
- September 2024
- August 2024
- July 2024
- June 2024
- May 2024
- April 2024
- March 2024
- February 2024
- December 2023
- October 2023
- September 2023
- August 2023
- July 2023
- June 2023
- May 2023
- April 2023
- March 2023
- December 2022
- November 2022
- October 2022
- April 2022
- March 2022
- February 2022
- January 2022
- December 2021
- November 2021
- September 2021
- August 2021
- July 2021
- May 2021
- March 2021
- February 2021
- January 2021
- October 2020
- September 2020
- August 2020
- July 2020
- June 2020
- May 2020
- April 2020
- March 2020
- January 2020
- December 2019
- November 2019
- October 2019
- September 2019
- August 2019
- July 2019
- June 2019
- April 2019
- March 2019
- February 2019
- January 2019
- December 2018
- November 2018
- October 2018
- September 2018
- August 2018
- July 2018
- June 2018
- May 2018
- April 2018
- March 2018
- January 2018
- December 2017
- November 2017
- October 2017
- September 2017
- August 2017
- July 2017
- June 2017
- May 2017
- March 2017
- February 2017
- January 2017
- December 2016
- November 2016
- October 2016
- September 2016
- August 2016
- July 2016
- June 2016
- May 2016
- February 2016
- November 2015
- October 2015
- September 2015
- August 2015
- July 2015
- June 2015
- May 2015
- April 2015
- March 2015
- February 2015
- January 2015
- December 2014
- November 2014
- August 2014
- July 2014
- May 2014
- April 2014
- March 2014
- December 2013
- November 2013
- October 2013
- June 2013
- August 2012
- April 2012
- March 2012
- February 2012
- November 2011
- October 2011
- September 2011
- July 2011
- June 2011
- May 2011
- April 2011
- March 2011
- February 2011
- January 2011
- December 2010
- November 2010
- October 2010
- September 2010
- August 2010
- June 2010
- May 2010
- April 2010
- March 2010
- February 2010
- January 2010
- December 2009
- November 2009
- October 2009
- August 2009
- January 2009
- December 2008
- November 2008
- October 2008
- September 2008
- July 2008
February 4th, 2011 - 03:56
Interesting how you fed those tiny wires through. I’m not sure how well it would work in terms of resistance, but my first thought was running the power through the poles themselves. Take the left post and the upper horizontal post and solder them together, then do the same with the right and lower horizontal post. With 2 small insulating buffer (such as 2 squares of plastic) use glue to attach these two halfs without creating an electrical connection. Then solder on the LEDs to complete the circuit and cover with an insulating paint to prevent a short if something metal touches it.
February 4th, 2011 - 07:33
David,
I have never measured the resistance of the copper wire, but I do know that the previous temple and streetlights work perfectly.
I would agree with your idea of using the poles as the conductors for the cathodes too, but I just have it as the anode. I wish to control each of the lanterns individually and so need a separate wire for each.
This is all thanks to the Arduino and the ability to control hundreds of LEDs: http://modelrail.otenko.com/arduino/controlling-lots-of-leds-with-your-arduino