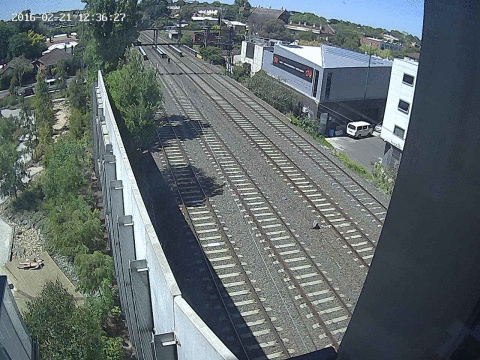
Subscribe via RSS
23Jun/150

My Pebble Time has arrived

I've always thought a smartwatch would be fun, but I've never really been keen on any of the models available. This stood true until I found out about the Pebble. The previous models were butt-ugly, but the kickstarter project for the Pebble Time took my fancy.

time-banner

I backed the project and received my Pebble Time last Thursday. The contents of the package were very simple: A manual/quickstart, a charging cable and the watch itself. The watch came pre-charged and I was ready to plug it in.

open-box

Initiating Connection

first-bootI enabled bluetooth on my phone and loaded up the Pebble App. It found the watch and then tried to update it's firmware. This managed to fail 3 times in a row... I held down a number of buttons on the watch but could not get it to reboot as per their recommendation. On the fourth attempt, the firmware updated.

I could now view the installed watchfaces and apps on my watch. Watchfaces are apps, but they get maximum screentime as they're the default app shown, displaying the time. Extra Apps can then be installed to do any number of tasks. The watch is effectively always connected to the world, as long as your phone is... and as long as you have battery... everywhere.

First Impressions

The battery life is intense. It lasts around 5 days without charging. It's warned me today that it's at 20%, but I thought I'd keep going to see how long it lasts. Last charge was Thursday evening. Better to deep-cycle the batteries, I suppose.

Off the shelf there is a remote to control music, an app to configure alarms (not tied in to any Android app), watchface selection and settings. The Music remote works great, although it tied in to 'Apollo' instead of Google Music... I have no music in Apollo.. will need to sort that out.

There's a whole plethora of watchfaces to install. Anything you can think of. I tried WeatherLand and IsoTime, two great designs. The former takes into account your location and the local weather and renders the background mountain scene accordingly! There's also the shadow clock, which is installed by default.

IMG 20150623 135216 IMG 20150623 135304 IMG 20150623 135457

I haven't installed any third-party Apps on the watch yet... I'll do that and report back here... but I have gone ahead and created my own custom Watchface!

Cloudpebble and Developing

Development for the watch couldn't be easier. Browse to Cloudpebble, create an account and you're already set to go. You can program in C++ or Javascript via their online IDE, which works extremely well. It can even allow you to emulate a watch via the web or directly upload your project to your own watch via your phone! The upload works via your phone's internet connection and then bluetooth... just enable Developer Mode in settings and you're off.

You can choose to develop an App or a Watchface. These are really the same thing, but a watchface will be categorised correctly and perform the correct actions on button-press events.

Mimicking My Old Arnette Watch

old-arnetteHere it is... it was a clunker and it contributed to a broken wrist. (Don't wear watches whilst playing sport!) This is the last remaining photo I have of this model and it is near-on impossible to find any reference to it on the internets.

As you can see, my watch bit the dust after a decade of punishment. I had loved the 'text mode' so much that I decided to emulate it on the Pebble Time. I used FontStruct to create a 30px high font that resembled the Arnette font. This then worked perfectly as a resource in cloudpebble and rendered pixel-for-pixel on the watch itself.

I then just had to write the logic to write out the text of the time. This was a little tricky, but nothing that couldn't be solved by a few arbitrary values and if clauses. The result speaks for itself! There was the odd bug or two to start with... but I've been testing the watchface out in the field and it's working great. I think I might add a battery meter on there and a few other doo-dads if possible. I'll then release it to the greater community.

Note that the old Arnette actually had a 'magic-a-ball' if you held down the top-right button. I hadn't known about this feature... 4 years in to owning the watch I accidently held down the button whilst trying to set the time and the friggen a-ball came up. It read back to me "YEAH SURE". Nice fortune! After that it became a great decision-maker whilst intoxicated. I might also program this into the watchface... will need to work out if I can commandeer the buttons whilst in 'watchface-mode'.

IMG 20150623 123045 IMG 20150623 123204 IMG 20150623 130328
IMG 20150623 130509 IMG 20150623 134455 IMG 20150623 141354

In the last shot you can see that I realised I'd had the colours the wrong way around... flipping them gave me goose-bumps... although the screen is 4x the DPI of the original watch, the result is so similar it's not funny. I love it!

Got any other ideas/development requests?

Feel free to leave a comment here and request something custom for this watch? Am happy to work with anyone who wants to design/develop something for this watch. It's a great platform and the only limit would be one's imagination!

17Jun/150

Osaka – May 2013

More from the photo album I'd neglected... This time it's Osaka and it's 3 years since I'd last visited.

Shinosaka station

Staying at the same apartment as usual (Thanks Masa-san!) I had the same great view of the trunk from Shinosaka Station to Osaka Station north of the Yodogawa.

DSC00462 DSC00467 DSC00468

With my freight timetable in hand, it was easy to be there at the right time to see the transfers through to Umeda Freight Yard or Ajikawaguchi.

Later that night I ventured to Shinosaka Station itself and checked out the expresses on platforms 11 and 12.

DSC00658 DSC00662 DSC00665
DSC00663 DSC00667 DSC00670 DSC00668

Hankai Tram Network - Ebisucho

The Hankai Tramway runs from the southern end of Den Den Town into the southern suburbs of Osaka. It has a cute selection of very well looked-after aging rolling stock.

DSC00478 DSC00481 DSC00485 DSC00518 DSC00514

The two photos at the end are from the steps on the northern side of Spa World as you head into Shinsekai. It's a display of one of the old Hankai Trams and has mentionings on the history. I couldn't read it ....

Noda Station - Tetsudou Library

I waited here one night for the Super Rail Cargo M250. It didn't come... The Railway Library is still there though! Very impressive... something that wouldn't commercially survive in any other country, I'd imagine... the photos below are the most recent from May 2013 and then photo I took in 2010. Not much of a difference, just different paper posters in the left windows.

A Haruka also bolted past on its way to Kyoto...

DSC00687 DSC00691 Railway Library... 180yen for 30minutes access.

16Jun/150

Taking the long way from Osaka to Kansai Airport

Digging through my backed up iPhoto album, I'd realised that I'd completely failed to upload and blog about my 2013 trip to Japan. I'll be collating (and trying to remember) the photos and trips and hopefully write about them in due course.

This post is about a trip I took from Tennoji to Kansai Airport. Usually you'd just jump on the Nankai Rapi:t or JR West Haruka, but I had time to burn and new places to visit.

Why not take the express?

Scenery from a train window in Japan is, more often than not, impressive. It's not as educational as a TV, but the quality is realistic and the views picturesque. The audio quality is also fantastic and there's often a connection to the soul when one of the clicks or clacks actually physically interacts with you.

Realising this, I had decided to extend what would be a very short and fast trip into a long and thoroughly enjoyable one through the south Osaka countryside.

Kansai Main Line

From Tennoji, I watched the expresses depart southbound towards the airport and realised that 3 or 4 of them would reach my destination before me. I was in for a much longer trip, starting off heading east, instead of south, towards Oji.

This is the Kansai Main Line (the translation could also be "Kansai Original Line") which cuts across the Kii Peninsula from Tennoji through to Tsu. I travelled on the west side of it from Tennoji through to Oji, which uses an assortment of EMUs. Further to the east you switch to a DMU to get over the mountain range to Tsu.

Note that Google Maps correctly shows the name from Kamo to Namba as the Kansai Main Line. JR West has given the stretch from Namba to Kamo the nickname "Yamatoji Line" and runs the "Yamatoji Rapid" on it.

Wakayama Line

This line runs from Oji to Wakayama. From Gojo Station, the track parallels the Kino River (Kinokawa River? Kino River River?) giving the passenger some fantastic views. I was there in early Summer and there were carp kites hanging from cables strung across the breadth of the river. For the life of me I can't believe that I didn't take any photos.

DSC00710

Oji Station DSC00712 DSC00713

Hanwa Line

This is the stretch of track from Tennoji to Wakayama. Multiple express trains run along here... The Haruka to the airport and the Kuroshio/Ocean Arrow to Shingu. I checked out Wakayama station, a junction for the Kisei Line and the Wakayama Railway Kishigawa Line.

DSC00717 DSC00719 DSC00724

Musota Station

This is the first station north of Wakayama on the Hanwa Line. The expresses don't stop... and there's a sweeping curve and bridge to the south, providing a great spot to get them coming through at full-tilt.

DSC00753 DSC00729 DSC00739
DSC00744 DSC00748 DSC00749

You then get great shots from the north with the mountain range in the background.

DSC00750 DSC00732 DSC00736

Yamanakadani Station

Heading north, the track enters a mountain range just after Kii Station. In the middle of that range is Yamanakadani Town. This little town has a tiny station where the expresses bolt through.

DSC00763

DSC00755 DSC00765 DSC00768

DSC00773 DSC00777 DSC00754

DSC00775

Shinge Station

Further north, after the mountain range, the track makes it way towards the branch to Kansai Airport at Hineno. Two stations before this is Shinge Station. It's extremely urban and sees very much the same traffic. No express trains stop here.

DSC00790 DSC00791 DSC00792
DSC00795 DSC00796 DSC00802

Hineno Station

The branch to Kansai Airport starts here. The Haruka Express trains therefore stop here to allow connecting passengers to continue south to Wakayama.

DSC00779 DSC00786 DSC00787

From here it was a quick transfer and trip through Rinku Town before arriving at Kansai International Airport.

11Jun/150

6029 to Wagga Wagga

That beast of an engine from Canberra was on the move again, this time southbound. It was the June Queen's Birthday long weekend and they were running a 'Winter Safari' tour to Junee and Wagga Wagga.

I wanted to check it out, but didn't feel like covering the 100s of kilometres there and back driving; so I chose to take the trusty XPT once again. The Friday night service would get me to Junee just before 0100 hours. This was ok as I'd arranged with the motel across from the station to stash my room key somewhere accessible. All went well and I slept for the arrival of the train the next morning.

DSC06677 DSC06696 DSC06703
DSC06683 DSC06684 DSC06687 DSC06691 DSC06694

The overland arrived just before our train departed. It was busy shunting the auto-rail off the rear and over to it's dock to put the cars back onto the road. The trip into the night was peaceful enough, although it seemed that getting drunk and walking up and down the corridors all night was to be a good hobby for some locals.

Saturday Morning

I'd inspected the ARTC timetables and put together the following diagram. There wasn't too much freight in the area, but there was enough to keep one's self entertained. I had initially thought that the steam engine shuttles were from Wagga to Junee and back, but it turned out that (once I actually read the website correctly) that the shuttles were just between Wagga and Bomen. It seems that quite a few others, who came looking for the engine on the platform at Junee during the day, made the same mistake.

		Coota	Junee	Bomen	Wagga
ST22	CLK	0137	0048	0033	0022
6MB4	PN	0329	0221	0158	0150
6MB7	QN	0539	0405	0340	0332
5BM7	PN	0354	0441	0522	0528
9L03	ARHS	0449	0543	----	----
3PW4	PN	0903	0757	0727	0719
9S05	ARHS	----	0805	0830	0840
9L06	ARHS	----	----	0915	0855
9S07	ARHS	----	----	0920	0940
9337N	PN	0852	0944	----	----
9L08	ARHS	----	----	1015	0955
6WP2	PN	0900	0952	1021	1028
9S09	ARHS	----	----	1030	1050
9L10	ARHS	----	----	1125	1105
9S11	ARHS	----	----	1130	1150
3314N	QUBE	----	1159	----	----
9L12	ARHS	----	----	1225	1205
9S13	ARHS	----	----	1230	1250
SP41	CLK	1219	1258	----	----	
3315N	QUBE	----	1300	----	----
ST23	CLK	1251	1327	1346	1354

I'd bought my return ticket from Junee and had considered trying to change it to depart from Wagga instead. Unfortunately there weren't too may transportation options to get to Wagga, so I stayed put in Junee to watch the festivities. In hindsight, I could have actually purchased a ticket on 6029 and travelled south to Wagga in the morning when they left... but meh, I'd no idea.

6029 arrives with assistance

4501 and 4403 lead 6029 into Junee around an hour late. Still under the cover of darkness, the consist made its way into the yard and then detached. All three engines came off the consist to allow 6029 to shunt off and proceed up to the roundhouse. As with most typical gunzels, there were ramblings of mechanical failure and other doom/gloom. I would've assumed that 6029 would've lead into Junee, but then again... it was pitch black and there was no need for spectacle. They would've also needed to keep up with traffic, so having the diesels do all the work makes sense.

DSC06709 DSC06715 DSC06717
DSC06719 DSC06720 DSC06722

The engine stayed in the roundhouse for quite a while... missing the initial slot it was meant to take from Junee to Wagga.

DSC06735 DSC06800 DSC06832

A northbound freight was then given the path and 6029 covered it in steam/smoke as it came through.

DSC06868 DSC06872 DSC06888 DSC06891 DSC06894
DSC06902 DSC06908 DSC06913 DSC06916 DSC06919

Once the path was clear, the consist was shunted into the station and passengers boarded.

DSC06923 DSC06931 DSC06932 DSC06935 DSC06937
DSC06938 DSC06948 DSC06951

It then proceeded off to Wagga, looking great, but requiring quite a bit of help from 4501 on the tail as it climbed the grade out of Junee.

DSC06954 DSC06956 DSC06958
DSC06962 DSC06965 DSC06967

That was it for 6029... the next site was from the window of our southboard daylight XPT. One of its shuttles was to Uranquinty and it was in the loop there as we bolted through.

Freight around Junee

There's always containers stored in the yard... Qube shunt here from Harefield. It seems that they can't fit their entire consists into the roads at Harefield, so they shunt rakes of container trains back and forth to load and unload. They then bring the portions together in Junee yard and take them south to Melbourne.

DSC06975 DSC06977 DSC06978 DSC06991 DSC06992

Junee is also the location of the triangle to Griffith. I lie though, it's no longer a triangle. The branch is only accessible when heading north from the south, so any southbound train wanting to go to Griffith has to head into Junee Yard, run around and then proceed back out again. A grain train did this whilst I was waiting at the station.

DSC07004 DSC07006 DSC07008

DSC07029 DSC07030 DSC07031 DSC07032 DSC07033
DSC07036 DSC07040 DSC07042
DSC07044 DSC07045 DSC07049

A random Aurizon track vehicle then appeared at the crossing, mounted the tracks and then bolted off north.

DSC07016DSC07017 DSC07034

Finally the Qube service from Harefield arrived to drop off one rake of containers and take another off to load/unload.

DSC07050 DSC07083 DSC07085

Railmotor Societies 721/621

The radar then showed that an unusual vehicle was headed south. Speaking to folks on the platform, it turns out that the Patterson Railmotor Society was running a tour over the long weekend also.

DSC07099 DSC07100 DSC07108

XPT shennanigans

Only one platform is in use at Junee. Whether it be for lack of accessibility, patronage or care, the second platform that would cater to northbound passengers is out of use. This means that, on approach, the northbound XPT needs to cross over to the southbound tracks to reach platform 1. Of course, it can only do this is the road is clear. Funnily enough, the road isn't often clear as the southbound XPT usually crossed the northbound here. It's the half-way point between Melbourne and Sydney.

DSC07129 DSC07133 DSC07139

DSC07143 DSC07148 DSC07151

Due to the track arrangement, the northbound XPT is, more often than not, sent north past the station into the siding north of the level crossing. The southbound XPT then comes through, visits platform 1 and then proceeds to Melbourne. Once clear, the northbound XPT then reverses (well, it's got a cab at either end, so it's not too much hassle) onto the southbound road and accesses the platform. Once loaded it then continues north on its journey.

Quite a lot of mucking around when they could just reinstate the other platform. It's the age-old issue with Australian trains and 'customer' service. They've slapped it in the too-hard basket and it's frustrating to watch the infrastructure crumble.

28May/150

An insight into the workings of a Comment Bot

I get emails every now and then from this blog telling me that there's a new comment for approval. Most often than not, it's spam. It's also usually really shit spam. The context is wrong, the URLs are Russian and the text is crap. I have always wondered how it's generated and who would be the one posting the comments.

Regardless of the plugins I have enabled to stop spam (and it seems 10000s of comments are in fact stopped), some of the crap still gets through.

Today I received an email indicating a new comment. This one was different though... the contents seem to have been verbatim pasted, as opposed to 'customised' by the 'poster'.

{I have|I've} been {surfing|browsing} online more than {three|3|2|4} hours today, yet I never found any interesting article like yours.
{It's|It is} pretty worth enough for me. {In my opinion|Personally|In my view}, if all {webmasters|site owners|website owners|web owners} and bloggers made good content as you did, the {internet|net|web} will be {much more|a lot more} useful than ever before.
I {couldn't|could not} {resist|refrain from} commenting.

{Very well|Perfectly|Well|Exceptionally well} written!
{I will|I'll} {right away|immediately} {take hold of|grab|clutch|grasp|seize|snatch} your {rss|rss feed} as I {can not|can't} {in finding|find|to find} your {email|e-mail} subscription {link|hyperlink} or {newsletter|e-newsletter} service. Do {you have|you've} any?
{Please|Kindly} {allow|permit|let} me {realize|recognize|understand|recognise|know} {so that|in order that} I {may just|may|could} subscribe.
Thanks.
{It is|It's} {appropriate|perfect|the best} time to make some plans for the future and {it is|it's} time to be happy.
{I have|I've} read this post and if I could I {want to|wish to|desire to} suggest you {few|some} interesting things or {advice|suggestions|tips}.
{Perhaps|Maybe} you {could|can} write next articles referring to this article.

Woah... it seems that these comments really do get customised... I mean, they still have NOTHING to do with my blog and the URLs they point to have NOTHING to do with the guts of the comment, but the contents of the comments seem to be variable.

I assume the variability is to prevent the crap getting marked as spam. The English makes sense, to the point where each of the permutations actually sound like a native speaker.

I wonder if a bot chooses, at random, which word to use from each array, or if a human is doing it all. A human should, at least, know that the entire body has nothing to do with any post on this blog; but then again, the poster may not even speak English.

I am sure this {article|post|piece of writing|paragraph} has touched all the internet {users|people|viewers|visitors}, its really really {nice|pleasant|good|fastidious} {article|post|piece of writing|paragraph} on building up new
{blog|weblog|webpage|website|web site}.
Wow, this {article|post|piece of writing|paragraph} is {nice|pleasant|good|fastidious}, my {sister|younger sister} is analyzing {such|these|these kinds of} things, {so|thus|therefore} I am going to {tell|inform|let know|convey} her.
{Saved as a favorite|bookmarked!!}, {I really like|I like|I love} {your blog|your site|your web site|your website}!

Then again.. if you keep reading the dribble you'll see how crap it is and, even though some sentences flow, others just don't belong where they are.

Meh... either way, it was a very interesting insight into the workings of these bots/humans/drones posting shitty comments on the world of blogging.

28May/150

Sockets: Bytes and Message Terminators

Sockets are fun. They're a cross-platform mechanism for opening a black hole to another dimension. Of course, you're the one that defines the other end and you're in full control of what gets sent into the hole.

Hopefully you've also written the code at the other end... that way you're also in full control of what comes back through the hole. Note that, like any good black hole, the specks of data flying back at you won't always be complete, nor in sequence. Fortunately, if you're using TCP, the underlying network technology/code will rearrange the packets for you. UDP, on the other hand, will send the packets to you as it receives them.

Text or Bytes?

It does get better though... especially when you're trying to send through real data, we'll call them bytes [valued from 0 to 255], as opposed to just fancy textual strings in the ASCII format. The latter is great if you actually want to send legible messages; a chat program perhaps? But useless if you want to send large numbers or other binary data quickly and efficiently.

A quick example... say you want to send the value of a HTML colour. Let's choose the colour off-white, of RGB value (250,250,250). You could send the string "250,250,250" and the receiver could parse the ASCII values. You could save further chars by passing in "250250250" and, as long as your receiver understands the format, it would still be understood. What you need to realise though is that you're sending 3 bytes down the pipe when you really only need to send one. Each byte, in this case '2', '5' and '0' are all bytes, has the ability to store a numeric value from 0 through to 255.

The first byte, the ASCII character '2' is actually represented by the numeric raw value 50. The basic idea is that ASCII is a big lookup table. The number 20 is the index in the table that describes the pixel arrangement to display a character '2' on the screen. What you can then realise is that, in the buffer, you've actually placed the value 50 in the first byte, not 2. If you knew how to read that value as 50 and not 2, then you're already saving 1 byte (as '50' would take two ASCII characters!)

It gets better though... each byte can store up to the value 255, so instead of trying to jam the string "250" into three bytes, you simply need to store the value 250 into the first byte.

Signed or Unsigned?

A byte has 8 bits. Of these 8 bits, all 0s equals the numerical value zero and all 1s equals 255. You can therefore store 256 values in a byte. Computers, to represent negative numbers, use the most significant bit (determined by endianess) as a flag to indicate if a number is negative. Unfortunately, this takes one bit off your value, allowing you to store -128 to +127. Why not -127? That would be a waste and would allow -0 and +0. See Two's complement to understand more.

In the end, unless you're using C# (where Microsoft likes to 'help' you and limit ASCII usage) then it'll be up to the receiving end as to how to read the data. All the bits will be there; it's just a matter of casting them to a format you desire.

Message Terminators

Firstly, I'm using the term 'message' here to describe a block of data sent from the server to a client. This block is formulated by the server with known start and end indicators and thrown down the tubes. If the client isn't listening hard enough, then they may well miss the start of the message and have no idea how to recover and process the rest of the data. The goal is to create unique tokens in your message stream to allow a client to truncate data it can't deal with and get back to a known starting point. It can then process the next message in the queue.

Choosing a terminator can be difficult. A unique byte, or sequence of bytes, can be hard to determine if you are expecting to send arbitrary data in the message content. Human-readable characters can be used, if sending strings where those characters can't possibly be included. The 'pipe' | is a good choice, even a comma if you're in total control of message content and can replace/remove them from the middle. The issue will be that as soon as a terminating character is found in the middle of the string, then the client will expect that the message is complete and pass on the truncated data for further processing. It then gets worse when the client retrieves the next message which happens to be the second half of what should have been a complete message.

The best way to get around this is to have a header at the start of your messages. First and foremost this header needs to indicate the length of the message it describes. From then on you can have whatever message content you want, making sure the byte count matches the length you have set. In a recent application, I limited myself to 255 byte messages, so the first byte of any data sent was a numeric value that describe the number of following bytes that made up the message. I then also put a terminating character at the end, the pipe, as a check so the client could confirm that the end was really there.

Putting it all together...

Once you've defined a message structure, your listeners and receivers should be able to decipher the string of bytes coming down the line with a little more ease. Of course, if they get caught up and fail to read packets then those packets are lost. Your next step would be to ensure each end is in a known state and that if a state hasn't progressed that data needs to be re-sent.

I'll post again in the future with code samples for the theories above.

14May/154

Quadra 950: MacOS 8.5 (and 8.6)

The Quadra is a 68040-based Macintosh. Unfortunately, MacOS 8.5 and higher require a PowerPC processor. Regardless of the fact that you can 'add' a PowerPC Processor to the Quadra, MacOS 8.5 is still listed as unsupported on this model.

Impersonating a 'real' PPC

It seems that every model of Macintosh has a specific unique ID stored in the BIOS of the logic board. The MacOS installer will verify this against a known set of values before proceeding. If a correct value is not found, then you'll get the dreaded This program cannot run on your computer error.

There's numerous tutorials online on how to get around this. The Unofficial Turbo 601 Site has instructions and so does Running Mac OS 8.5 on A 68k Mac with A PPC Upgrade Card. The Mac OS 8.5 Special Report has an Install Hack page also describing how to do this.

Note: You don't need to go through the hacking process! The Presto PPC Software can do it all for you and I've described the process further below.

The main point behind all of this is that the hardware is there and ready to roll for MacOS 8.5. Apple, in their infinite (loop) wisdom, decided that they'd wipe the slate clean and only support the 'real' Macintosh PPC models. We can get around this and the following steps will show you how.

Tricking the installer

Your first step is to go to Low End Mac and grab Wish I Were. This archive contains both an extension and a control panel. Read the README that comes with it for more information.

fail-install wish-1 wish-2

Drag both the extension and control panel at the same time to your startup system folder. Once copied, jump over to Control Panel and open Wish I Were. Set your Gestalt to Powermac 6100/60. You'll now need to reboot... Don't bother with the Quadra 940 with Upgrade, I thought this might work, but it's probably the original ID that the Quadra 950 CPU/BIOS is already returning.

If you have your installation disk ready to go (it is recommended to install to another physical disk!) then start the MacOS 8.5 installer now.

MacOS Installation

Note: Prior to even trying the install, make sure you have enabled your PPC Upgrade Card and have set Wish I Were to a relevant value!

Grab the software and burn it to a CD or mount the image on the desktop. Double-click the Mac OS Install application to get started. Installation itself is painless... lots of 'next, 'next', 'finish'. You can choose to customise; for some reason Quickdraw GX was unchecked for my machine, I checked it for fun.

The install will try to update harddisk drivers. Don't be worried if you get a warning that this cannot be done. It will usually only work for drives that have Apple firmware. The installer will continue regardless of a successful firmware update. Note that it will try to update firmware for all attached harddisks; not just the target disk.

Files started copying... (the estimate was 21 minutes) and then fail: "Get QuickTime Pro" could not be copied from Disk "". What? Blank disk label? I had been using the internal drive at this point and decided to switch to the slower PowerCD (see all about my optical drive illusions here.)

I inserted the original Mac OS 8.5 CD in the PowerCD and everything loaded. You could feel the icons refreshing in the finder folder and the screen refreshing the license agreements during the installation steps. The files started copying again and the estimate was 50 minutes! They were smart enough to judge the speed already, prior to any files copied and guessed that this drive would take more than double that of the internal drive.

The file copying continued without errors... was the slower PowerCD more capable of reading a damaged disk? The-slower-the-better with scratches? Either way, the 50 minutes quickly became 46, then 40 and then 30. It still did take a good amount of time. My last Windows 8.1 install felt like it took me only 15 minutes to get to the desktop!

Once the install has finished... make sure the startup disk you installed from is still handy (and remember the SCSI ID!) Rebooting at this point will make Mac OS 8.5 throw the usual "this startup disk will not work on this Macintosh model." .. feel free to reboot just to ensure this occurs.

If it does, hold down CMD-OPTION-SHIFT-DELETE-(SCSI ID) on your next reboot and make your Macintosh boot the harddisk of the associated SCSI ID. Note that 'Delete' needs to be the full 'Delete key, not 'Del'. The number also needs to be a number from across the top of the keyboard, not the numpad! This should be your previous startup disk, or another... either way, we just need an environment to ResEdit the Mac OS 8.5 partition.

gestalt-hack-2 gestalt-hack-3 gestalt-hack-4

Once you're back on a known desktop, download and install ResEdit. Open the 'System Suitcase' from inside the System Folder on your new MacOS 8.5 partition. Once in there, open the gusd resource and then open resource 1. Go to Find -> Find Hex and search for 001f001c, there'll be one occurrence. Highlight the block including 001f and type 0076 for the Quadra 950 (see other model IDs here.)

Quit out of ResEdit, saving your changes... as that you booted with the special shortcut, your startup disk will still be the new MacOS 8.5 partition... reboot your Macintosh. Now you get to watch it pass the hardware check and load to the desktop! Step through the Mac OS Setup Assistant if you're really bored. 'Checking network connections' in the setup assistant took a REALLY long time... minutes... and then never completed... I forced it closed, but Finder then never responded. Sorry Finder, you get a reboot. I then, for the first time in ages, saw the "Your machine was not shutdown/crashed" disk-check screen. I'd forgotten all about it!

Meanwhile, my Asante Card just worked! Note that TCP/IP is disabled by default. Go to the control panel and enable it. I loved it that my Ethernet slot 3 was already a selectable option.

Also, all the disk mounting issues from above had gone away. Blank floppies show up as 'PC' floppies but the PowerCD still wouldn't work with Audio CDs (data CDs were fine.)

Upgrading to MacOS 8.6

I acquired the update and burnt it to a blank CDR. Turns out the internal NEC drive just hates recordable media. Fortunately, the trusty PowerCD came through with the goods and got me started. At the 8.5 desktop, with the CD mounted, I double-clicked on "Upgrade to 8.6" and got the usual "you have an unsupported system." Of course I do... I'd been running peacefully in 8.5 for so long that I forgot that the Wish I Were hack was on the previous 8.1 disk. So, I scrounged around, extracted the extension/control panel from the other disk and dumped them on my 8.5 install. Prior to reboot I adjusted the machine back to a Powermac 6100/60.

After a reboot, I was running the installer. It is extremely streamlined... I get one option to update SCSI HD Drivers and that's about it. The installation proceeded (slowly on the PowerCD) without a hitch.

After the installation, I attempted to get back to the desktop. Unfortunately the installer wasn't going to have it... it kept demanding that a restart was in order. I had no choice... I didn't want to restart because I knew it'd throw an error. Luckily, my 8.1 partition was there, so option-command-shift-delete-0 (remember, that's delete, not del) saw that boot.

Once at the desktop I opened the new System Suitcase in ResEdit, made the hex change to gusd and saved everything. The system was now allowed to reboot.

The desktop came up and everything worked very well. My network wouldn't get a DHCP address to start with, but that ended up being my ethernet-over-power setup... a solid cable fixed it up.

Note that if you have any DHCP issues that you can supposedly update OpenTransport to the version included with MacOS 9. Sustainable Software's page on DHCP and Mac OS indicates that MacOS 8.6 uses a different technique to obtain DHCP addresses. Download OpenTransport 2.6 here. You will probably need to re-enable 'Wish I Were' to install it.

Sonnet Presto PPC 8.5 and a fresh MacOS 8.6 install

It seems to be little-known that this can all be automated. Sonnet, a maker of PPC upgrade cards, released their Presto PPC utilities to do everything listed above in a much easier fashion. Find the manual for an upgrade here. Download the application and install open the archive. You'll get an dialog that allows you to mount the disk or write it to a real floppy. I did the latter and, once successful, you get the Macintosh Text-To-Speech telling you it's complete! How quaint!

From here, I've installed a fresh version onto another SCSI HD. This drive is 36gb and needed to be partitioned. Using my previous install, I had a base to run partitioning software from. It turns out there's quite a few options... your mileage may vary! Check out this page for partitioning and the tools available.

DSC06342

DSC06345

Partitions ready, I copied over my Games, Apps and Development files. I then restarted with the Presto Floppy Disk. The floppy has a raw Apple CD Driver on it and it didn't find any of my CD-ROMs. I threw CD Sunrise in the system folder and then rebooted with the floppy... it tried to see the PowerCD but thought it was uninitialised!

I opened up the MacOS 8.1 partition and copied the ISO9660 File Access, AudioCD Access and High Sierra Access extensions to the floppy. I had to remove the Profiler patches to make this work, but I wont need them yet anyway. After a reboot, still no dice. I swapped the CD Sunrise extension out for the original Apple CD version, just in case that only worked with the access extensions... it still didn't work on reboot.

At this point I realised I wasn't going to be using the floppy to boot and install. So I booted into my 8.1 install and ran the installer from there. I chose to install a fresh version on my newly partitioned HD. Starting the installer got the usual "this software cannot be installed on your machine", so I resorted to the Presto PPC manual.

So, floppy disk inserted, you must first copy the Presto PPC 8.5 Enabler and Presto PPC ID files to your current system folder. Do this and restart your machine. Installation can now proceed as usual. I chose a clean install on the blank partition.

The install took so long that I gave up. Don't even bother using an Apple PowerCD for data... it's toooo slow. Single speed maybe? I booted up Cockatrice III on my Windows machine and mounted the 8.6 ISO. I then shared it via Chooser to the Quadra and installed it that way. Worked a lot quicker.

Rebooting got the usual This software is not designed for this Macintosh. This is expected... the fresh install did not have the PowerPC ID masking files. So, back to the manual, I booted from the floppy and failed ... The System version on the Presto PPC Floppy is too old and wont recognise my 4gb partition. It tells me there isn't enough space to copy the files over! I'd imagine it's an integer size issue.

cmd-opt-shift-del-0 WOULD NOT boot my original partition... it seems that this time around the system wanted to ignore my keypresses! Booting from the floppy and trying the short-cut combination wouldn't boot my other hard disk either... guess the hack? Boot the Presto PPC floppy to the desktop, open the system folder on your MacOS 8.6 install partition and browse to the Startup Disk Control Panel. Changing the startup disk there will actually change it for that entire drive. I then went Special -> Restart and Finder locked up. I forced a restart, the disk didn't eject and we rebooted back into the floppy's archaic desktop. A further restart got me back into MacOS 8.1!

So, now I could copy the extensions over. These are the Presto PPC 8.5 Enabler and the Power Macintosh Card Control Panel (yes, it says 601 Processor Upgrade in the doc... but on the disk that is not its name!) Drag them from the floppy to the 8.6 System Folder.

From MacOS 8.1 I then switched the Startup Disk back to MacOS 8.6... and... the friggen thing booted. Winner!

Black-screen-of-death (aka Sad Mac)

If you do anything to screw your PRAM, then it will default back to the 68k processor. As soon as you do this, you'll get the following error screen:

DSC06453

This error: Sad Mac 0000000F 0000000C indicates that MacOS has tried to boot and found invalid hardware. 8.6 only wants to boot on a real PowerPC, so it's found the 68k processor and failed.

The resolution is to boot from a disk that can boot on 68k (Presto Floppy as above? Older MacOS 8.1 boot disk? etc...) and then get to a control panel that'll let you switch the PRAM back to PowerPC mode. My answer was to boot the Presto disk, go to the System Folder on my 8.6 HDD and then toggle the PowerPC card.

The system then rebooted fine!

Filed under: Apple 4 Comments
7May/150

net.tcp and IIS Express does not work

I've just spent time trying to rig up a test to get a working net.tcp server. Turns out that, in Visual Studio 2012 (and just about every other VS version), the IIS Express Server that one usually debugs through CANNOT support anything other than HTTPS and HTTP.

Q: Does IIS Express support non-HTTP protocols such as net.tcp or MSMQ?
A: No. IIS Express only supports HTTP and HTTPS as its protocol.

Please do not waste your time... When you hit debug on your net.tcp service, IIS Express will instantiate and you'll be thrown to your favourite web browser, staring at your root folder which is readable. You'll note that you'll also be on a port that has nothing to do with your web.config. This is because IIS Express has generated a random port and not cared one iota for your port configurations in web.config. You'll get nothing but connection refused when you try to connect to net.tcp://localhost:PORT/Service.

I was about to whinge that this tutorial on configuring a net.tcp service on IIS7 doesn't mention anything about incompatibilities with IIS Express. I suppose that one must assume by the header that the article is only for IIS7. A footnote would still be greatly appreciated for those trying to develop their code before deploying it!

If you ever want to get this to work, deploy and test your server on a real IIS instance and run from there... IIS7 preferably.

Note, if you need to debug... bring the server up, hit it with a simple query to make sure the app pool is active, and use Debug -> Attach to Process from Visual Studio. You'll find w3wp.exe way down the list with your Website's 'name' next to it. Highlight it and hit Attach to debug pesky server-side problems.

Once debugging in Visual Studio, you'll then need to open your source files (they can be in any folder, VS initially wont find them automatically) to set breakpoints. Note that exceptions will be caught in VS whilst debugging and will halt execution on IIS for all users. I have, once or twice, accidentally left the debugger attached overnight and had very angry clients in the morning with stalled connections.

6May/153

Quadra 950: CPU/RAM Upgrades and Overclocking

When it comes to upgrades, the Quadra 950 has 16 SIMM RAM slots, 4 VRAM slots, a ROM SIMM slot, 5 Nubus slots and a PDS slot. RAM and CPU upgrades can be purchased via off-the-shelf means. Little is it known that you can also then overclock your CPU. Below lists some options for getting more horsepower out of your vintage Macintosh.

Apple PowerPC Upgrade Card

The previous owner already had the "Power Macintosh Card" Control Panel installed on the 7.6.1 system. After inserting the card, I went into the control panel and enabled the PPC Card. I was informed that a reboot was required and promptly did so. It rebooted.... Apple System Profiler indicated the same-old 68k processor? I had recalled online that one user had issues with the card, but then found that it wasn't seated properly. Trying this, I shut the machine down and then put the case on its side. A gentle downward press on the card from both top corners resulted in a rewarding click. Nothing sharp, but that feeling of success when you know something is now in the correct location.

I hit the power button and ... jeebuz.... what was that wretched chime? The 68k boot chime of the Quadra 950 is pleasant, if not downright triumphant. The chime that came from the PPC addon card was ... it sounded like a cheap knock-off MOD compared to an MP3. A dodgy, poorly-recorded sample. Either way... it worked. The screen then came on and I could actually see it drawing the background line-by-line as the grey pattern loaded. Then I saw it draw the MacOS central loading screen. I was running the Supermac Spectrum/24 PDQ+ at this point and that turned out to be the cause. It needs a software update. Meanwhile the onboard video performs much better.

DSC06143 DSC06145 DSC06145

Overall the UI seems much zippier with the PowerPC enabled. Placebo probably... I'll try and perform benchmarks once I have new HDDs and a fresh operating system. Maybe some more RAM too... In the meantime, here's some benchmarks done by Low end Mac.

I've read here at Apple Fool that you can actually remove the 68k CPU when running the PowerPC PDS card. Doing so also resolves graphics issues with other Quadra models. When overclocking (the only reason I found out that you could do this), removing the 68k CPU actually allows you to run the PPC upgrade at faster speeds!

Upgrade VRAM to 2mb

The Quadra 950 has 1mb of VRAM onboard. There are 4 slots in which 4 256kb SIMMs can be installed to extend the video memory to 2mb. This will allow 1152x870 @ 24-bit colour, which is comparable to any video card you can insert! Apple has a support page describing the options for each Macintosh model and you can see that the Quadra can only take 4 more SIMMs.

Four slots support 256k 80 ns VRAM SIMMs for a maximum total of as much as 2 MB of VRAM. 512k VRAM SIMMs can be installed, but four identical ones must be installed and the system can only use 256k of each SIMM.

ROM SIMM Slot

I initially thought that there was a cache slot next to the RAM slots on the logic board. If you look at the images below in the RAM upgrade topic, you'll see that, apart from the 16 SIMMs for system memory, there is another empty slot top-right. It's near the CPU, so cache made sense. It turns out it's a ROM SIMM slot, not a cache slot. In this slot you can put in a ROM that will override the on-board ROM.

Doug Brown makes ROM SIMM programmers that can write the SIMMs that'll fit into this slot. It doesn't seem that anyone, at all, on the internet has ever done this to a Quadra 950. I've been told that you can change the start-up tune and disable the memory check, if you want to... otherwise your options for profit from tinkering with the ROM are little. It would require some very low-level detailed hardware knowledge also!

But for fun, check out Doug's post where he changed his Macintosh IIci start-up tune to the Super Mario theme. If you do want to code ROM SIMMs, Doug has his ROM SIMM burner for sale here.

This slot does have me thinking... minimal OS on an 8mb chip... it'd be like loading from an SSD!

Cache Upgrades

Meanwhile, you can buy Nubus cards full of cache. These 'MicroMac Cache cards' come as PDS cards or 'slot-free', the latter being a device that is installed between your CPU and logic board. This piggy-back mechanism puts the cache right next to your CPU and keeps your PDS slot free for a PPC upgrade.

Upgrade System RAM to 256mb

This one was simple... purchase from seller in the US on eBay. Wait. Open package. Open Quadra 950. Remove old SIMMs. Install. Or so it should have been... quite the initial scare when, upon applying power, the machine didn't start. It powered, the CD-ROM was eject-able, but it just sat there! around 2 minutes later the grey screen came up. It seems that the machine is busy checking the RAM.

DSC06247 DSC06250 DSC06252 DSC06253 DSC06254

Further cold starts took just as long; it seems the RAM checks occur every time you boot after a shutdown.

Installing large amounts of RAM in 68k Macintosh computers causes VERY LONG BOOT TIMES. It seems the BIOS runs a memory check and the more RAM in there, the longer it takes. The Quadra 950 with 256mb of RAM now takes 5 minutes from chime to gray happy mac! Note that restarts are as quick as ever.

Now that I've got my RAM in there, it's time to use it with A/UX.

Power Supply Fan

Every now and then, the Quadra would start up and the fan would make terrible noises... It sounded like something was actually stuck in it, but I couldn't see anything. Either way, I managed to take a fin off the fan propeller during an attempt to stop it. I now had to replace it. It's a standard 120mm 12v fan and a replacement was easy to find.

As I pulled off the old fan, I found the cause of the previous noises! There was an unused cable-tie in there. It seems that it had either been sucked in, or someone had shoved it in there. It was not damaged and did not come from inside the power supply. Every now and then it'd make its way close enough to the fan blades to make a racket. Seems that a bump would make it quiet again, but it would've been entirely random!

DSC06258 DSC06259 DSC06260
DSC06261 DSC06263

Either way, the new fan was in place with some adjustments; it was around 10mm shallower. The previous fan was also powered by the socket on the power supply. I grafted the new fan onto the old fans plug. The system is now running 'cool' again and much quieter! I even get a pretty blue light inside the case.

DSC06361 DSC06362 DSC06368
DSC06370 DSC06373

Overclocking your Quadra 950

Lowend Mac has the downlow on this. With the PPC card installed, I could max my oscillator out at 80Mhz. The system would then run the 68040 at 40 MHz and the PPC card at 80 MHz. Note that there may be software incompatibilities once you upgrade. Check out Apple Fool's run-down of incompatibilities here. For further information, check out Mac Crystal Oscillator Speedup History 2.6. Note, you may not be here for the Quadra 950, check out the Apple Fool Machine Specifics page to see the recommended crystal for your machine.

Based on the modification options table at Apple Fool, the Quadra 950 can take option 1 or option 2. Option 1 sounds the easiest whereas option 2 the safest... either way you need a soldering iron and some guts to tinker with your vintage macintoshes logic board.

The oscillators are available on eBay for a few dollars. I purchased mine from a Hong Kong seller. I bought a 5pk just in case. The are a standard-size unit and have 4 pins. The existing components are soldered into the motherboard, so from here on in you're in for a challenge. The best bet is to unsolder the current crystal and solder in a socket. This will allow for easy replacement to the original crystal if problems are encountered.

It might be hard to find an exact socket for the crystal. Jaycar has 14-pin sockets but they have all pins when we only want the four corners. I've modified a full-size socket by pushing through the intermediate pins.

DSC06347 DSC06348 DSC06352

The sockets are a mongrel to manipulate. Firstly, break off the thin end of the pins to be removed. They only bend when you try to force them out, so remove them from the equation. Next, use pliers or find a surface with a suitable space to push the other side of the pin in to. You could use hammer and nail here, with the head of the nail on the pin. Tap them out gently, but be warned, they are in there solidly and will require a bit of work. I used pliers on them, at an angle, and squeezed them out; but not without minor damage to the housing.

DSC06354 DSC06356 DSC06358

Removing the logic board is straight forward. Remove all the cables from the rear, remove any Nubus cards or PDS PPC card installed. Remove the power supply and hard disks/floppies/cd-roms. Disconnect the speaker and the power switch cables. The debug and reset buttons 'pop out' and can hang half out the front of the case during the process (see pictures.) There is then a tab between the memory banks, to the left, that needs to be pushed down. Once down you just need to slide the whole logic board left and it'll fall into your hands.

DSC06380 DSC06381 DSC06382
DSC06384 DSC06386 DSC06387
DSC06388 DSC06391DSC06392

Once out, heat up your soldering iron. You'll find the 66.6mhz crystal directly above the 68040 CPU. There's four pins on the back that needs to be de-soldered. Your process will either be to (as I did) loosen them one at a time, jimmying the crystal off the board, or the smarter way: use a solder-sucker to remove all solder from the pins and hope that the crystal will just slide out.

DSC06374 DSC06377 DSC06397

Either way, it took me around 10 laps of the pins with a very gentle lever-action in between to remove the crystal. I then soldered my socket in, not doing the cleanest job!

DSC06397 DSC06399 DSC06404
DSC06407 DSC06408 DSC06410

powerpcI put the original crystal in the socket (keep the 'pointy' corner of the crystal in the top-right corner!) to test that the socket was good. Note that the original crystal will have very short legs! Make sure that it's in as-firmly-as-possible and that you don't bump the machine and dislodge it! Running benchmarks (more on this below) produced the same results as pre-chipping. We win. I then shut down the machine and socketed the new crystal. It was a very suspenseful wait for the RAM checks to happen... was the machine going to boot??

5 minutes later.... I had an 80mhz PowerPC 601 machine~!

Benchmarking MacOS

Speedometer is included with the Newer Technology Disk downloads. The results, pre-clock-chip, are as follows:

newer-tech-download Picture 9 speedo-pre-chip

After the chipping, the following results were produced:

speedometer-startup Picture 9 speedo-post-chip

Yeeeeey! Not only did the bloody thing boot, the speed increased! It seems round ~20% too. Makes sense really... since the previous crystal was 66.6mhz, with the new being 80.0mhz.

SieveAhl is a recommended benchmark application for 68k Macintoshes. This application performs two tests: Sieve and Ahl. Pre-clock-chip results are reported below. The 500 tests executed very quickly. The site has a disclaimer that running the tests on PowerPCs isn't accurate as they use all sorts of emulation layers to execute 68k code. Either way, I have a clean set of figures pre-chipping.

sieve-download sieve-pre-chip-1 sieve-pre-chip-2

After the chipping the results were as follows:

sieve-configure sieve-post-chip-1 sieve-post-chip-2

...there's that ~20% increase again! Winner... the overall OS felt much zippier.

Over-clocking equals over-heating!

Of course, your mileage will always vary when over-clocking anything. Extra speed always leads to extra heat and then compounds into stability issues; the system was clocked at a specific speed by the manufacturer after rigorous quality control. Unless politics/marketing have come in, then higher clock-speeds have proven to be unstable and therefore weren't selected/enabled. Don't be sad that your CPU created a nuclear event, be happy that you had it rocketing along for a few nanoseconds! Of course, try and keep it cool for as long as you can.

It turns out that the 20% speed increase also increased the heat coming from the CPU. After around 30 minutes of running, depending on what I was actually doing, the machine would freeze. This is a very common symptom of overheating and the best method is to air-cool the CPU. The PowerPC PDS Card has a heatsink on it, but it's only passively-cooled. Fitting a fan to this should help keep the temperatures down.

DSC06436 DSC06443 DSC06447

I grabbed a fan from a local PC store that plugs into the standard power cables. It was a little huge for the scenario, but it kept the CPU nice and cool during normal usage. Note that there ain't much clearance in the case with a fan of this size... if you need more than 2 nubus slots then you'll want a smaller fan that fits inside the heat-sink fins.

If you've successfully over-clocked your 68k then fill out the survey at Apple Fool to keep everyone informed. You can see the results of other successful chippers here.

5May/150

FileSystemWatcher isn’t watching your files?

Quick note that just stole 2 hours of my weekend; of which I'll never get back... It seems that the FileSystemWatcher in C# it capable of watching files... yes.... but it turns out that the filters aren't as simple as you'd think.

Say you want to watch for new or changed text files in a folder? Filter = "*.txt" right? And the folder has a crapload of *.txt files? that's how it displays in Explorer? Right?

Wrong... Check out this sample code... yes, I'm holding the files open in my own source, but this is just a dirty way to show what's happening:

        static void Main(string[] args) {
            string folder = @"d:\temp\fileWatcherFolder\";
            FileSystemWatcher fsw = new FileSystemWatcher(folder, "*.txt");
            fsw.NotifyFilter = NotifyFilters.LastWrite | NotifyFilters.LastAccess;
            fsw.Changed += fsw_Changed;
            fsw.EnableRaisingEvents = true;
            using (StreamWriter file = new StreamWriter(folder + "test5.txt")) {
                Console.WriteLine("[");
                for (int i = 0; i < 10; i++) {
                    file.WriteLine("test line " + i);
                    Console.WriteLine(".");
                    Thread.Sleep(1000);
                }
                Console.WriteLine("]");
            }
            Console.ReadKey();
        }
        static void fsw_Changed(object sender, FileSystemEventArgs e) {
            Console.WriteLine(e.Name + " was changed!");
        }

From above, you can see that I start a watcher on a known folder, I then start a new file and write to it. The output should always show that updates are occurring. The updates never come... and this is symptomatic of what I had with another external application that was holding files open. It also then presented a bigger issue of adding tildes to the end of the extensions.

It seems that this is an issue in .NET regarding file flushing. The application with the file handles open must flush the data out for a FileSystemWatcher to pick it up. Depending on the speed and quantity of files being flushed, the watcher may have to be customised to cope with the load. Check out the InternalBufferSize parameter.

Note in the above code, you can force a file.Flush() after the file.WriteLine, you'll get a single event. If you use file.FlushAsync() then you'll get ALL of the events! There is no threading in my example code, so the fact that async works makes sense. Of course, if you have no control over the application that is writing the files (as I didn't) then you're stuck trying your hardest to watch the files.

I still can't see my files?!

It gets better though... on some versions of windows, you may will not even see the filename with the expected extension... there may actually be a tilde at the end of the name... invisible to the naked eye. Explorer will show "test5.txt" but the watcher will see "test5.txt~"! It seems that if another application has the file open, the operating system keeps the filename with a tilde at the end until 'flushed' to disk. I haven't been able to reproduce this via the source above, using notepad to hold files open... but I know it happens. The application I had to deal with spewed files out quickly, holding them open, and the watcher only saw "txt~" extensions...

If this is the case, then you can loosen your filter to "*.txt*". Note that if you have a LOT of files being created, then this will slow down the watcher considerably. I actually recommend that you set up a second watcher, one for "*.txt" and the other for "*.txt~".

It's only when you watch the files with a filter of *.* that you'll see the crappy extension names. So when trying to debug this... set your filter as 'relaxed' as possible to capture changes and tighten it when you know what you are looking for.

Be careful! It seems others have had the same problems: FileSystemWatcher class does not fire Change events when NotifyFilters.Size is used.