


 Melbourne BG SCS Train Timetable


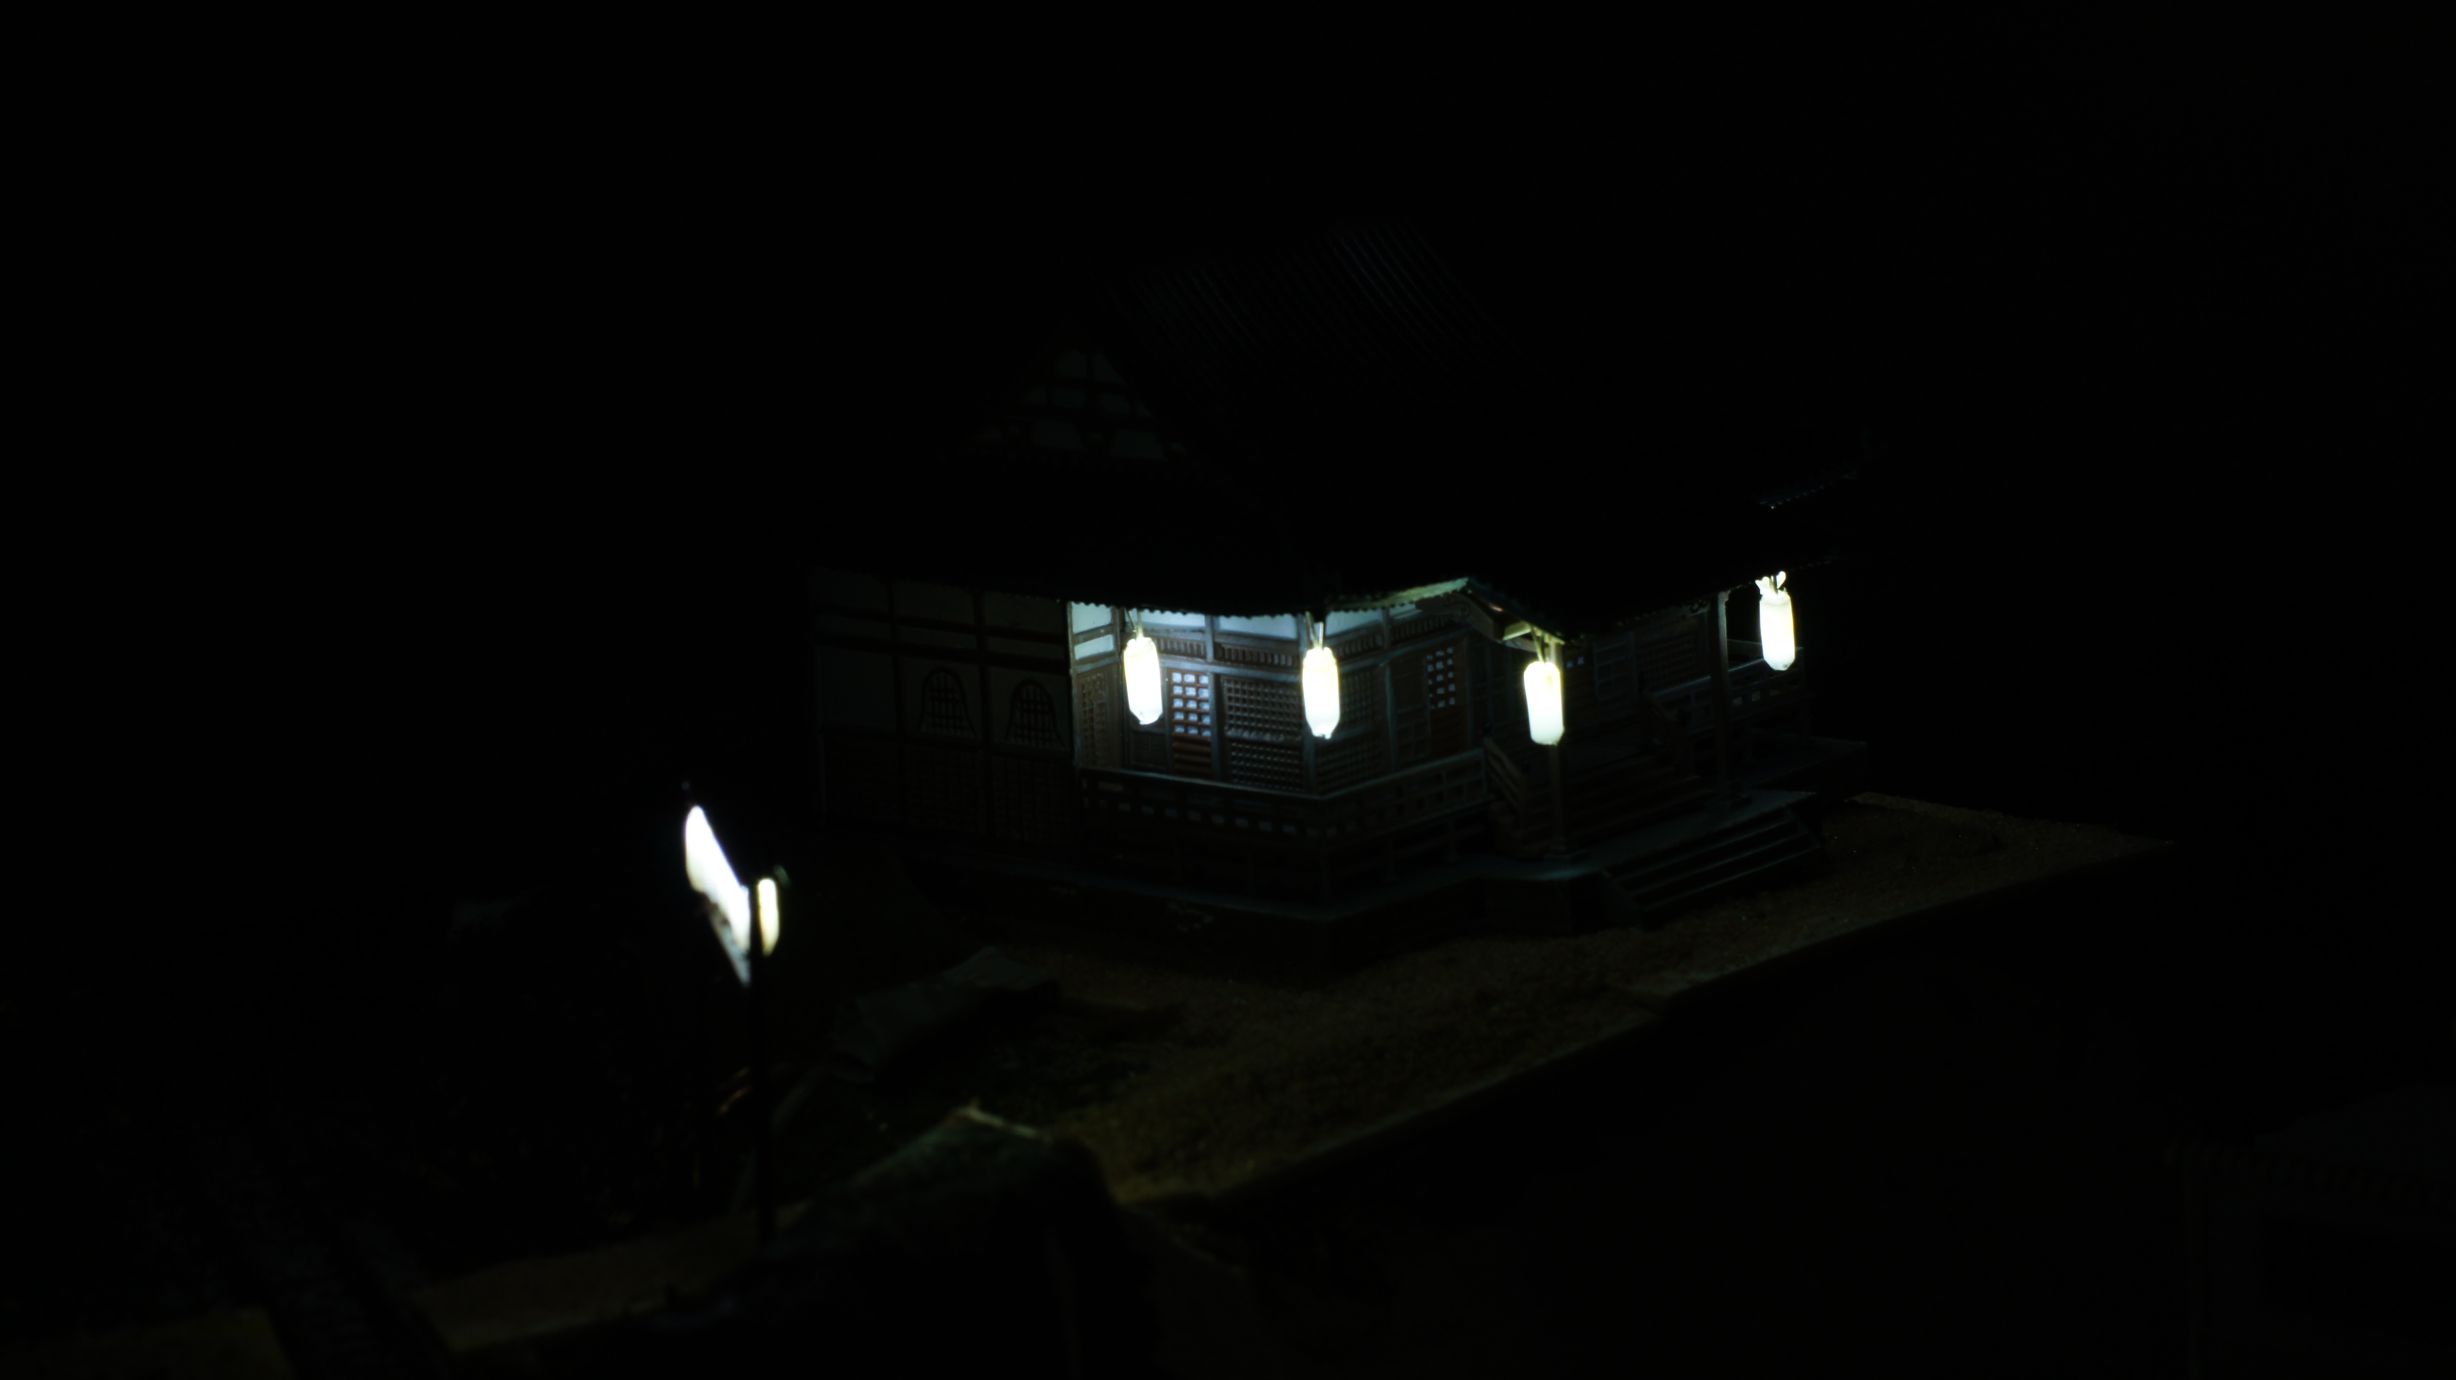
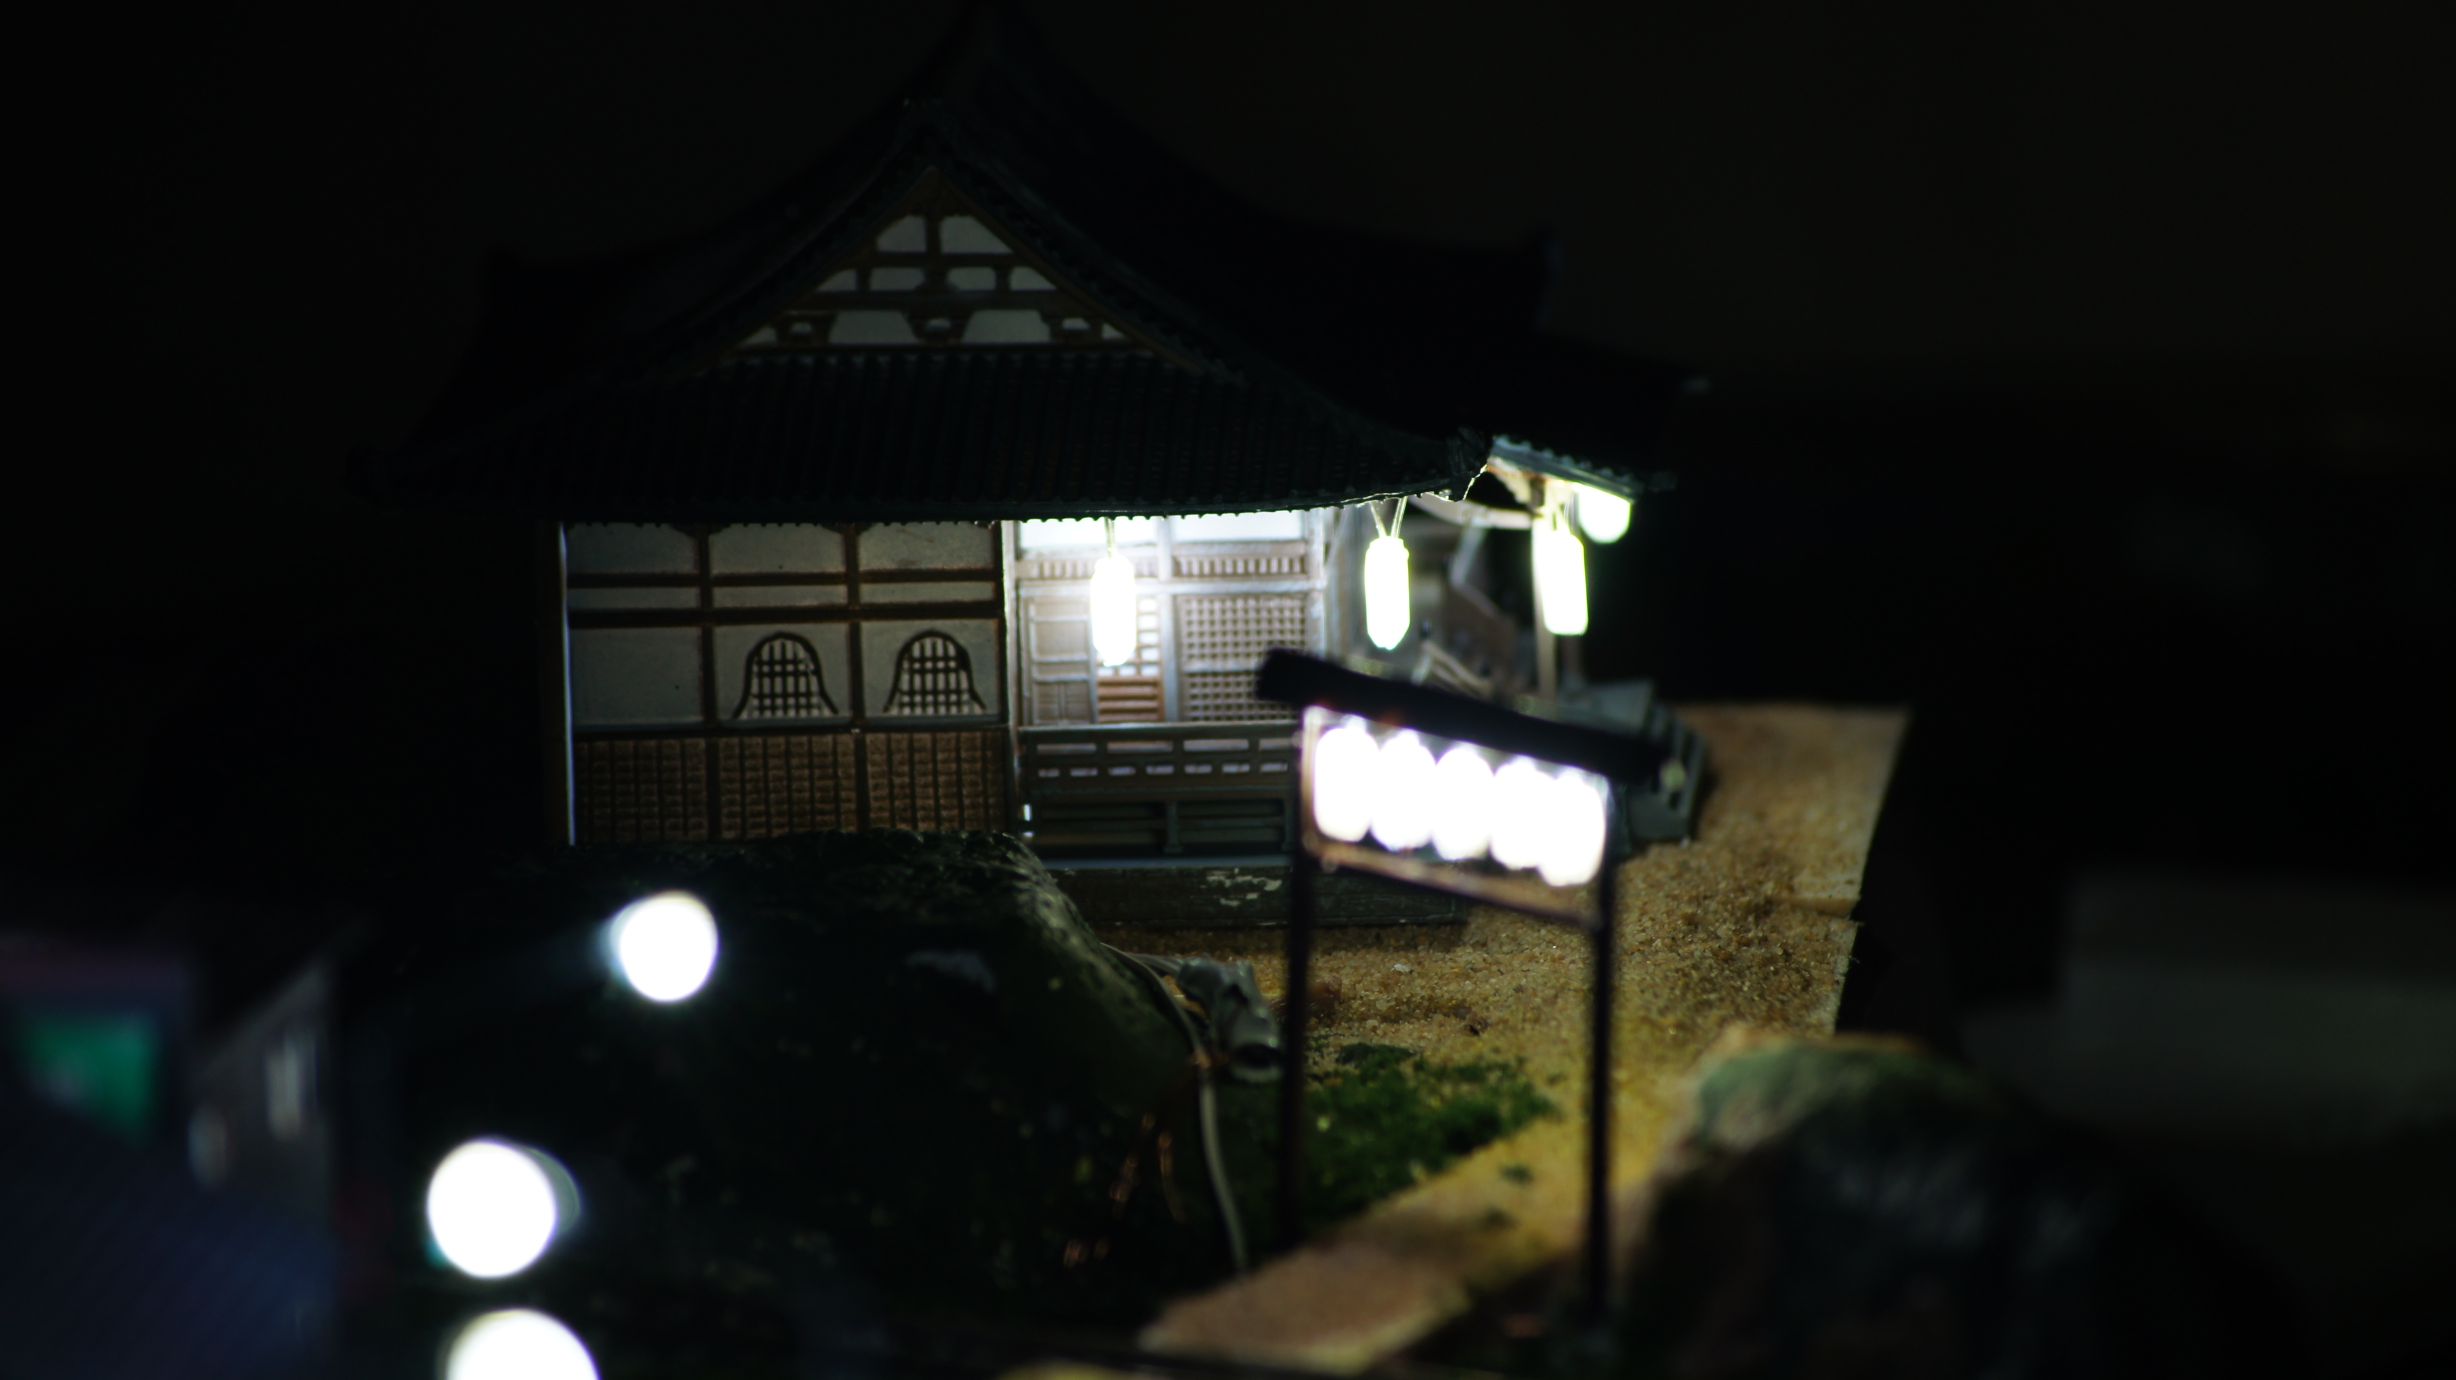
Lighting a Japanese Temple
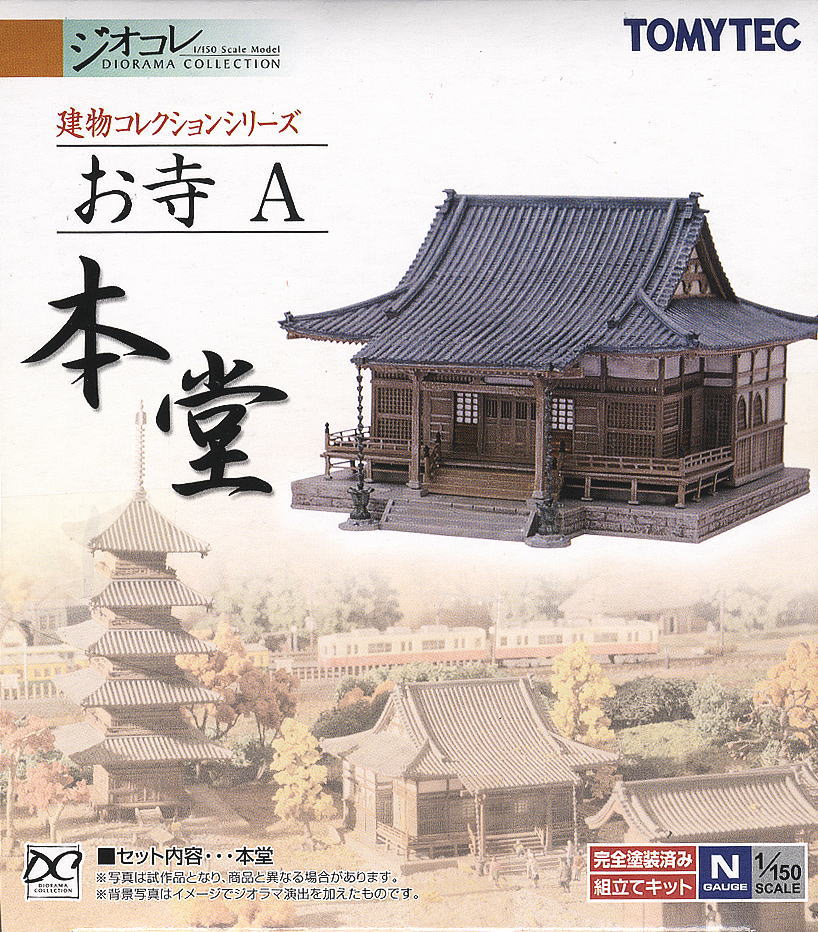
I'd decided it was time to light the temple after building the Torii for the entrance. This temple was the Tomytec Japanese Temple A (Main Building) and is still available for purchase from most Japanese online hobby retailers.
I've slapped LEDs in buildings before, but this time I also wanted to add lanterns to the front of the shop. I'd made the lanterns before, as in my previous attempts of creating the Torii, but I was to make a few changes this time as I wasn't totally impressed with the previous outcome.
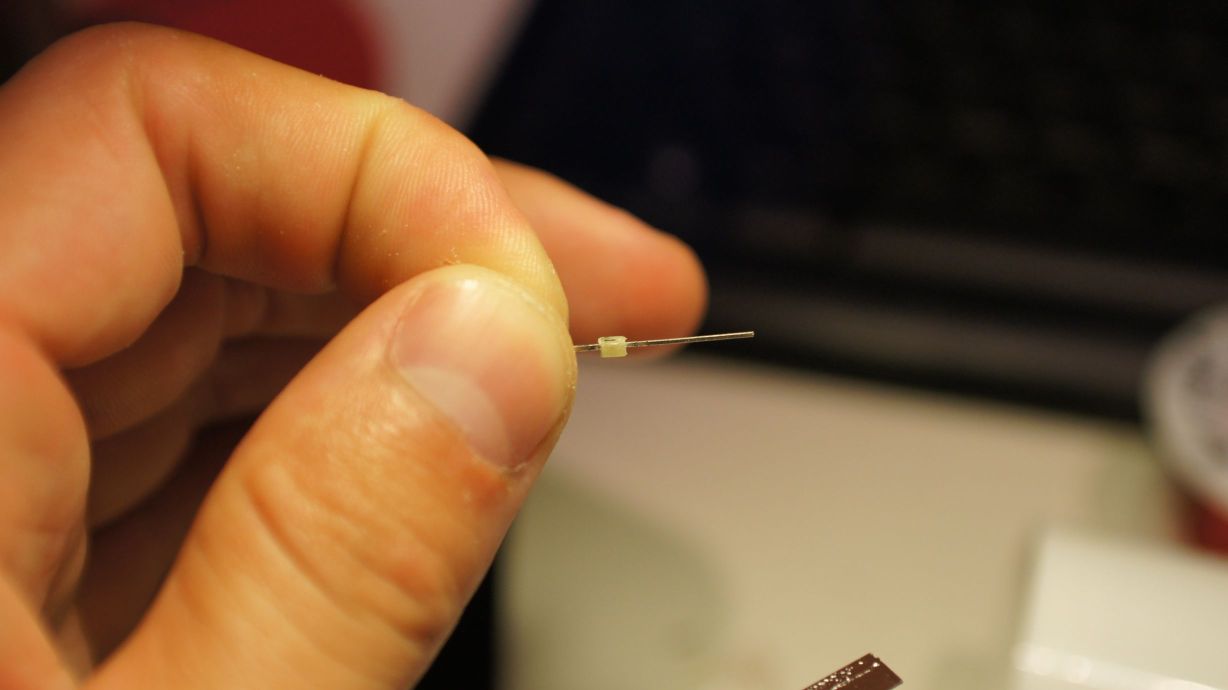
Creating the lanterns
There was a slight change this time to creating the lanterns... instead of cutting them and sliding them over the LEDs, I shaved them down to fit and inserted them into the center of the tubing. This all worked well, but you must be careful when shaving down the LEDs as you can destroy them quite easily. To shave the LEDs, I held them in pliers in one hand and filed away with my pocket knife. It was pretty obvious to feel when you were no longer filing away at plastic and, unfortunately, this was usually the demise of the LED.
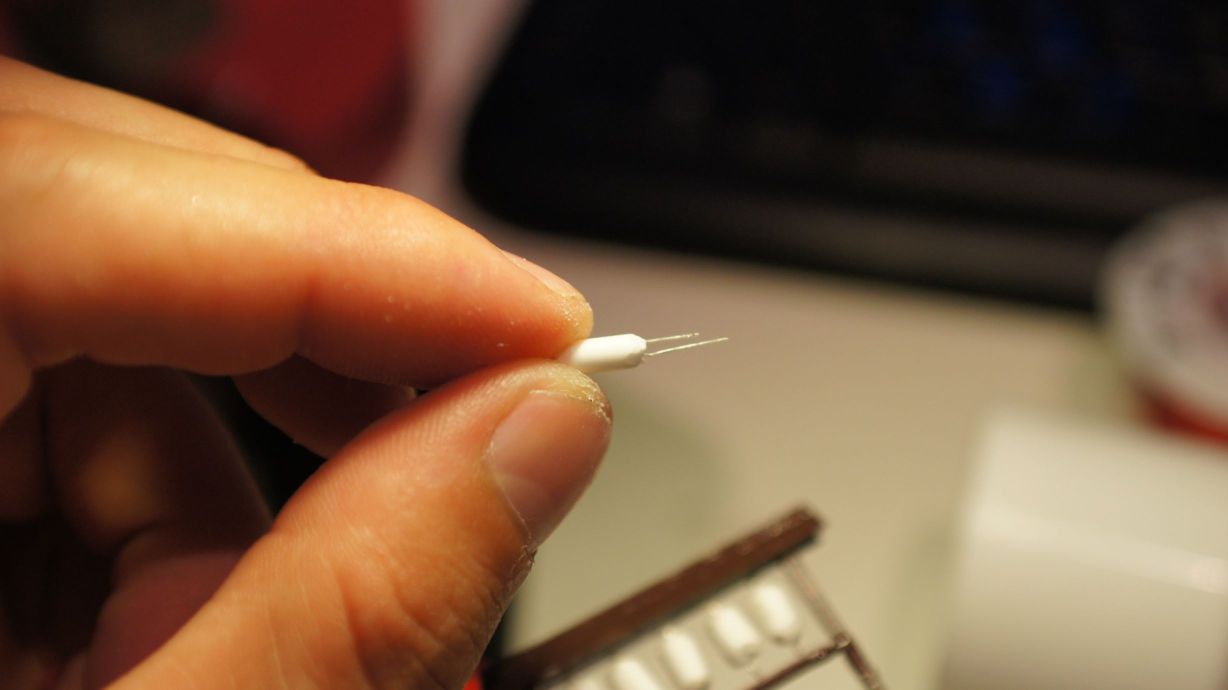
Mounting the lanterns
I used the same copper winding wire that I always do and bent it into a rectangular shape to fit the roof of the temple. I then started soldering the lanterns in place.
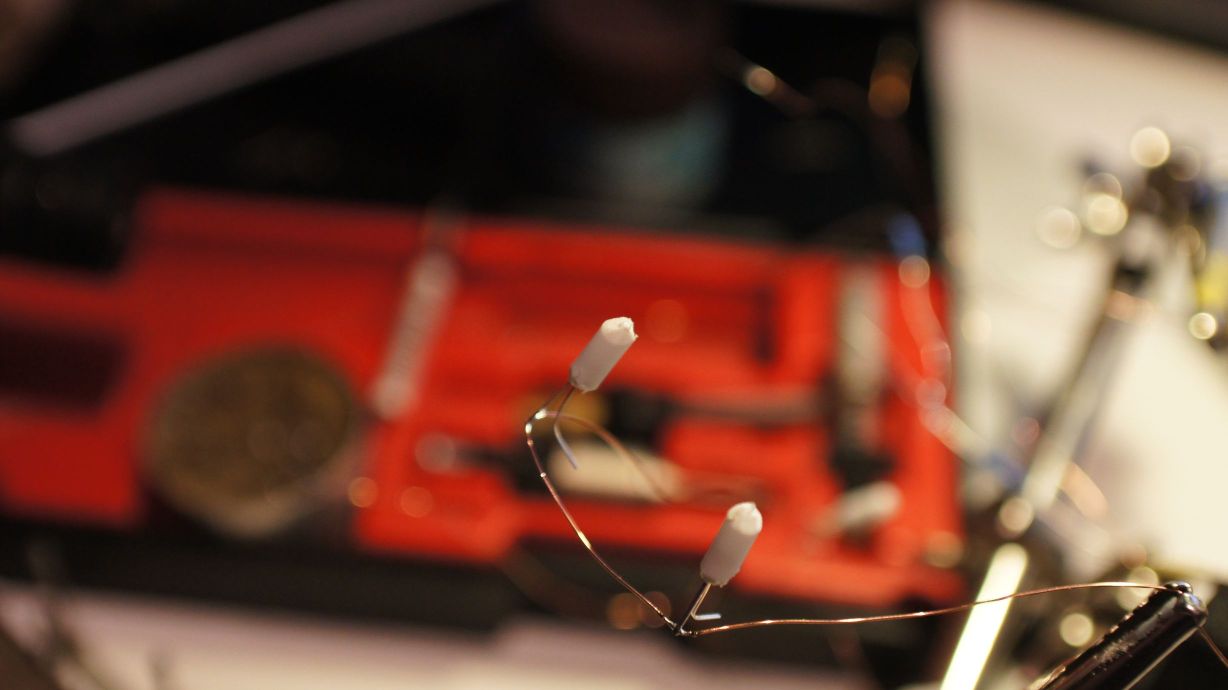
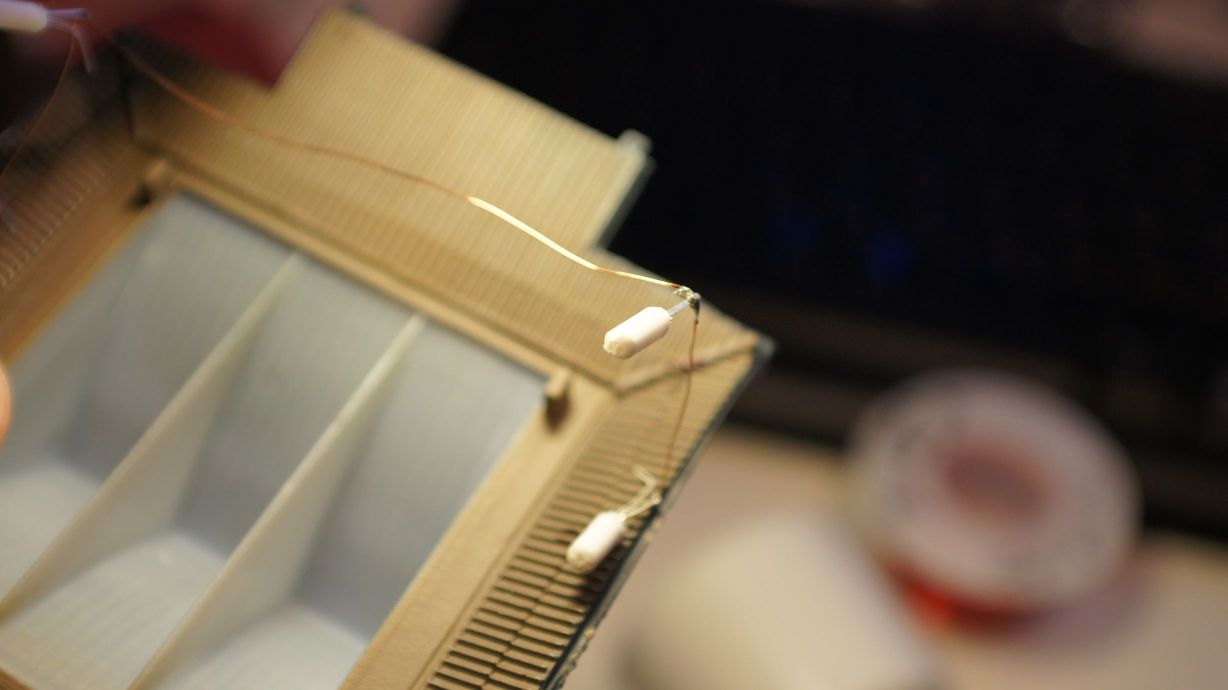
I then pulled out the trusty Selleys Aquadere and, using random aligator clips found on the bench, glued the lanterns in place.
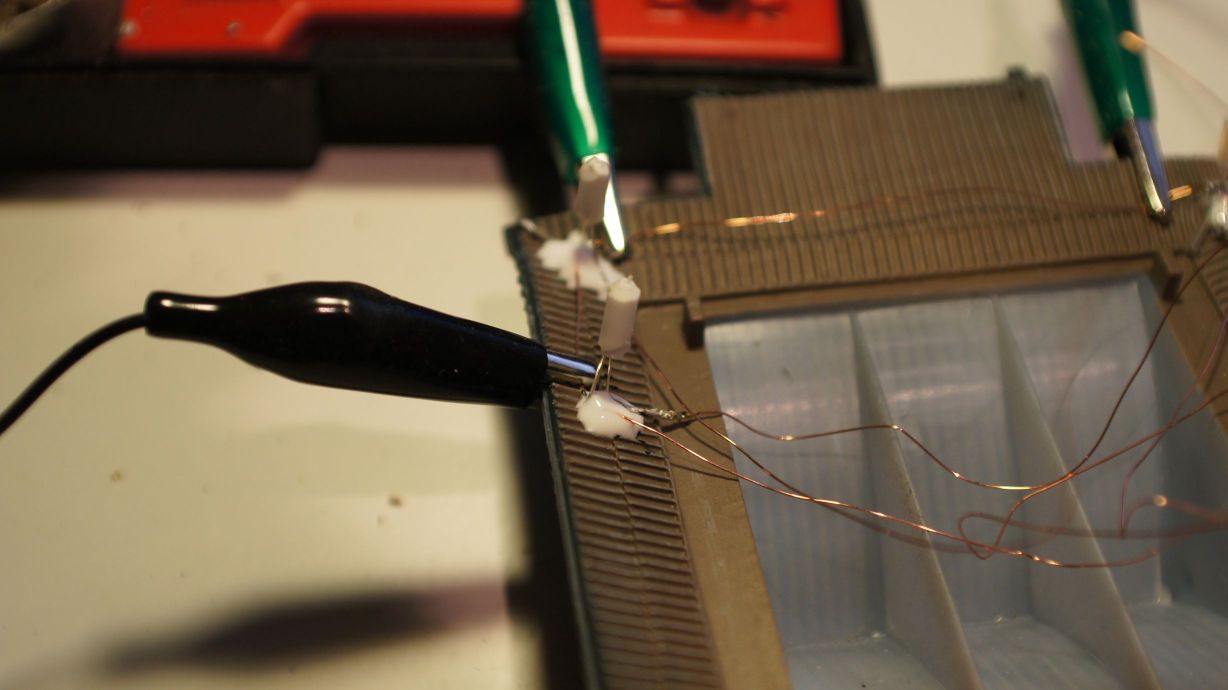
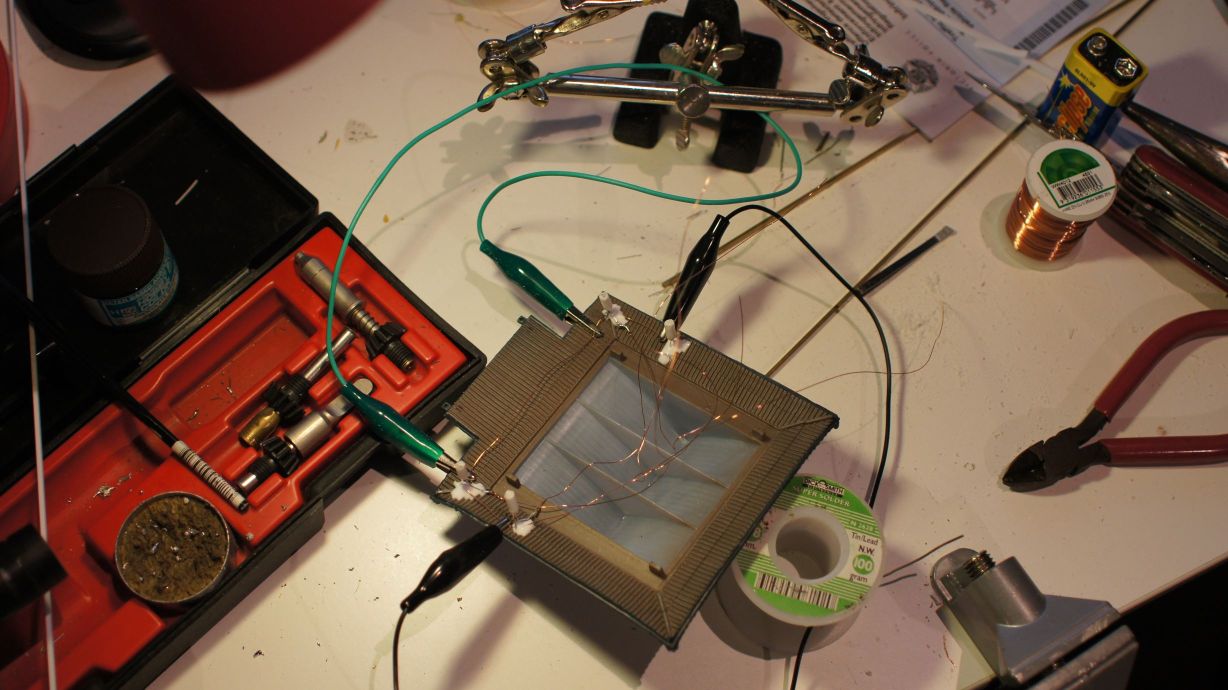
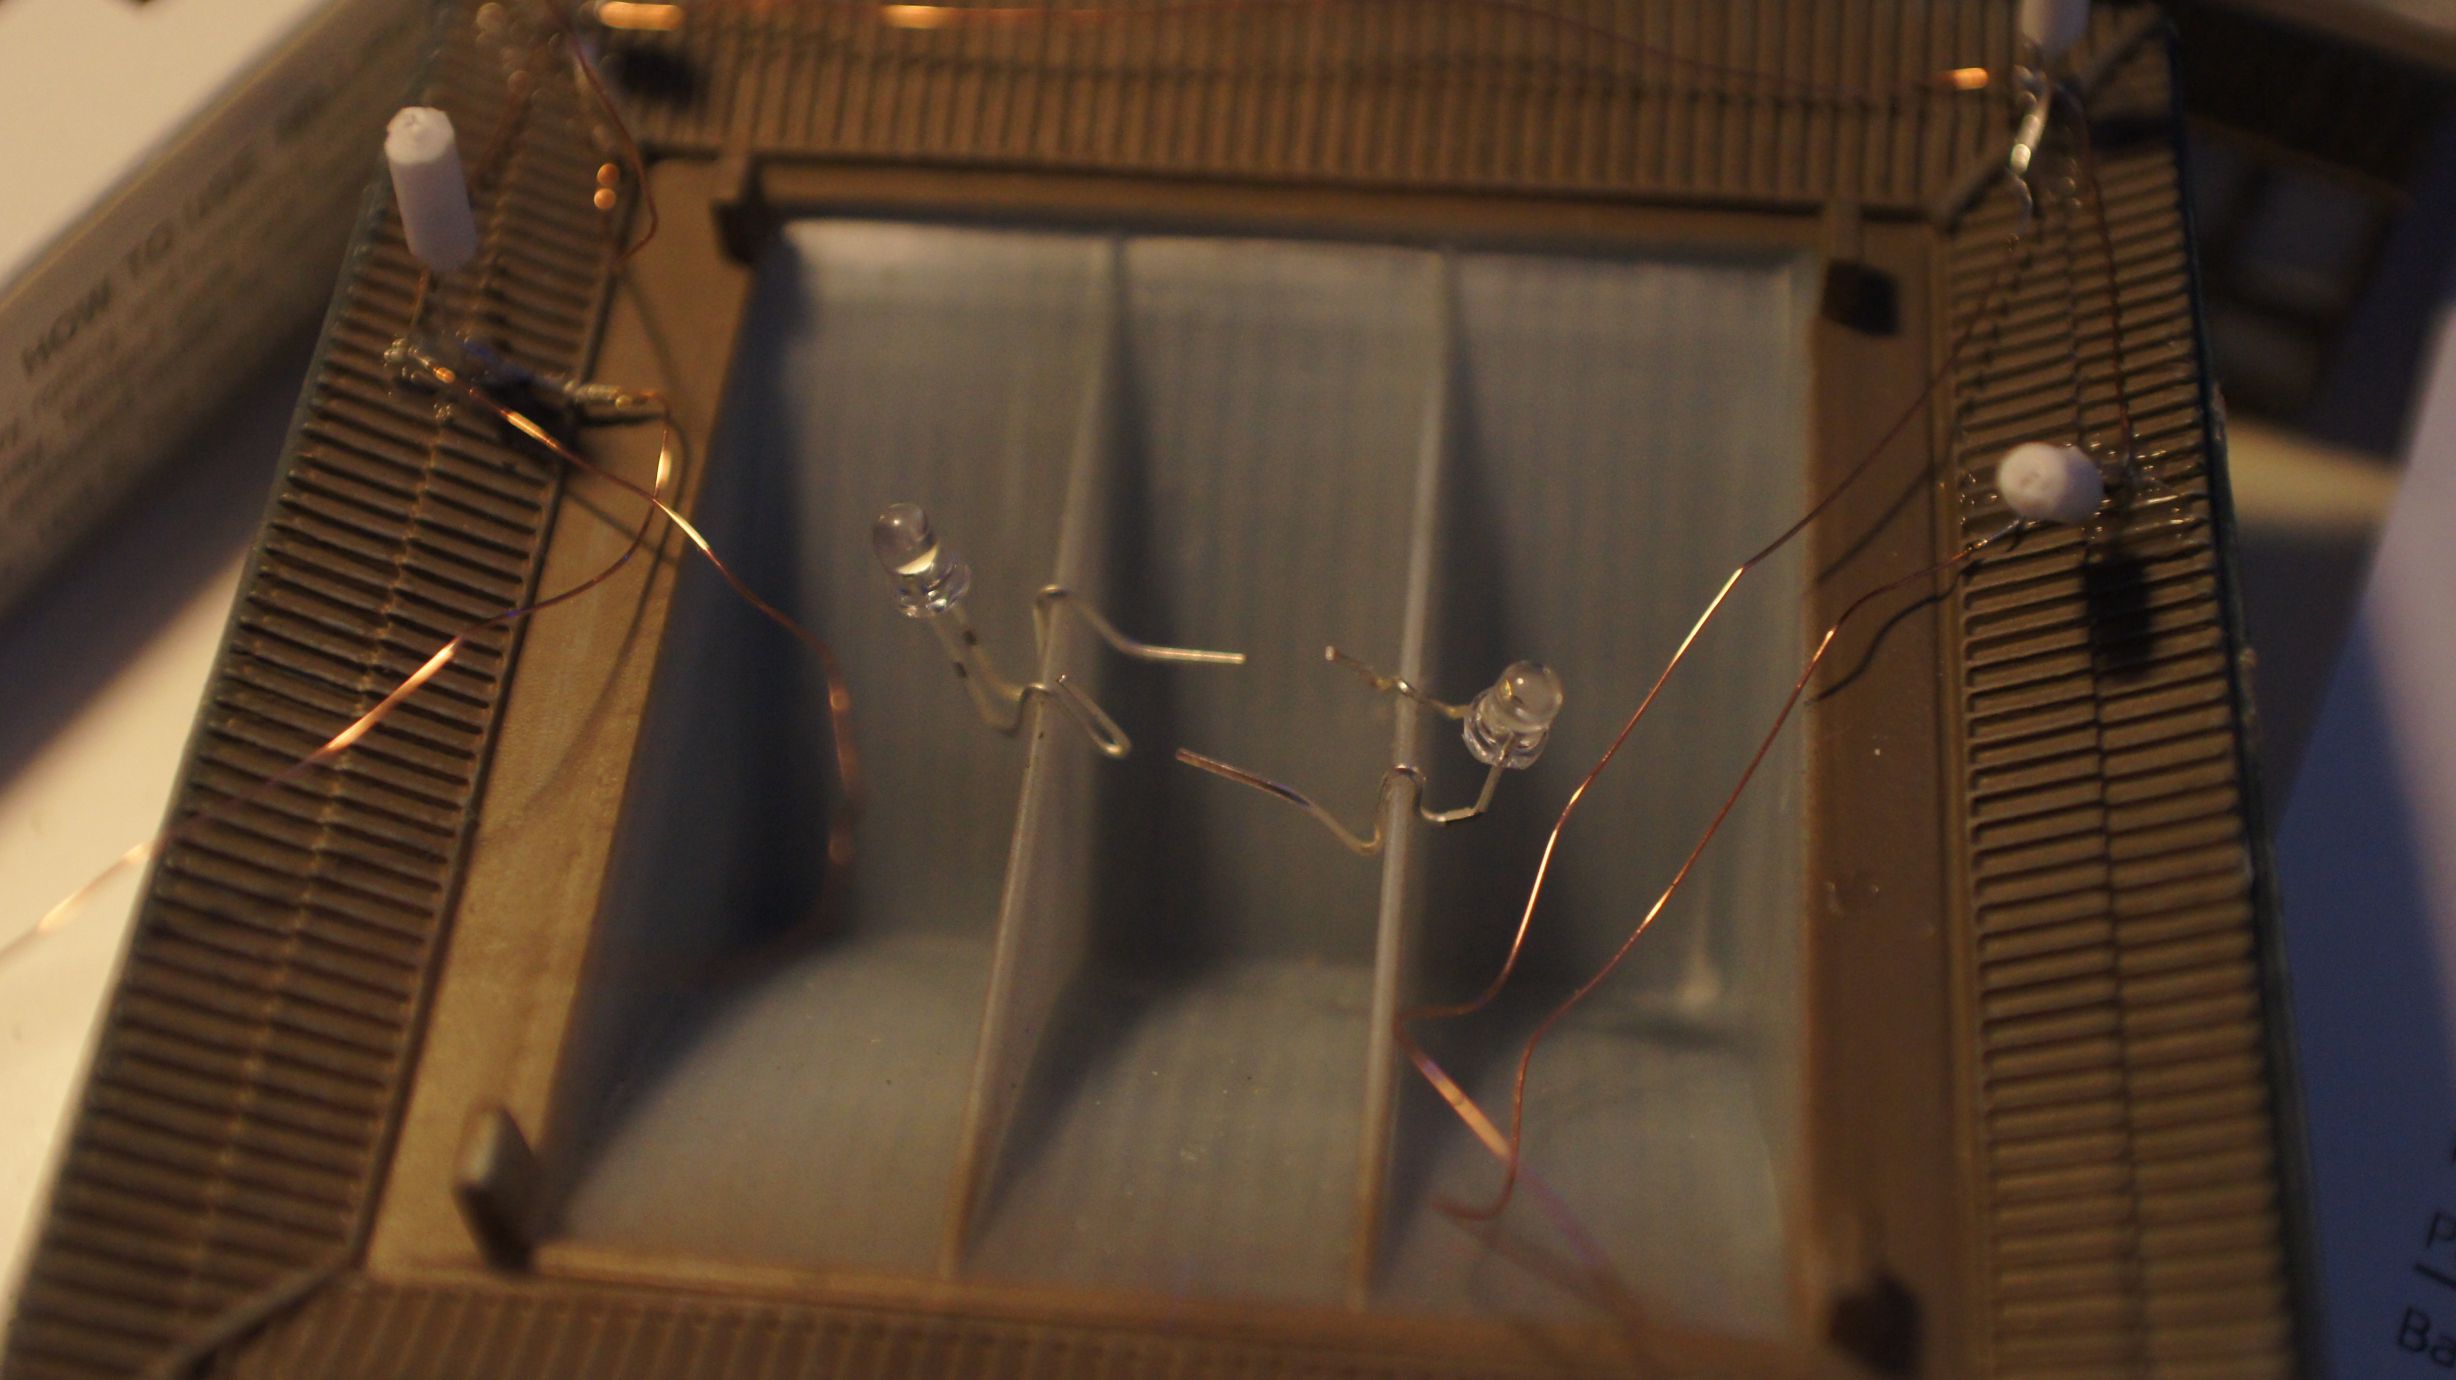
I also put two standard 3mm white LEDs in the center of the ceiling for building lights.
The finished product
After the glue had dried, I tested all the LEDs and found that I'd broken the front-left lantern. This was 24hours after starting the project and frustrating. I quickly removed it from the temple and filed another LED down. I left it dry again, overnight, after testing, gluing and testing again.
Finally, yesterday, I was able to hook it up to my Arduino LED Controller. It worked perfectly and I took the opportunity to test my night-time photography skills.
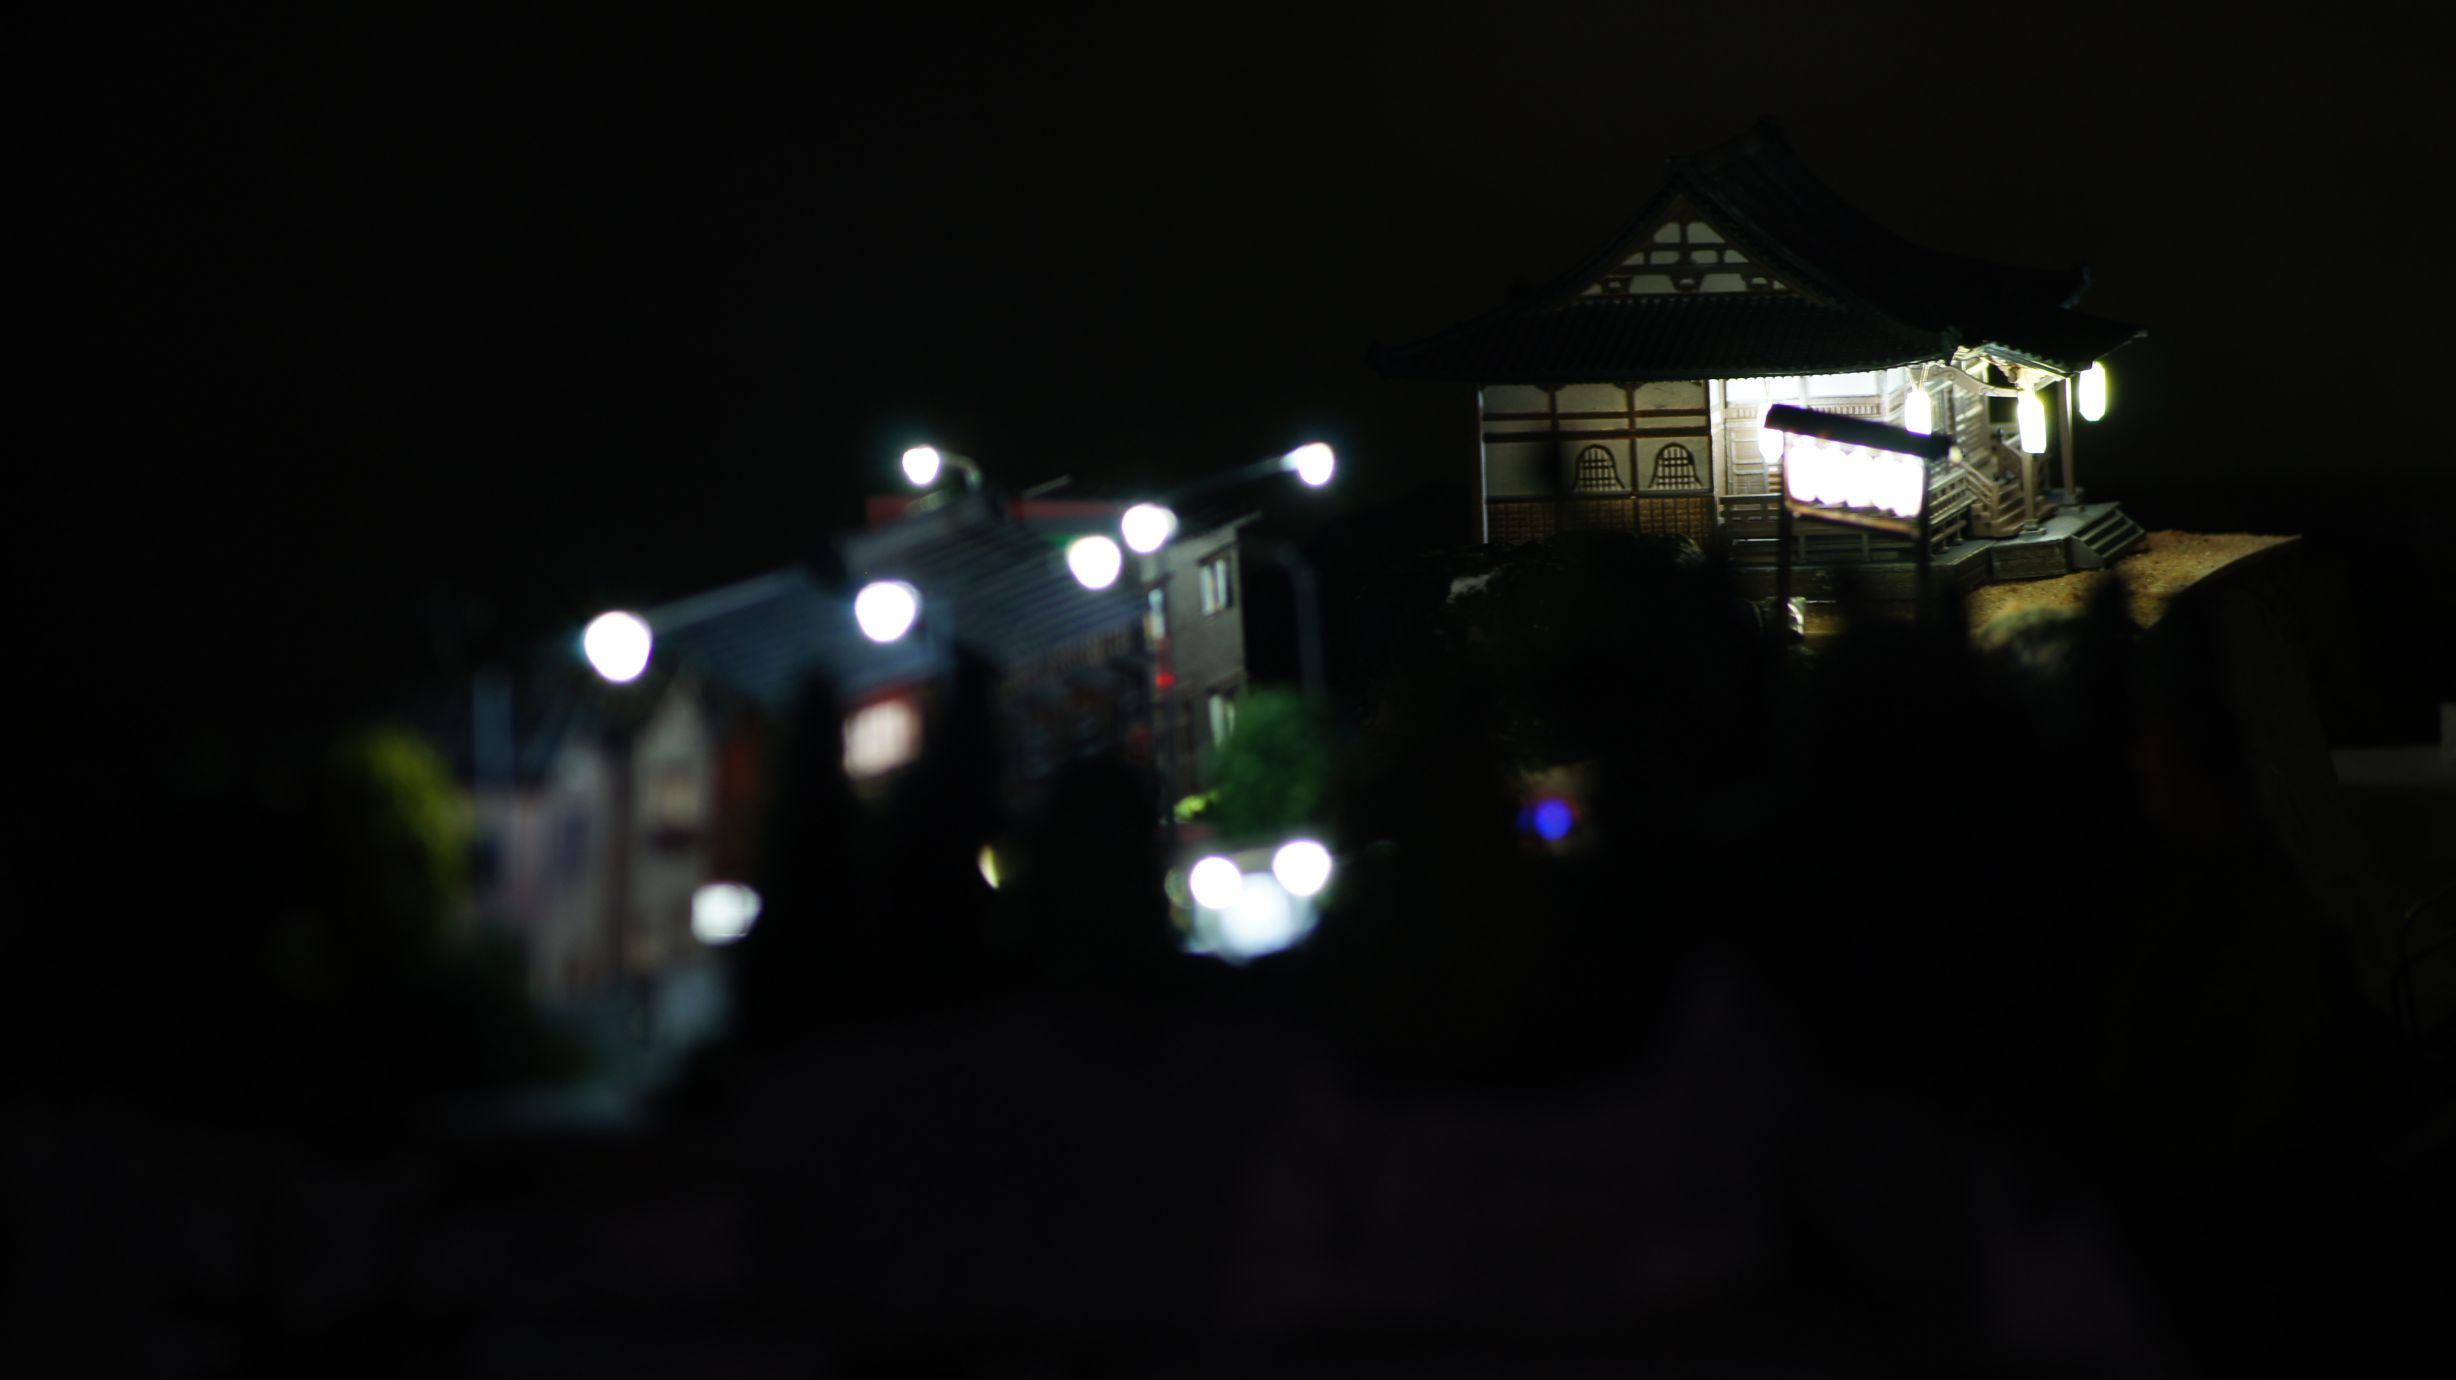
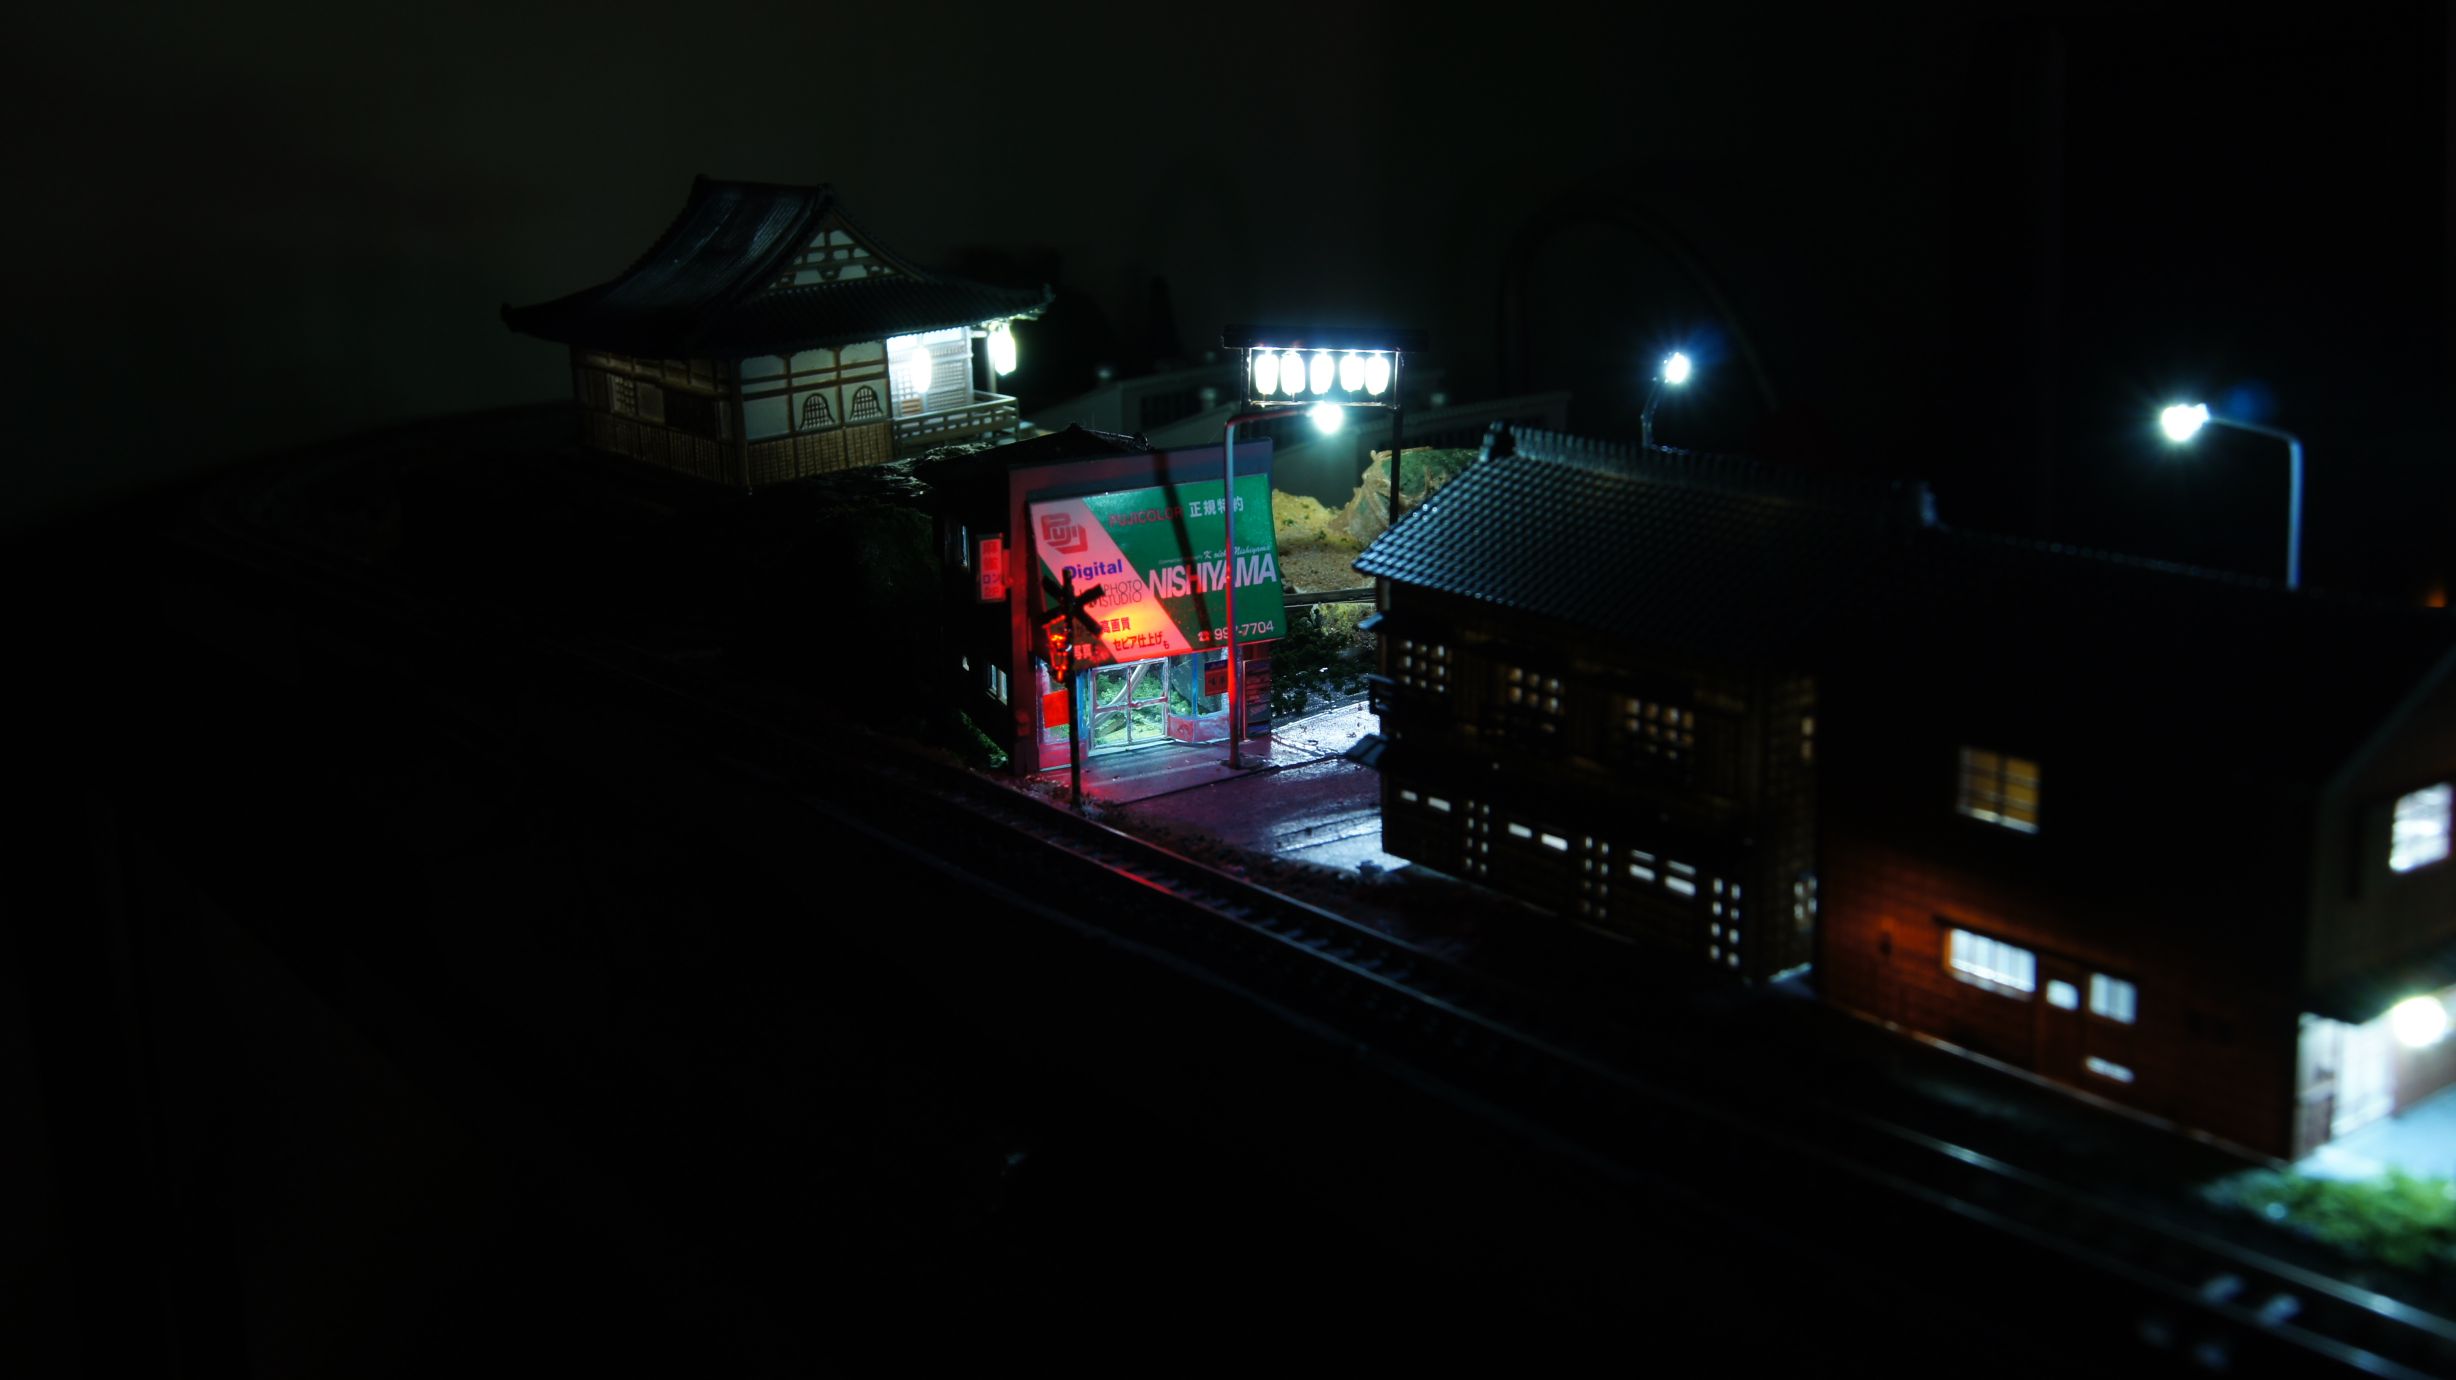
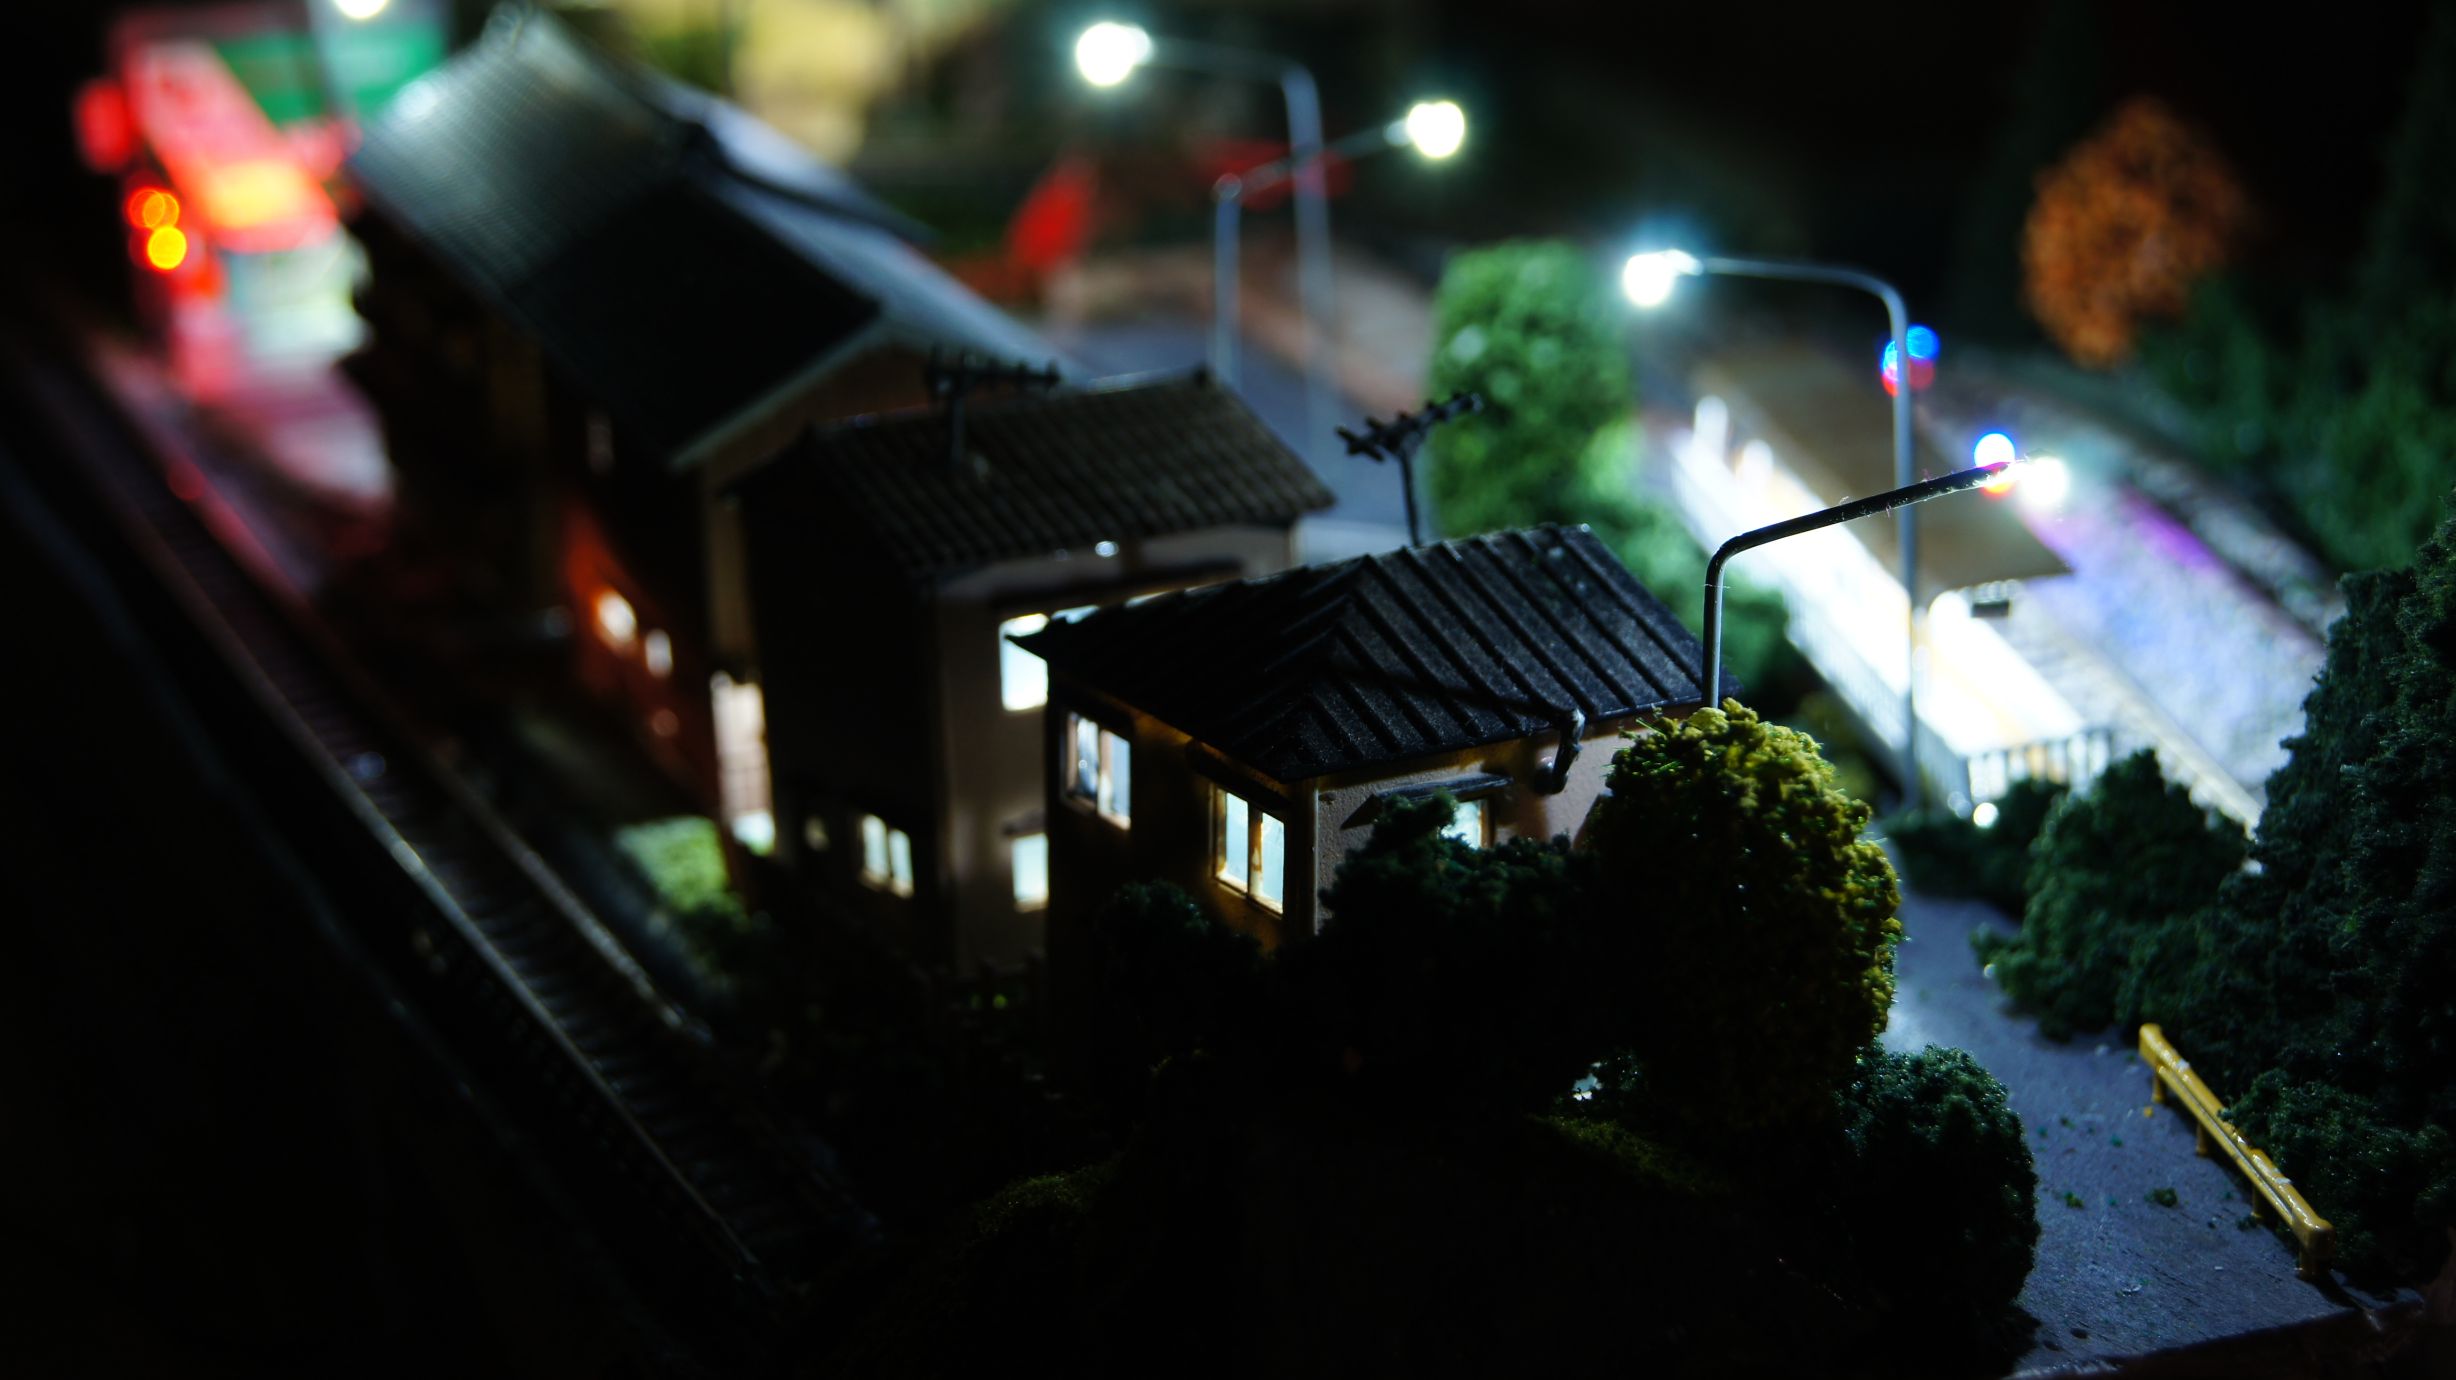
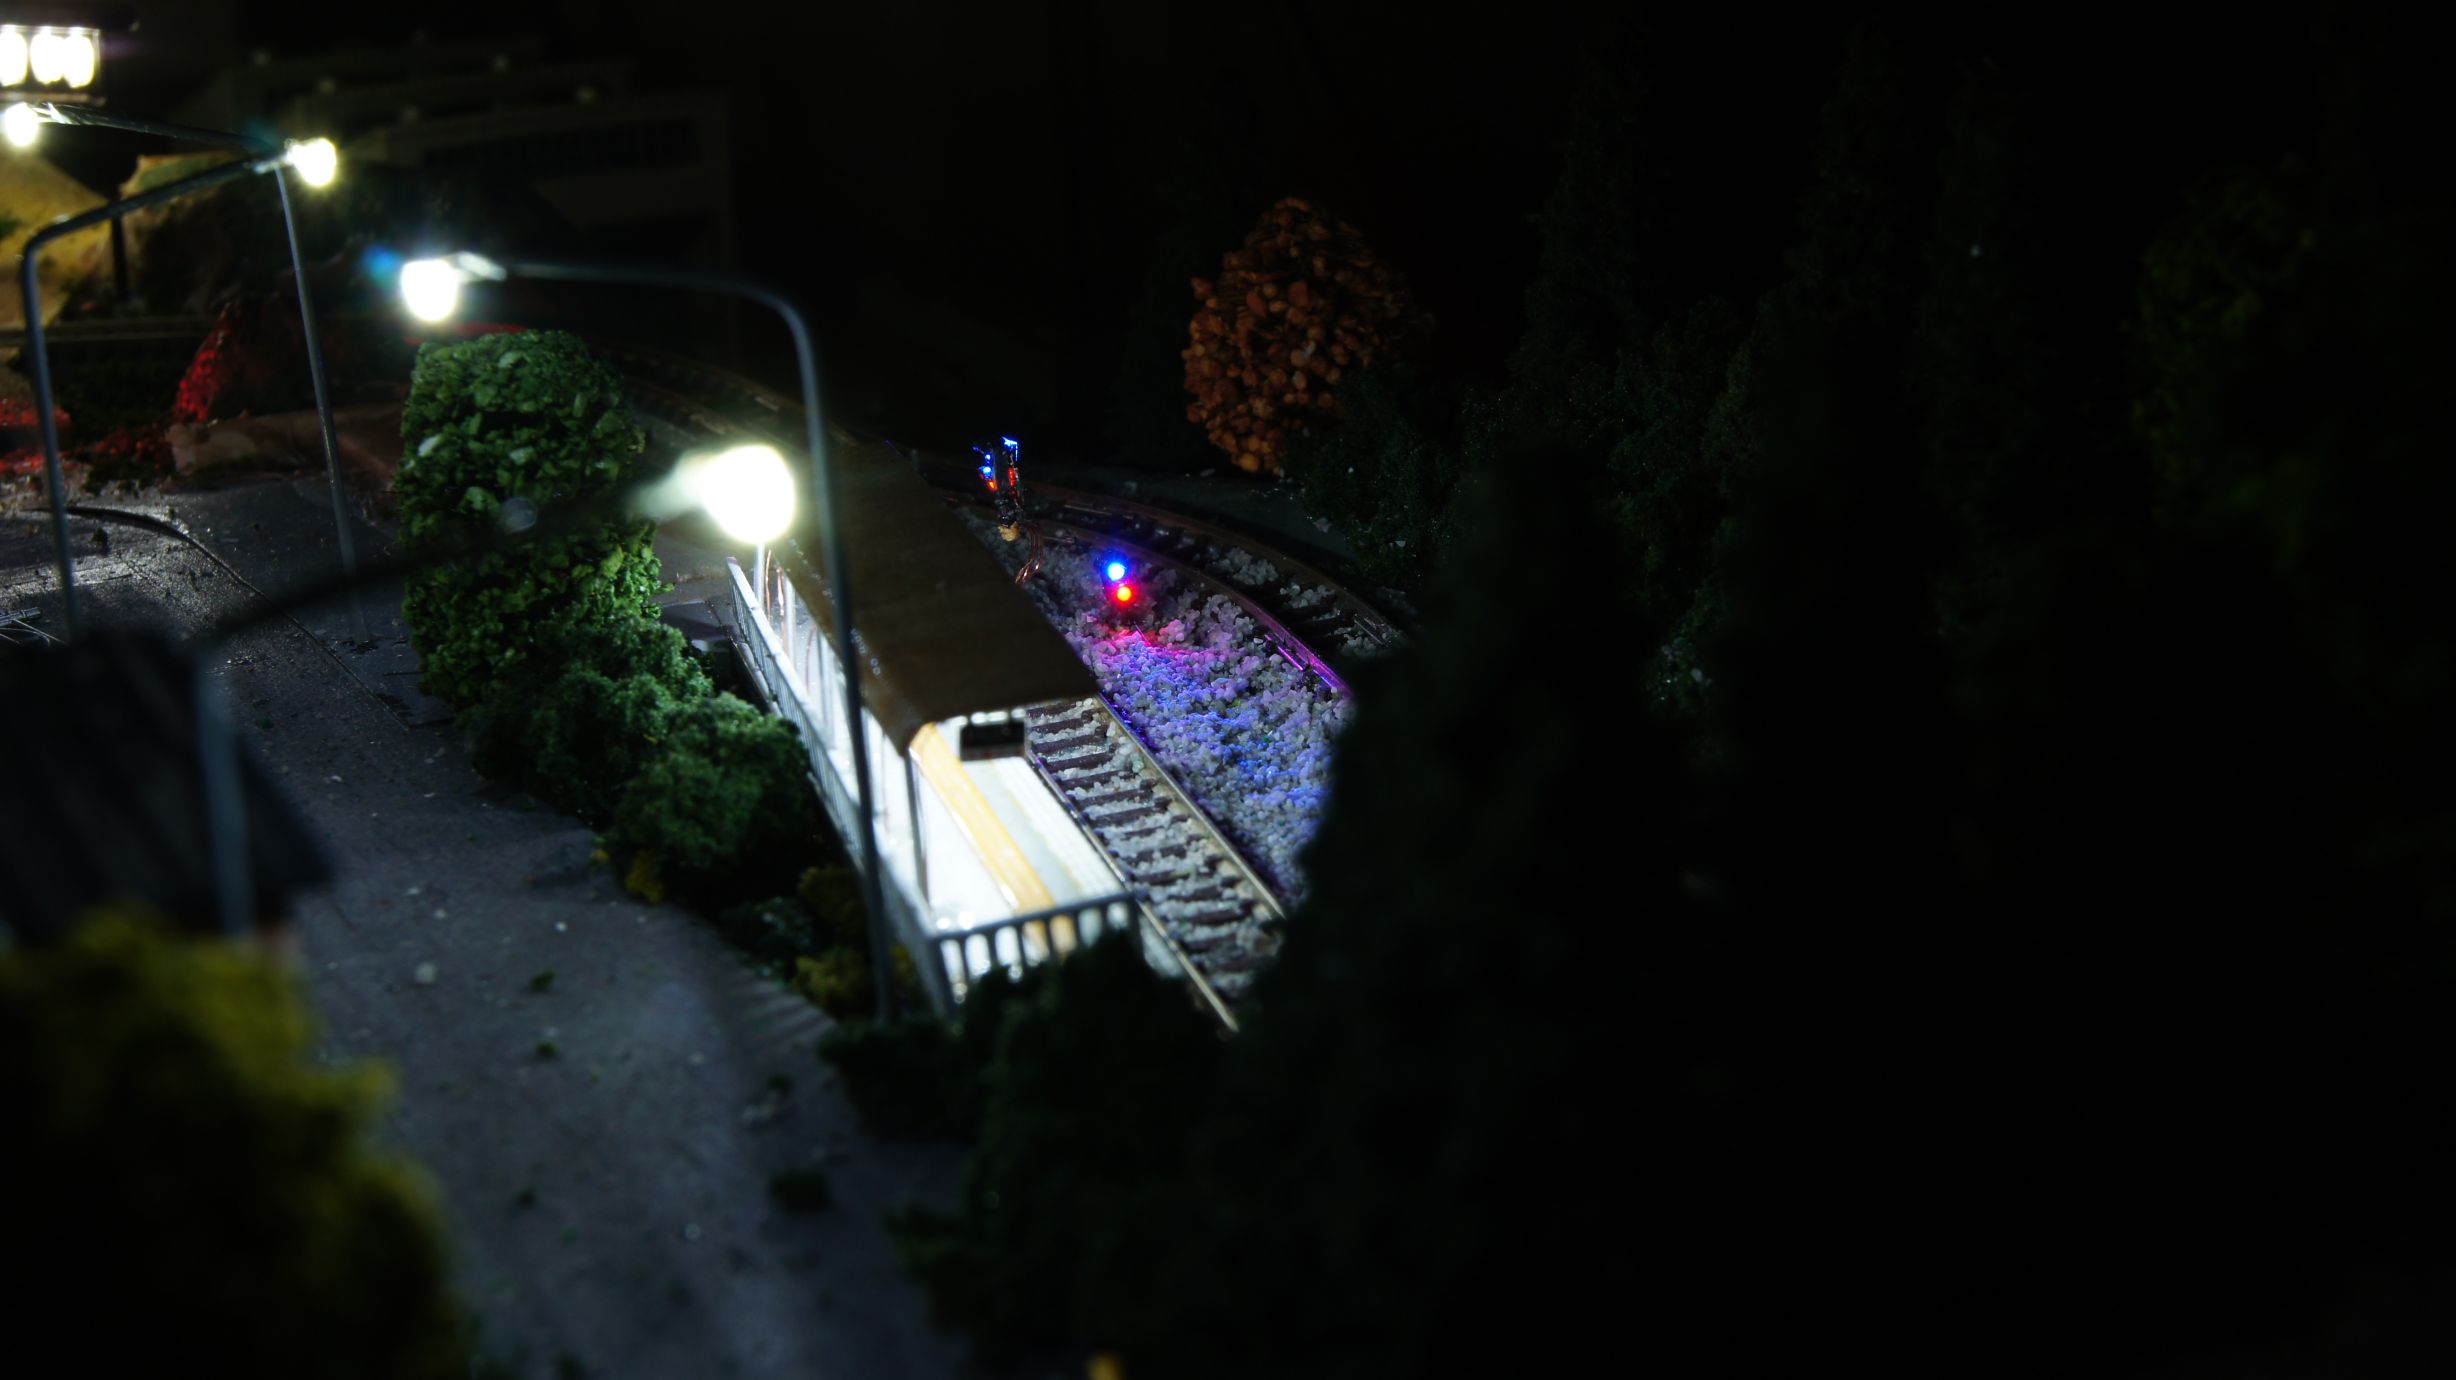
Now to settle the landscape around it.
Random Photos
Search
Tags
Ads
Links - Click for details
- Abandoned Rails (Japan)
- AIRLINE (Shinkansen Photography)
- Akihabara Station
- annexpressのブログ
- Australian Model Railway Magazine
- DCC普及協会ホームページ (Japanese DCC)
- Dead Section (Japanese Track Diagrams)
- Delicious Things (Japanese N Scale DCC)
- Densha Wotorou
- Digital Direct for Windows (DCC Server)
- Don's Dream World – AMAZING N Scale Japanese Layout
- Hatena::Diary
- Japanese N-Scale Modeling Forum
- JR Chiisai
- Kaz-T's blog レインボーライン (Rainbow Line)
- LED Resitance Calculator
- Masioka
- Poppondetta Blog
- RailFan Magazine, Japan
- Railmind
- Railway Travelers' Room
- Serenity Valley
- Shashinka Ichiban
- Shuzuku
- Sumida Crossing
- The next station is…
- Tomix N Gauge Track and Japanese N Gauge Trains
- TT Forums (Transport Tycoon Deluxe)
- 名鉄尾西線の貨物列車 (Nagoya: Meitetsu Freight)
- 日本型Nゲージ DCC改造例のご紹介 (Okiraku DCC)
- 泰 茅 轍 道 (Taichi Railway)
- 箱庭登山鉄道製作記 (Hakone-Tozan Layout Blog)
Archive
- April 2024
- March 2024
- February 2024
- December 2023
- October 2023
- September 2023
- August 2023
- July 2023
- June 2023
- May 2023
- April 2023
- March 2023
- December 2022
- November 2022
- October 2022
- April 2022
- March 2022
- February 2022
- January 2022
- December 2021
- November 2021
- September 2021
- August 2021
- July 2021
- May 2021
- March 2021
- February 2021
- January 2021
- October 2020
- September 2020
- August 2020
- July 2020
- June 2020
- May 2020
- April 2020
- March 2020
- January 2020
- December 2019
- November 2019
- October 2019
- September 2019
- August 2019
- July 2019
- June 2019
- April 2019
- March 2019
- February 2019
- January 2019
- December 2018
- November 2018
- October 2018
- September 2018
- August 2018
- July 2018
- June 2018
- May 2018
- April 2018
- March 2018
- January 2018
- December 2017
- November 2017
- October 2017
- September 2017
- August 2017
- July 2017
- June 2017
- May 2017
- March 2017
- February 2017
- January 2017
- December 2016
- November 2016
- October 2016
- September 2016
- August 2016
- July 2016
- June 2016
- May 2016
- February 2016
- November 2015
- October 2015
- September 2015
- August 2015
- July 2015
- June 2015
- May 2015
- April 2015
- March 2015
- February 2015
- January 2015
- December 2014
- November 2014
- August 2014
- July 2014
- May 2014
- April 2014
- March 2014
- December 2013
- November 2013
- October 2013
- June 2013
- August 2012
- April 2012
- March 2012
- February 2012
- November 2011
- October 2011
- September 2011
- July 2011
- June 2011
- May 2011
- April 2011
- March 2011
- February 2011
- January 2011
- December 2010
- November 2010
- October 2010
- September 2010
- August 2010
- June 2010
- May 2010
- April 2010
- March 2010
- February 2010
- January 2010
- December 2009
- November 2009
- October 2009
- August 2009
- January 2009
- December 2008
- November 2008
- October 2008
- September 2008
- July 2008
April 23rd, 2011 - 07:35
Woah! Love it!